One of the best things about Google Sheets is that it allows us to enter all our data points separately. Every entry has its own cell. But that could also be a curse when the data sets are not uniform. Take textual data, for instance.
The text wrapping feature is on by default, however, it doesn’t change the overall width of your columns and cells. So how many times can you manually adjust it?
Thankfully, Google has recognized this issue and addressed it with the Autofit feature, and that is exactly why we are here. So, let’s begin!
Ways To Autofit in Google Sheets
There are actually a couple of ways to make cells fit text, but the catch is that you can only do it after you have entered the data and not before.
This is because Google Sheets needs to know what is the maximum width of the text in your cell before it auto-adjusts.
All three ways include accessing the columns from their headings. One is through a mere double click while the other is through the right click option.
Let me explain both methods, step-by-step.
Method 1: Using Double Click
When you double-click on the drag cursor that appears when you hover over the edges of the headings of the column, it automatically autofits the columns based on the text in it. Think of it as a click shortcut (like a keyboard shortcut).
Here are some simple steps to autofit the columns using a simple double click.
- Open your spreadsheet from the link or the Drive folder.
- Go to the top of column (header) whose width you want to adjust and click its right border line.
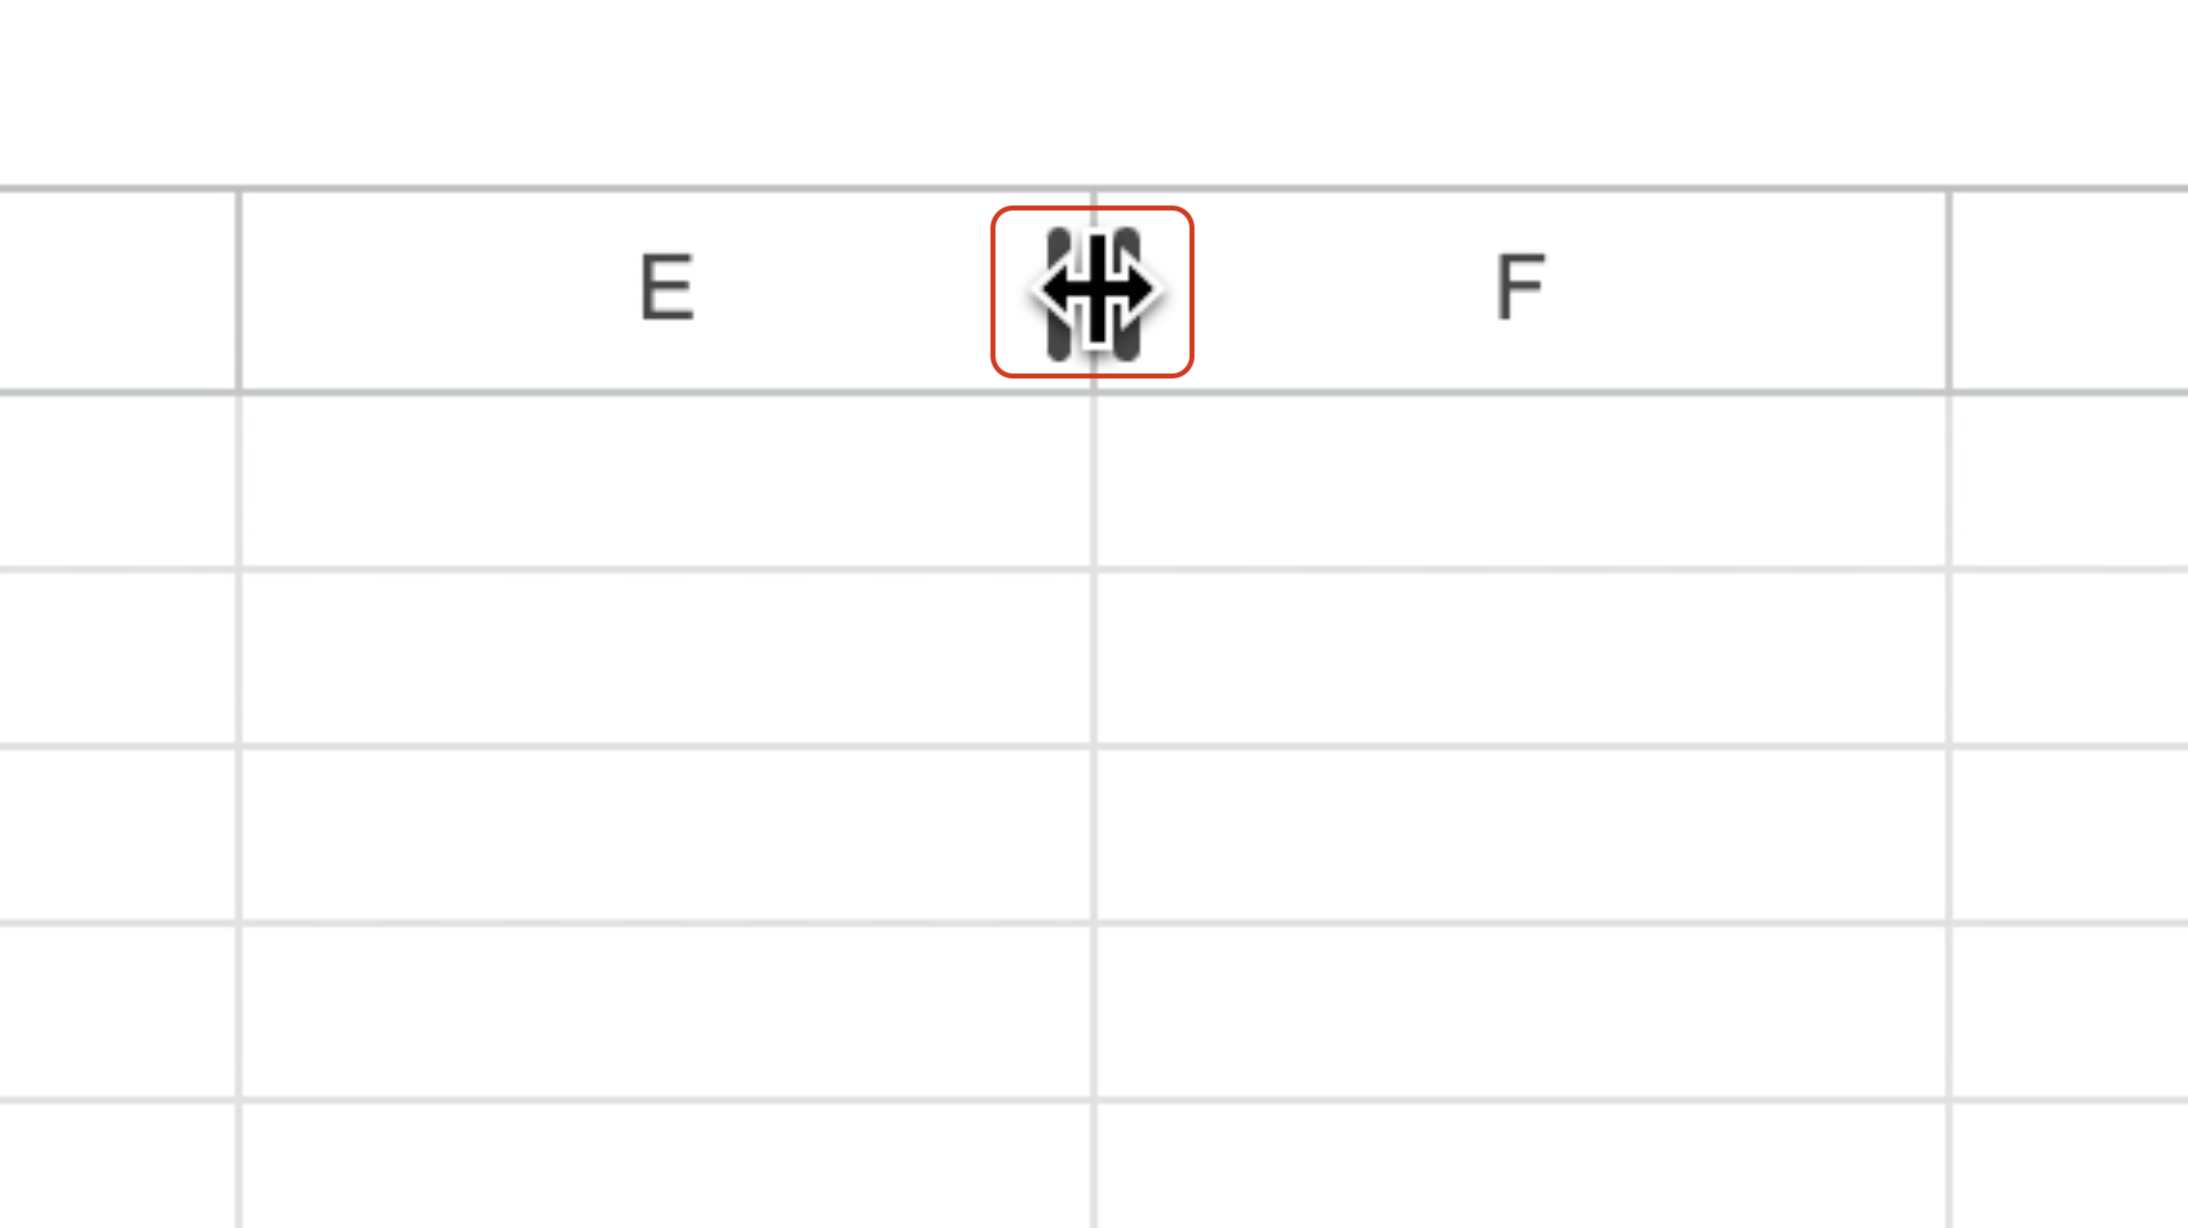
- Now, you’ll notice the cursor turning into a double-headed arrow as shown in the screenshot below:
- Double-click on the edge when the cursor is of a double-headed arrow.
Method 2: Using Right Click
You can also make cells expand to fit text automatically using the right-click menu. As we all know, the right-click menu includes all the popular tasks that you would want to perform upon selecting a particular cell, row, or column.
Here are some simple steps:
- Open your Google Sheets file from the link or the Drive folder.
- Go to the column whose width you want to adjust and click its heading.
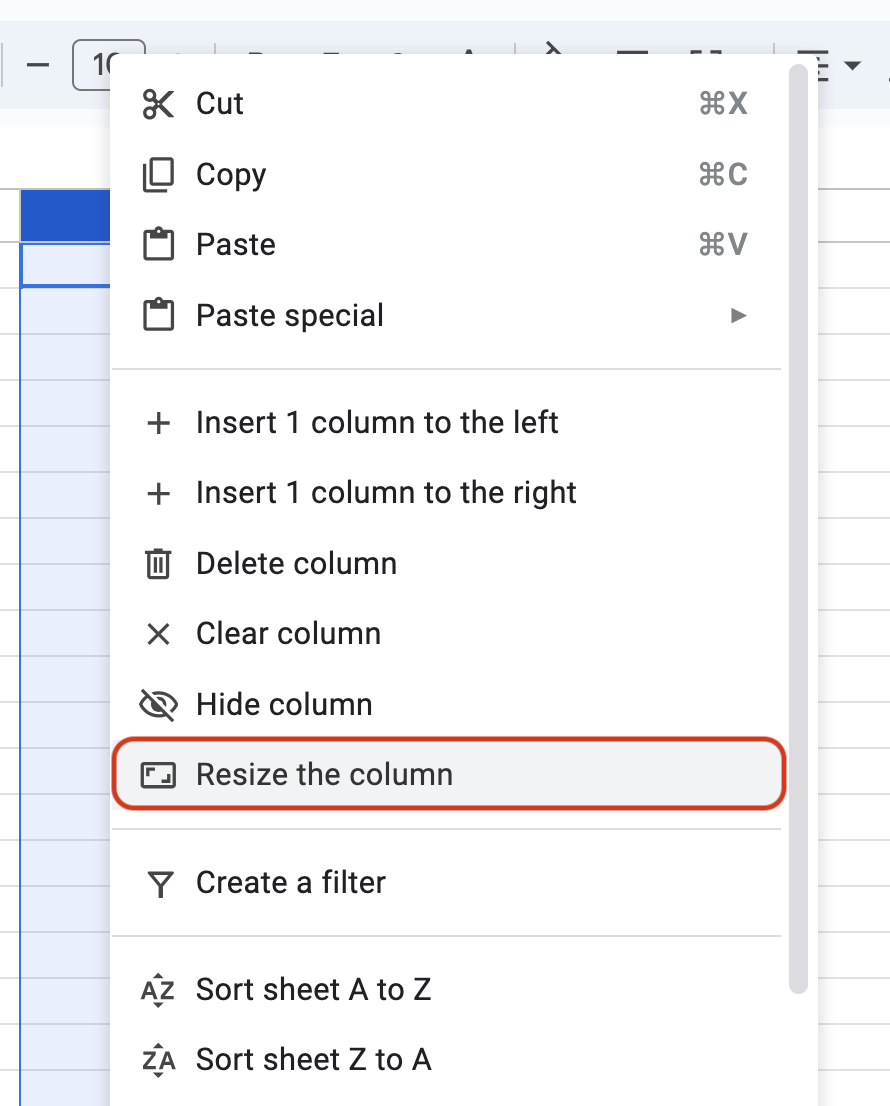
- Right-click on the selected column.
- Click on “Resize column” from the menu.
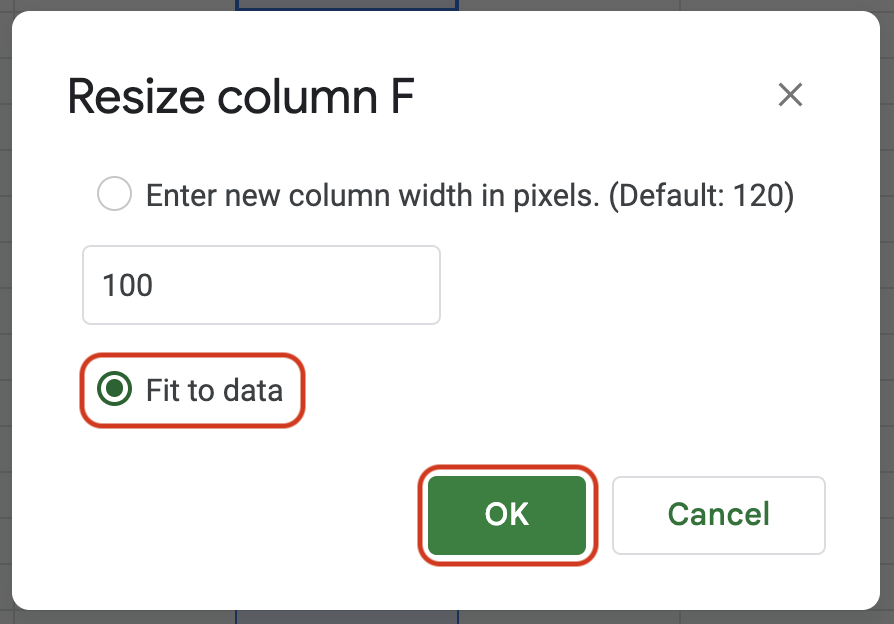
- From the pop-up, click on the second option, which is “Fit to data” and click on “OK” to proceed.
Bonus: Autofit Multiple Columns
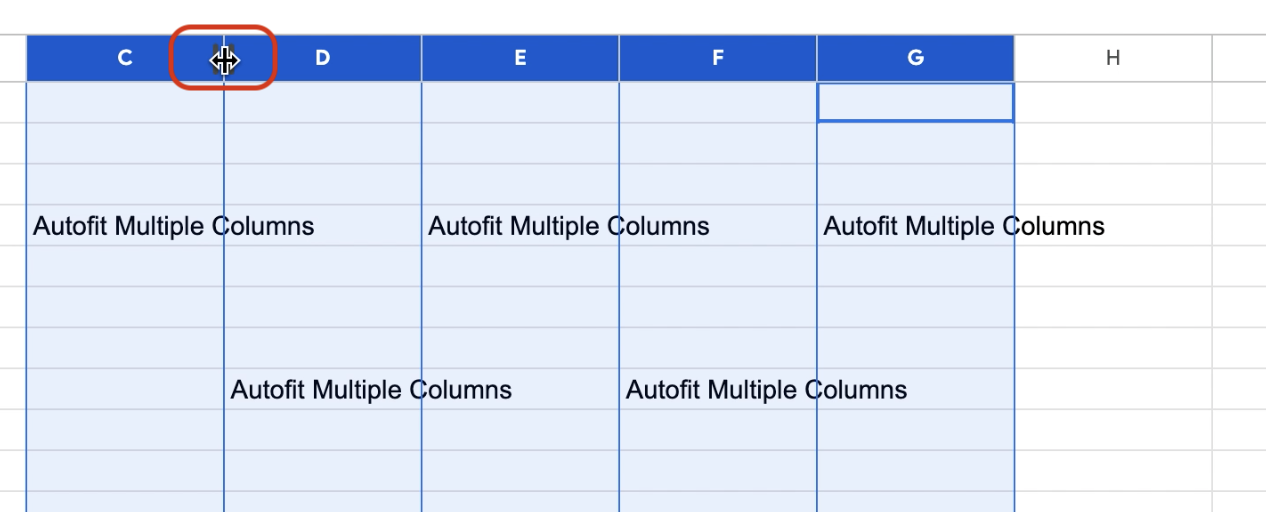
You can also autofit several columns at once using the same methods mentioned above. All you have to do is select all at once and perform the following steps:
- Open your sheet file from the link or the Drive folder.
- Click on the headings of all the columns whose width you want to adjust while keeping the Ctrl or Cmd key pressed.
- Now, keep the cursor on the right edge of the heading of any one column and notice the cursor turning into a double-headed arrow.
- Double-click on the edge when the cursor is of a double-headed arrow.
Alternatively, you can also right-click on all the selected cells, select “Resize selected columns”, and select “Fit to data” to adjust the width of those columns with the right-click method.
Make Cells Expand To Fit Text Automatically
Now auto-adjusting the columns based on the width of the data set is quite a tidy way that prevent your sheet from looking bloated or empty. But it also takes the symmetry away.
I explained how you can adjust the width of the column based on what you enter in the cells, but a lot of people like to keep a uniform width for all their columns and adjust the text within.
Here are a couple of ways to adjust the data set width and keep the column width uniform.
- Wrap text: You can choose to wrap the text in a cell which automatically breaks the line in a cell when it exceeds the width of the columns.
- Resize: You can choose a smaller font size if the fonts are too large to fit within the confined width of the cells. If needed, you can also make all columns the same width.
Frequently Asked Questions
You can widen the cells by hovering the cursor over the edge of the heading of the column and then dragging it on either side. You can also right-click on the heading of the column, select “Resize column” and either enter the width manually or select “Fit to data” which widens the column based on the width of the data in it.
You can autofit the rows by simply double-clicking on the upper edges of the row headings. Alternatively, you can also right-click on a row, select “Resize row” and click on “Fit to data” which autofits the row. You can do that for multiple rows at once as well.
Wrap Up!
Some people regard symmetry more than others. They would rather adjust the data than adjust the uniform width of the columns. But for purposes like print or digital sharing, you have to mind the widths of your columns and that is where auto-adjusting them makes the difference.


Leave a Reply