Whether creating to-do lists, questionnaires, or event RSVPs, checkboxes simplify collecting information digitally. With intuitive formatting tools, you can easily create a checklist in Google Docs.
In this article, I will take a look at two different methods with which you can insert the checkboxes in Google Docs. I will also discuss how you can do the same for the mobile app.
So, let’s get into it.
Method 1: Using Checklist and Bullets Menus
There are two menus, a checklist and a bullet list, they both perform the same function. Meaning, you can add check marks with both these icons. The only difference is that the bullet list has a lot of different types of bullet patterns while the checklist only has two checkbox types.
1. Using Checklist Menu
- Write all the labels you want in front of the checkboxes in the form of text.
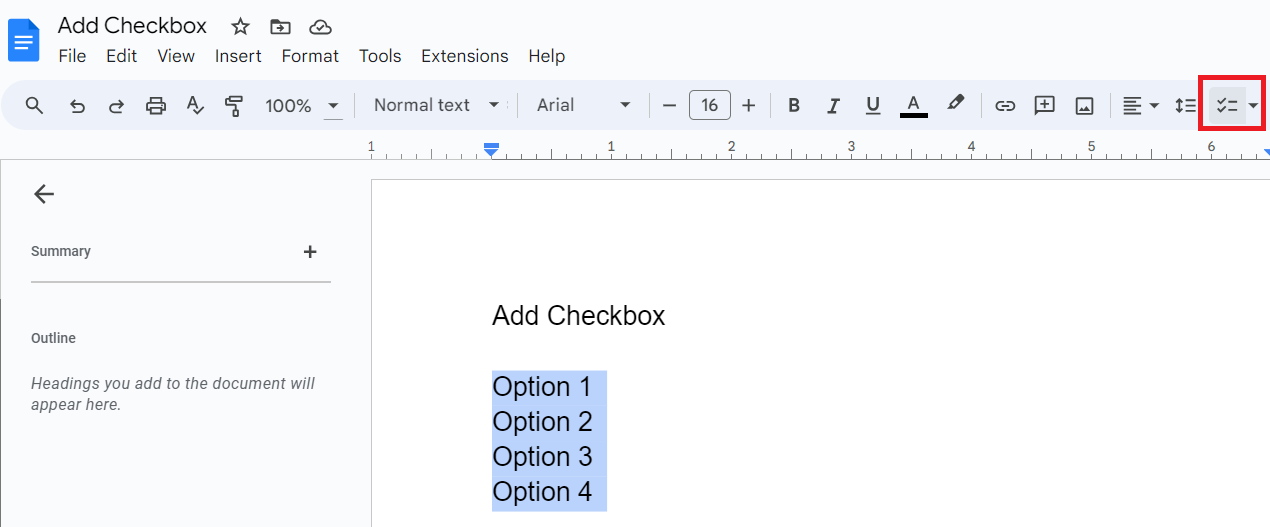
- Select all the text that has the names of the labels.
- Spot the checklist icon in the ribbon menu. It has two checks preceded by two dash lines on it.
- Click on the checklist icon.
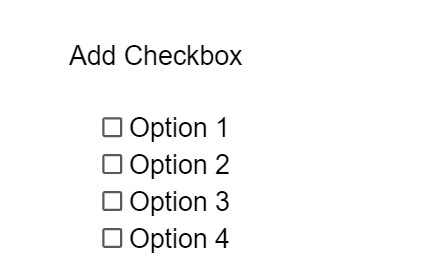
- Done! You have converted all the text into checkboxes.
2. Via Bullet List Menu
- Write all the labels you want in front of the checkboxes in the form of text.
- Select all the text that has the names of the labels.
- Spot the Bullet list icon in the ribbon menu. It has three dots preceded by three dash lines on it.
- Click on the Bullet list icon and then click the checklist menu option.
- Done! You have converted all the text into checkboxes.
Note: You can also add checkboxes first and then write labels. But for that, you have to either keep clicking on the checklist icon or enter the keyboard shortcut, write the text, and repeat the same pattern for all options in the checklist.
Therefore, it is better to write down all the options, select them all and then apply a keyboard shortcut or select the checkboxes from the Checklist or Bullet list menu for all of them at once.
Method 2: Using Format Menu
You can do the same thing, which is to add checkboxes from the checklist icon, through the Format tab as well. Here is how you can do it:
- Write all the labels you want in front of the checkboxes in the form of text.
- Select all the text that has the names of the labels.
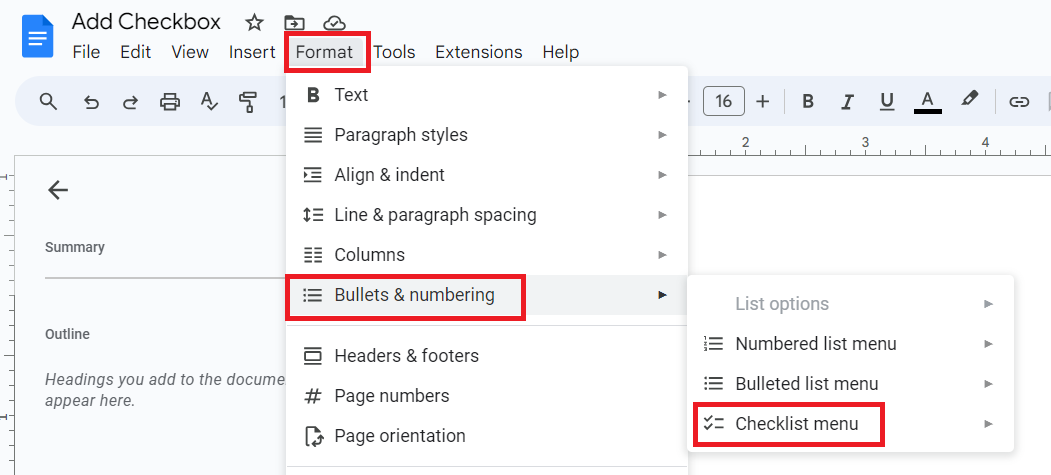
- Go to the Format tab from the main menu.
- Select “Bullets & Numbering” from the dropdown.
- Select the checkboxes from the “Checklist” menu.
- Done! You have converted all the text into checkmarks.
When inserting checklists, you can choose strikethrough to show check the items in the list with lines over the text or non-strikethrough where checks appear but the text remains normal. Select your preferred format while creating the list.
Inserting Checkboxes in Google Docs Mobile App
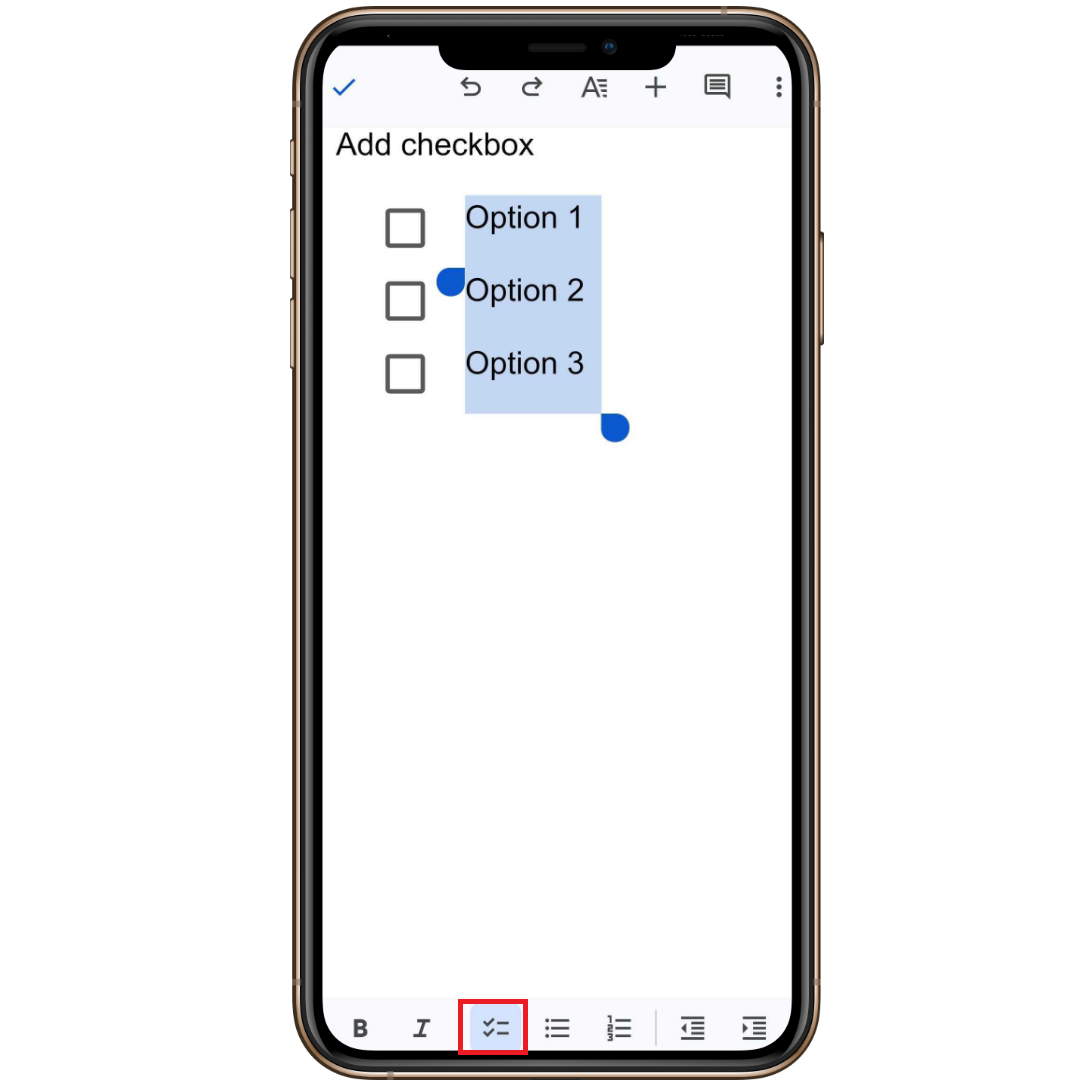
The process is pretty much the same. Instead of having the Checklist menu right there in the ribbon, you have to access it through the Bullet list menu.
- Write all the labels you want in front of the checkboxes in the form of text.
- Select all the text that has the names of the labels.
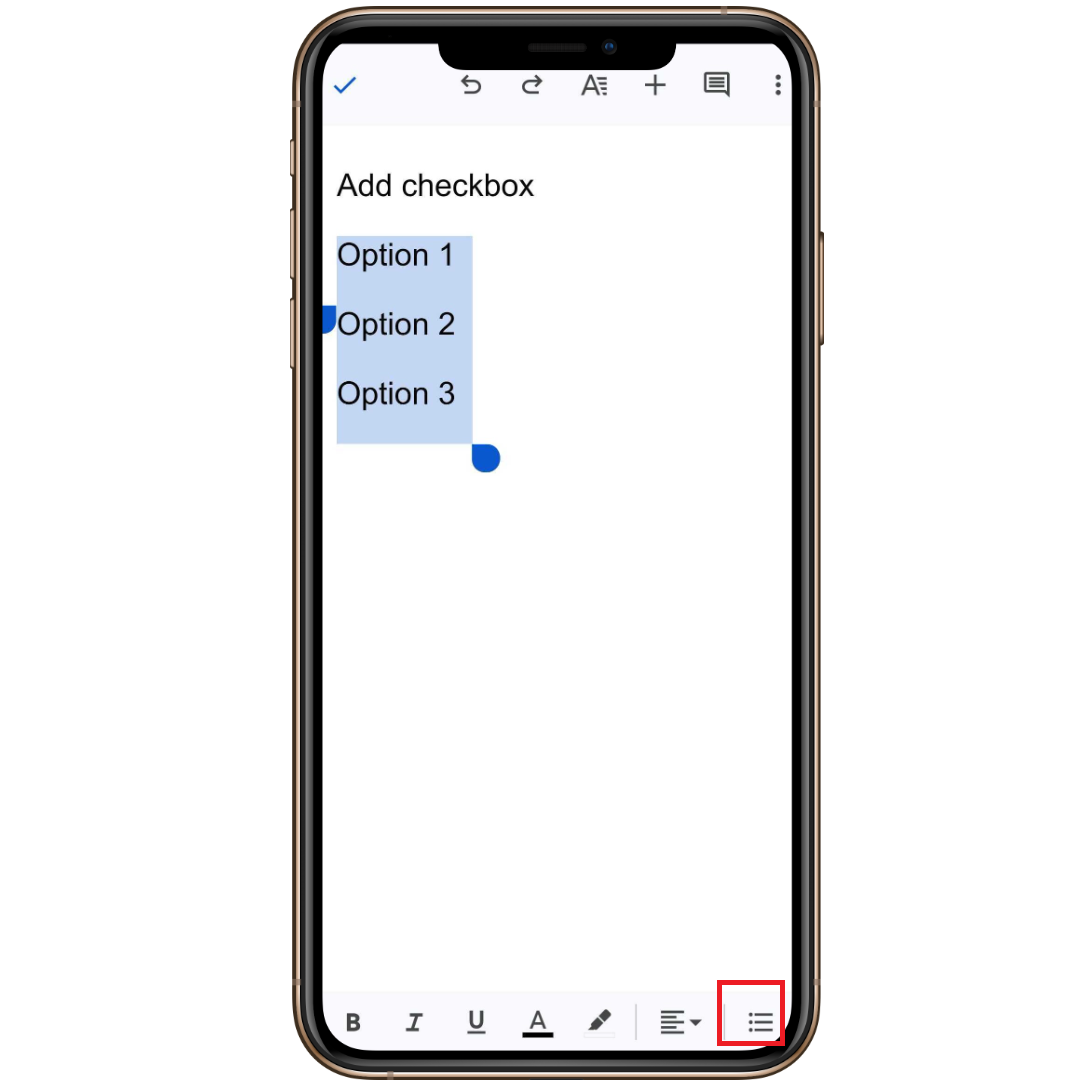
- Tap on the Bullet list menu in the bottom ribbon.
- Select the Checklist menu among a range of different bulleting and numbering options that appear upon clicking the Bullet list menu.
- Done! You have converted all the text into checkboxes.
That’s it. Say goodbye to static documents, and hello to functional, reusable forms with checkboxes!
Apart from checkboxes, there are other things you can do in Google Docs that may seem impossible at first. For instance, you can:
Frequently Asked Questions
There are two options to choose from when you locate the dropdown of the Checklist menu in the ribbon in Google Docs. The second one indicates no strikethrough.
If you accidentally select the one with the strikethrough then simply right on the checkboxes and select “Don’t strikethrough when checked”.
The smaller checkbox can be added by going to the Insert tab > Special characters. Search for the checkbox in the search bar and add the appropriate box. Note that these boxes are not interactive hence you cannot check or uncheck them.
You can remove the checkboxes by selecting them all and then by pressing the keyboard shortcut Ctrl + Shift + 9 (number nine). You can also select all the checkboxes and then unselect the Checklist menu from the ribbon.
As things stand, strikethrough and no strikethrough are the only formatting options for checkboxes in Google Docs. You cannot change the style of the checkboxes in Google Docs.
Wrap Up!
So there you have it. If it is for the print purpose then you can try adding different types of checkboxes through the “Special characters” option from the Insert tab.
But if it is to check or uncheck from the doc file itself then it is better to use the checkboxes from the Checklist menu or the Bullet list menu.
Leave a Reply