The default layout in Excel is set to a particular dimension that may not work for everyone. This is true especially when you have a lot of data. You may need to take a final look at the spellcheck or the numbers before approving them.
On the other side, you would want to look at the final result (or multiple pages within a sheet) by zooming out to a point where you can see everything on your screen. The zoom-in and out features are quite handy.
There are a couple of ways to zoom your Excel sheets in and out. Let me explain each in detail.
Method 1: Using Ribbon
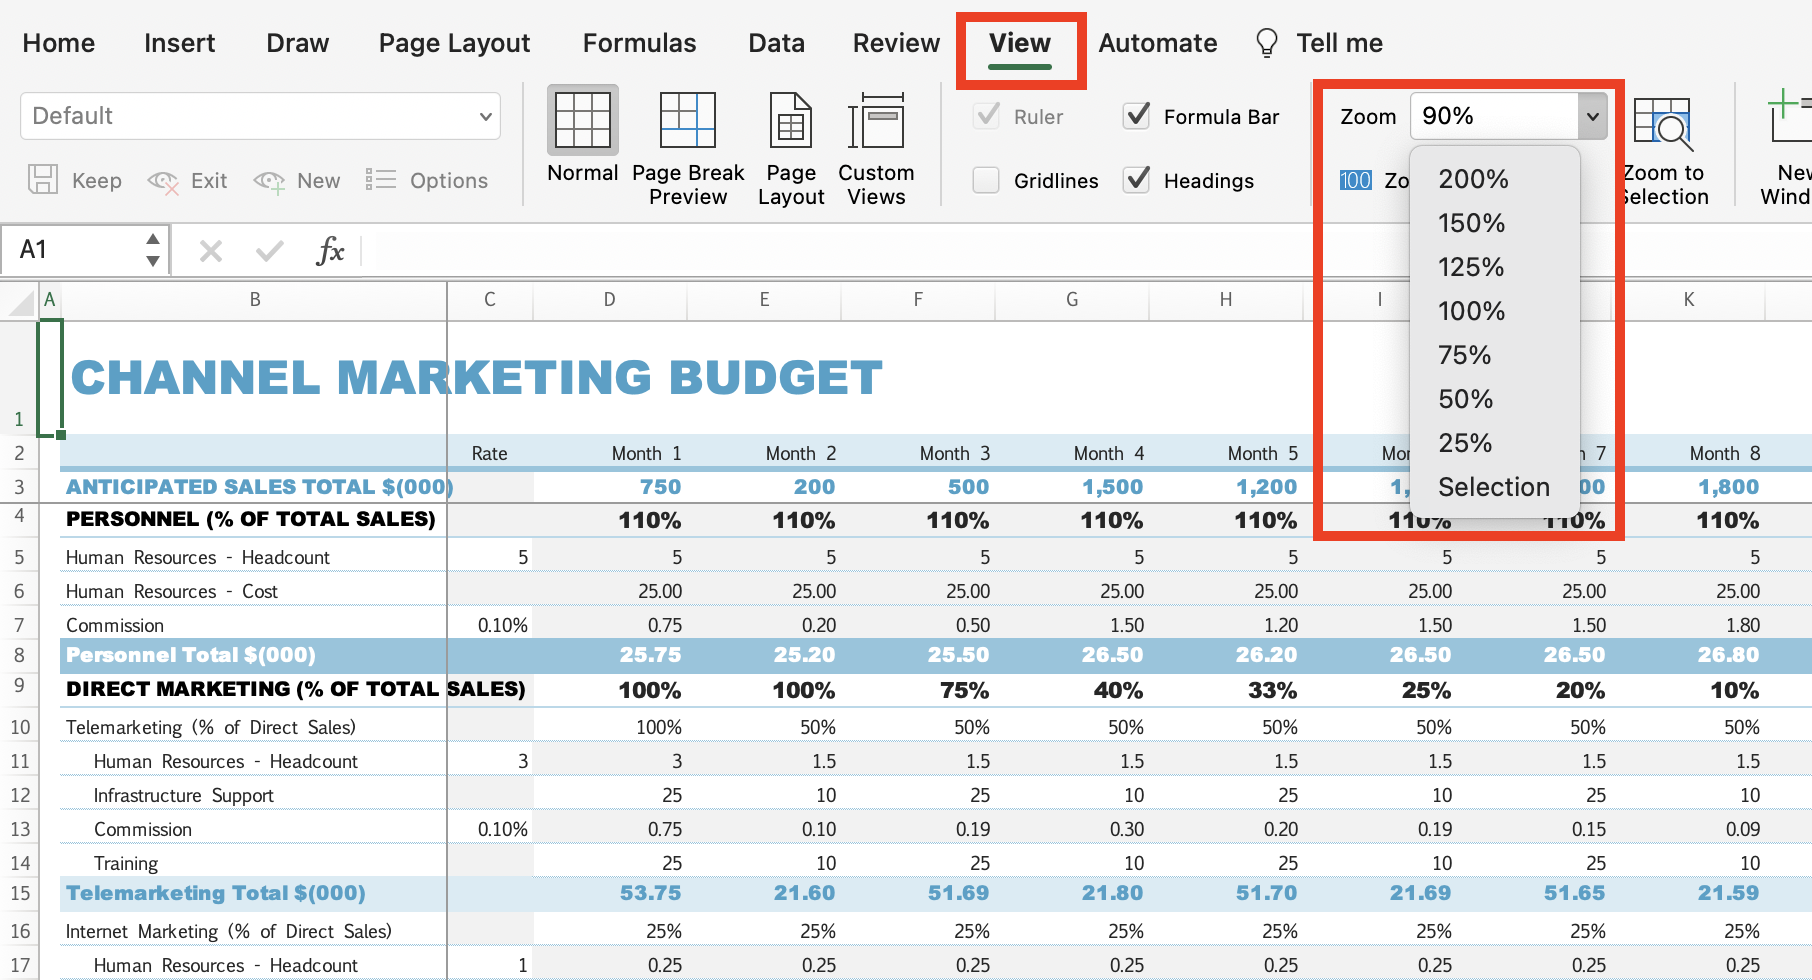
The ribbon menu has many prominent and most frequently used features in it. There is a tab called “View” that is dedicated to page layouts and other viewing options, including zoom.
Steps to zoom in and out using the ribbon menu:
- Click on any cell from the active sheets. Note that if you are at a cell that is outside the active sheet, the zooming options will appear disabled.
- Now go to the “View” tab from the ribbon menu.
- Locate and go to the “Zoom” section.
- Click on “Zoom” to select from predefined levels of magnification.
- Choose any one from the pop-up or simply write down the percentage to which you want to zoom in (or out).
- Click on “OK”.
- If you are zoomed in or out and you want to go back to normal (100%) levels then click on “100%”.
Restoring Normal View
You can restore to the regular magnification level (mostly 100%) by either pressing the keyboard shortcut of Ctrl, Alt & +/- or by clicking on “100%” from the “Zoom” section in the “View” tab.
Method 2: Using Zoom Slider in the Status Bar
The feature can also be found at the bottom right of your Excel screen on the status bar. Apart from zooming, it consists of other options from the “View” tab like switching between Normal, Page Breakout, and Page Break Preview.
Here are some simple steps:
- Move the cursor to the bottom right of your Excel screen.
- Locate and access the zoom slider on the status bar.
- Slide the bar towards the right to zoom in and slide it towards the left to zoom out.
- Click on the “+” icon to zoom in and the “-” icon to zoom out by 10% with each click.
- Lastly, click on the percentage to open the pop-up where you can select between the predefined common percentage levels of magnification or you can enter the percentage levels manually.
- Click “OK”.
Method 3: Using a Keyboard Shortcut
Up until recently, Excel did not have keyboard shortcuts for zooming. Maybe people just undermined how effective shortcuts are, especially while writing the values in Excel.
If you are using a wireless keyboard and don’t wish to reach out to your mouse which breaks your rhythm, then you can follow these simple steps:
- Click on any cell from the active sheets.
- Now press the keys Ctrl, Alt & + to zoom in or press Ctrl, Alt & – to zoom out. Press the + and – multiple times to keep zooming in or out.
Method 4: Using the Scroll Wheel on the Mouse
I saved the easiest method for the end. All modern-day mouses come with scrolling wheels between the click buttons. Most apps, including Excel, allow users to perform certain actions with the scrolling wheel.
Here are some simple steps to follow:
- Click on any cell from the active sheets. Note that if you are at a cell that is outside the active sheet, the zooming options will appear disabled.
- Press the Ctrl key and scroll the wheel on the mouse in the forward direction to zoom in.
- Similarly, press the Ctrl key and scroll the wheel on the mouse in the backward direction to zoom out.
Note: If you come across errors while validating data, strikethrough the text to highlight and escalate it.
Bonus: Focusing on a Specific Range
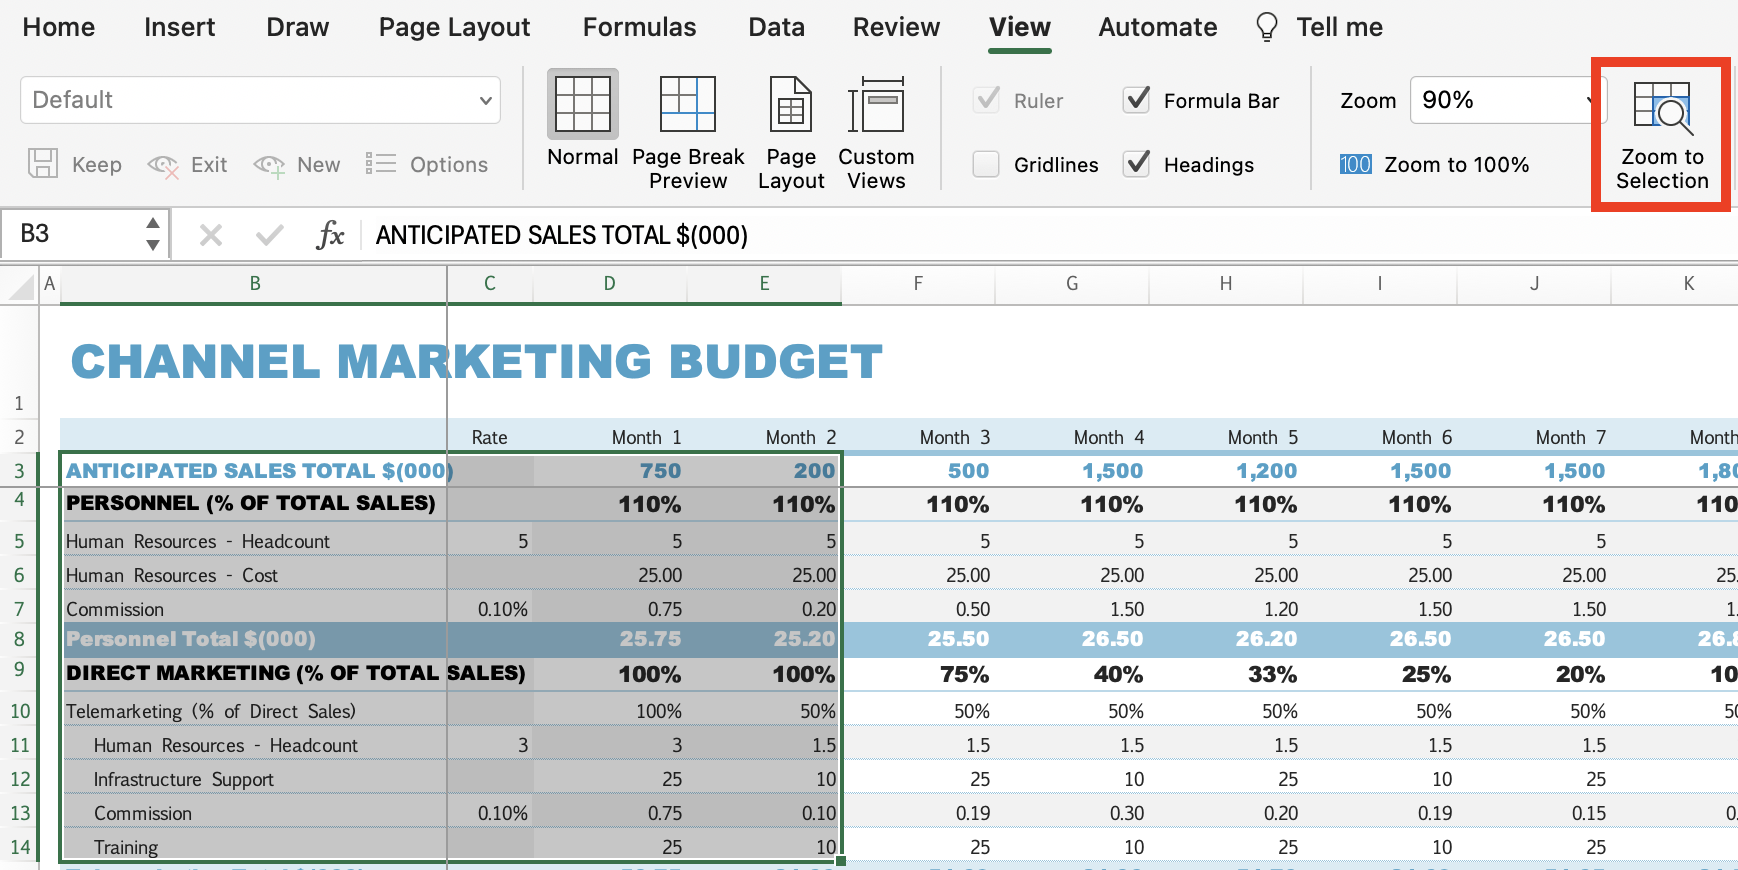
If you want to zoom in on a specific range of cells then you can use all the aforementioned methods but you have to select the range first. Here are the things you have to do to zoom in on a specific range of cells.
- Select the range manually.
- Click on “Zoom to Selection” from the “Zoom” section in the “View” tab.
- Press the Ctrl key and use the scroll wheel on the mouse to zoom in or out.
- Use the zoom slider on the status bar to zoom in and out.
- Use the zoom-in and out options on the Quick Access toolbar.
Adding Zoom Tile To Quick Access Toolbar
If you need to zoom in and out quite frequently, you’re better off adding the shortcut to the quick access toolbar right at the top left of your Excel window.
Once added, these options stay on the Quick Access toolbar for every new sheet, until you remove them from there.
Here are the steps to create it:
- Click on the dropdown next to all the Quick Access features on the top left of the screen.
- Click on “More Commands” from the dropdown.
- Make sure you are in the “Quick Access Toolbar” section on the left side of the pop-up window.
- Click on the dropdown that says “Choose commands from”.
- Select “Commands Not in the Ribbon” from the dropdown.
- Scroll down (alphabetically) and locate zoom options in the list.
- Click on the zoom, zoom in, and zoom out options one by one, and click “Add” in the middle.
- Click on “OK” to apply the changes.
- Click on the zoom option from the Quick Access toolbar to open the zoom dialog box where you can choose from either predefined levels of magnification or enter the level of percentage manually.
Wrap Up!
Zooming in and out is a very common practice among professionals to accurately enter the values in the cell, proofread the values, and check out the overall layout of the columns and rows of all the pages within the same sheet.
Additionally, you can also center a worksheet horizontally to ensure consistent appeal. It will add up to readability.


Leave a Reply