Rotating a text is pretty much similar to how we would flip an image or any other design object. The easiest way, of course, is through the conventional right click. All your major formatting options for text are right there.
With global design language evolving every year, text is no longer seen as just words lying around. People did all sorts of design experiments. You can garner attention by curving the text or rotating it from top to bottom or vice versa.
In this article, I will take a look at how rotated text is one fine way to make your boring content (headings and titles) appear more exciting than just regular left-to-right alignment. So, let us get started!
Ways To Rotate a Text in Google Slides
Before beginning, know that there is a difference between writing vertically and rotating your text. By rotating, you rotate the orientation of your letters whereas if you write vertically, you are just changing the shape of the textbox and the letters retain the orientation.
Method 1: Using the Right Click
This is the most common way, as iterated earlier. Although many would argue dragging the rotation point is faster and more convenient, the safe way is to do it through the Rotate option from either the right click or through formatting.
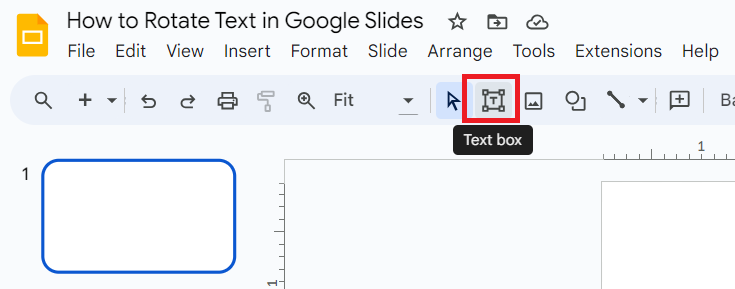
- Select “Text Box” from the ribbon menu to enter a text box on your slide.
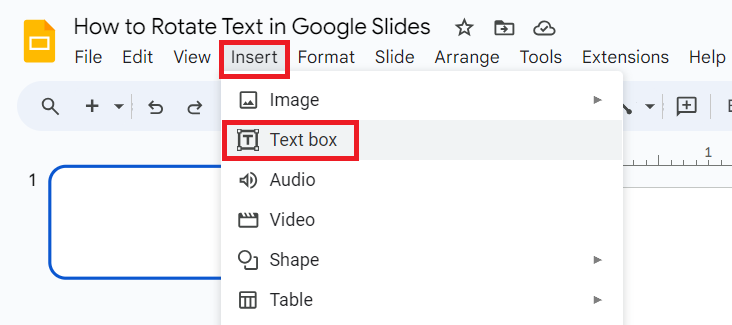
- Alternatively, you can also select “Insert” and then select “Text Box” from the dropdown to enter text.
- Enter the text into the textbox, which you want to rotate.
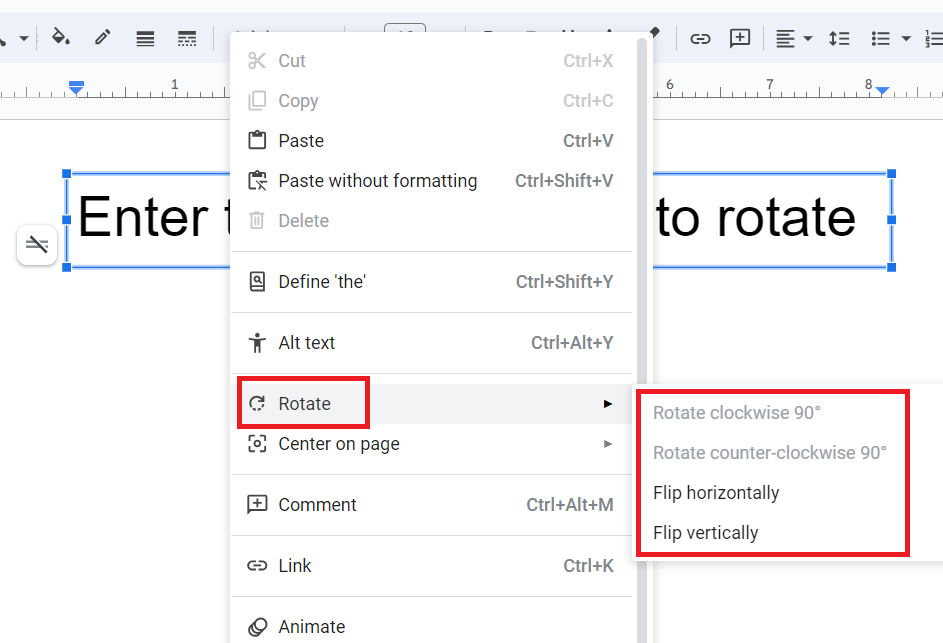
- Next, right click on the text box and select “Rotate”.
- Select the orientation to which you want to rotate the text.
In this way, you can only rotate your text at a gap of 90 degrees. You have options like rotating clockwise 90°, rotating counter-clockwise 90°, flip horizontally and vertically.
Method 2: Using the Format Options
This method takes slightly longer than the other methods but works the same way. Note that, unlike the previous method, you can manually enter the degree of rotation you want your text to have.
- Insert a text box and add the desired content to it.
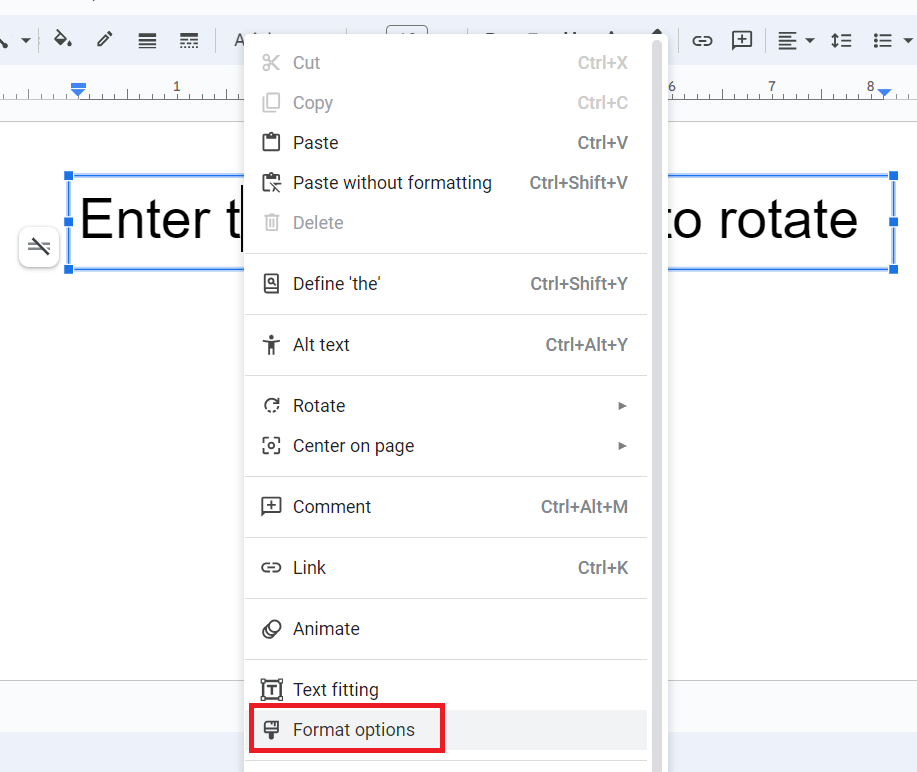
- Right click on the text box and select “Format options”.
- Alternatively, you can click on the three vertical dots at the end of the ribbon menu (below the main menu) to expand it further and select “Format options” from there.
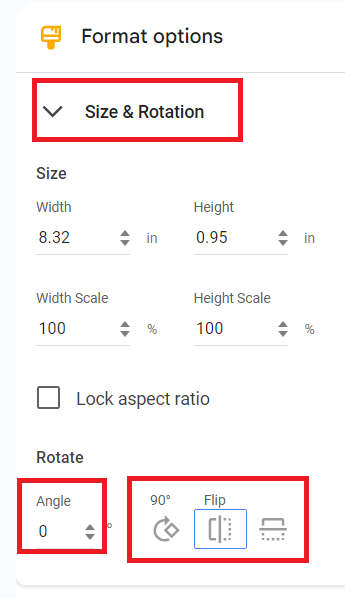
- Expand the “Size & Rotation” tab in a new format options editor that opens on the right side of your screen.
- Enter the degree of rotation you want in the “Angle” dropdown below the sizing options.
- Alternatively, you can also select the common rotation options given in the “Size & Rotation” tab which are to rotate the text 90° or to flip the text horizontally/ vertically.
Method 3: Using the Rotation Handle
- Locate the rotation point just above the text box. It is usually a circle shape.
- Click on it and drag it across to rotate the text box.
- Once you find the right degree of rotation, leave the click.
- To find more accuracy in the rotation, click and drag the text box from the rotation point while pressing the Shift key.
The Shift key helps you find the appropriate angle. It rotates the text box at 15° on each movement of your cursor.
You also see the exact degree of rotation (it flashes while you rotate) that takes place when you press the Shift key and rotate the text box.
Method 4: Using the Arrange Option
The “Rotate” option from the Arrange tab works exactly like the first method which is through the right click.
Here also you get four options for rotating your text like rotate clockwise 90°, rotate counter-clockwise 90°, flip horizontally and flip vertically.
- Click on the text box.
- Go to the “Arrange” tab on the main menu.
- Select “Rotate” from the dropdown.
- Select the degree of rotation you want for your text box.

Can You Rotate a Text in a Table in Google Slides?
Unfortunately, you cannot change the orientation of text inside a table. There is no feature to rotate text that you enter inside the cells of a table.
But since the versatility of Google Slides allows you to still do things that are not possible through default features.
You can make columns with the help of shapes like squares or lines and then enter text boxes inside each of those boxes that appear like table cells. Then, as we saw earlier, you can rotate all the text boxes.
This is a little tedious but if you want to rotate text inside a table then this is the only way possible.
Frequently Asked Questions
No, the rotate effect won’t apply. You must use the text box tool to add text and then rotate it in the editor. Even then, you cannot copy the rotated text box drawing from the Google Docs file to the Google Slides file.
Select the text box and right click on it. Go to “Rotate” and then select the rotation you want according to the direction you want.
Insert a text box and write the text you want to make vertical inside the text box. Now locate the resizing squares on the edges and the walls of the text box. Select the resizing box on the right wall and drag it closer to the other end on the left. This will shrink the text box and the text, instead of being left to write, will appear from top to bottom.
Text in a shape will essentially be text in a text box that appears on top of a shape. So you can rotate the text with the rotate option on the right click or through the format options.
Wrap Up!
There is a lot that you can do with text which converts it from being boring to interesting. Rotating is one of those ways to make your point visually appealing. You can top it up by adding colors and shapes to your text.


Leave a Reply