I understand how clumsy it looks when you fumble with controls during a presentation. Therefore, with an auto-playing setup, you don’t have to navigate through each slide manually.
You can make your Google Slides play on a loop with two different methods. In this article, I shall discuss them for effortless delivery and a continuous content flow. So, without further ado, let’s get started!
1. Using the Autoplay Option
The Autoplay method is the easiest and most common one. With it, you can transition smoothly and create an impressive school presentation or a professional pitch. Follow the steps below:
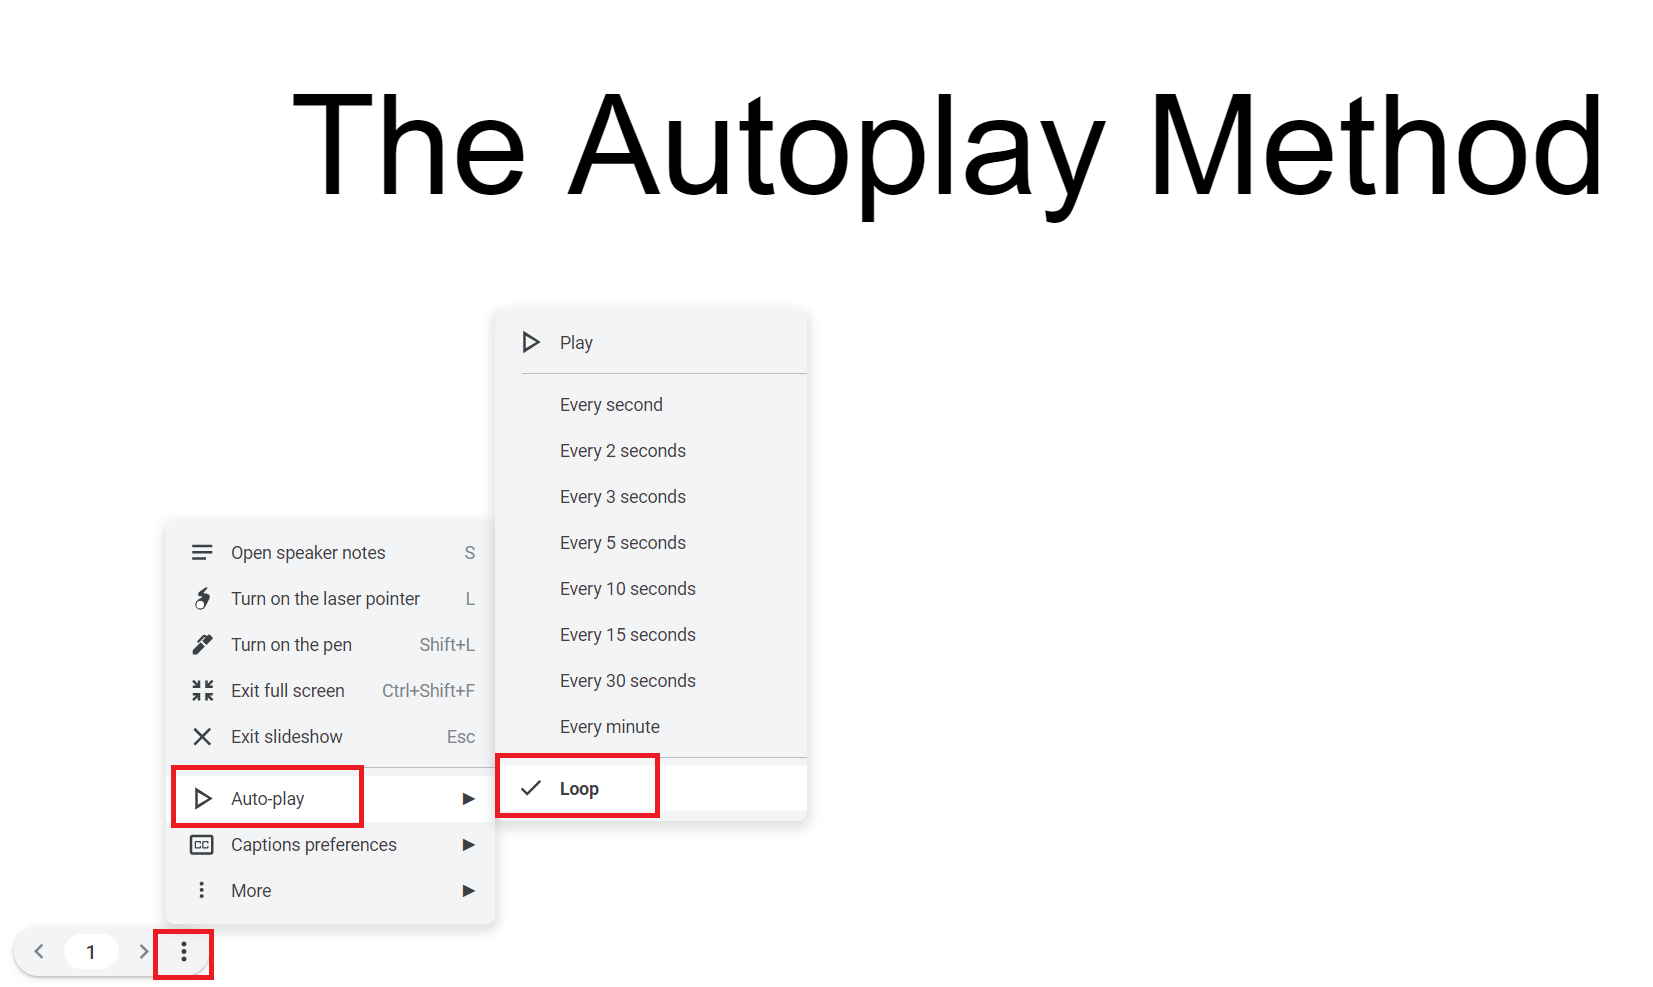
- Click the Slideshow menu to play your presentation.
- Hover over the screen and click the ellipsis (three dots) that appear at the screen’s bottom left corner.
- Navigate to the Autoplay option and select the loop time.
- Click on the Loop option.
Now, when you play the presentation, each slide will automatically change after the selected time interval.
2. Using the Publish to Web Option
You can publish your Slideshow with auto-play and loop it in Google Slides. Here’s how:
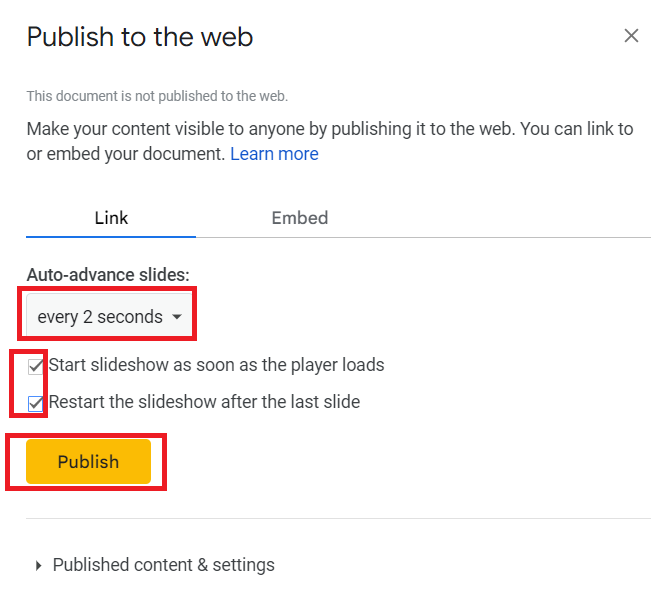
- Go to the “File” menu.
- Click the Share option and go to the Publish to Web button.
- Set the time for auto-advance slides.
- Ensure that you check the Start slideshow as soon as the player loads to start the Slideshow automatically.
- Check the Restart the Slideshow after the last slide box.
- Click Publish.
- That is it. You can share the presentation with the link or any way you prefer.
Additionally, if you have created too many pages or want to present only certain pages, you can hide unwanted slides.
Frequently Asked Questions
Your Google Slides autoplay might not work if you have outdated software or incompatible browser or file formats. Another reason might be that you missed checking the Play option in the Slideshow menu.
You can select the Loop option after starting the Slideshow. However, you might not notice the loop as your file only has a single slide.
Select a slide go to the Transition menu on the top-right corner and then select your preferred transition effect and click Apply to all slides. I also have a dedicated guide on adding a transition to Google Slides.
Wrap Up!
Adding a loop to your Google Slides will save you the hassle of manually navigating through each slide for a seamless experience. The loop will enable a continuous content flow for longer audience attention.
Now, you can transform your presentation and captivate your audience without having to focus on changing your slides now and then.


Leave a Reply