I recently made a presentation, and while I was discussing some important points from it, it proved to be a pain manually going back and forth. It hit me that I could get Google Slides to play automatically. If you’re in a similar situation, you’re in the right place.
There are two ways to do it. One is local, where you alter settings from the presentation mode, and the other is when you publish it on the web. Both are fairly easy, and the end options remain the same.
Let me walk you through each of them, step-by-step.
1. Using Slideshow
Here you begin your slideshow, and before you move on with the presentation, you set up the auto-play options and the delay you want between each transition of slides. Follow these simple steps:
- Open the file for which you want the slides to play automatically.
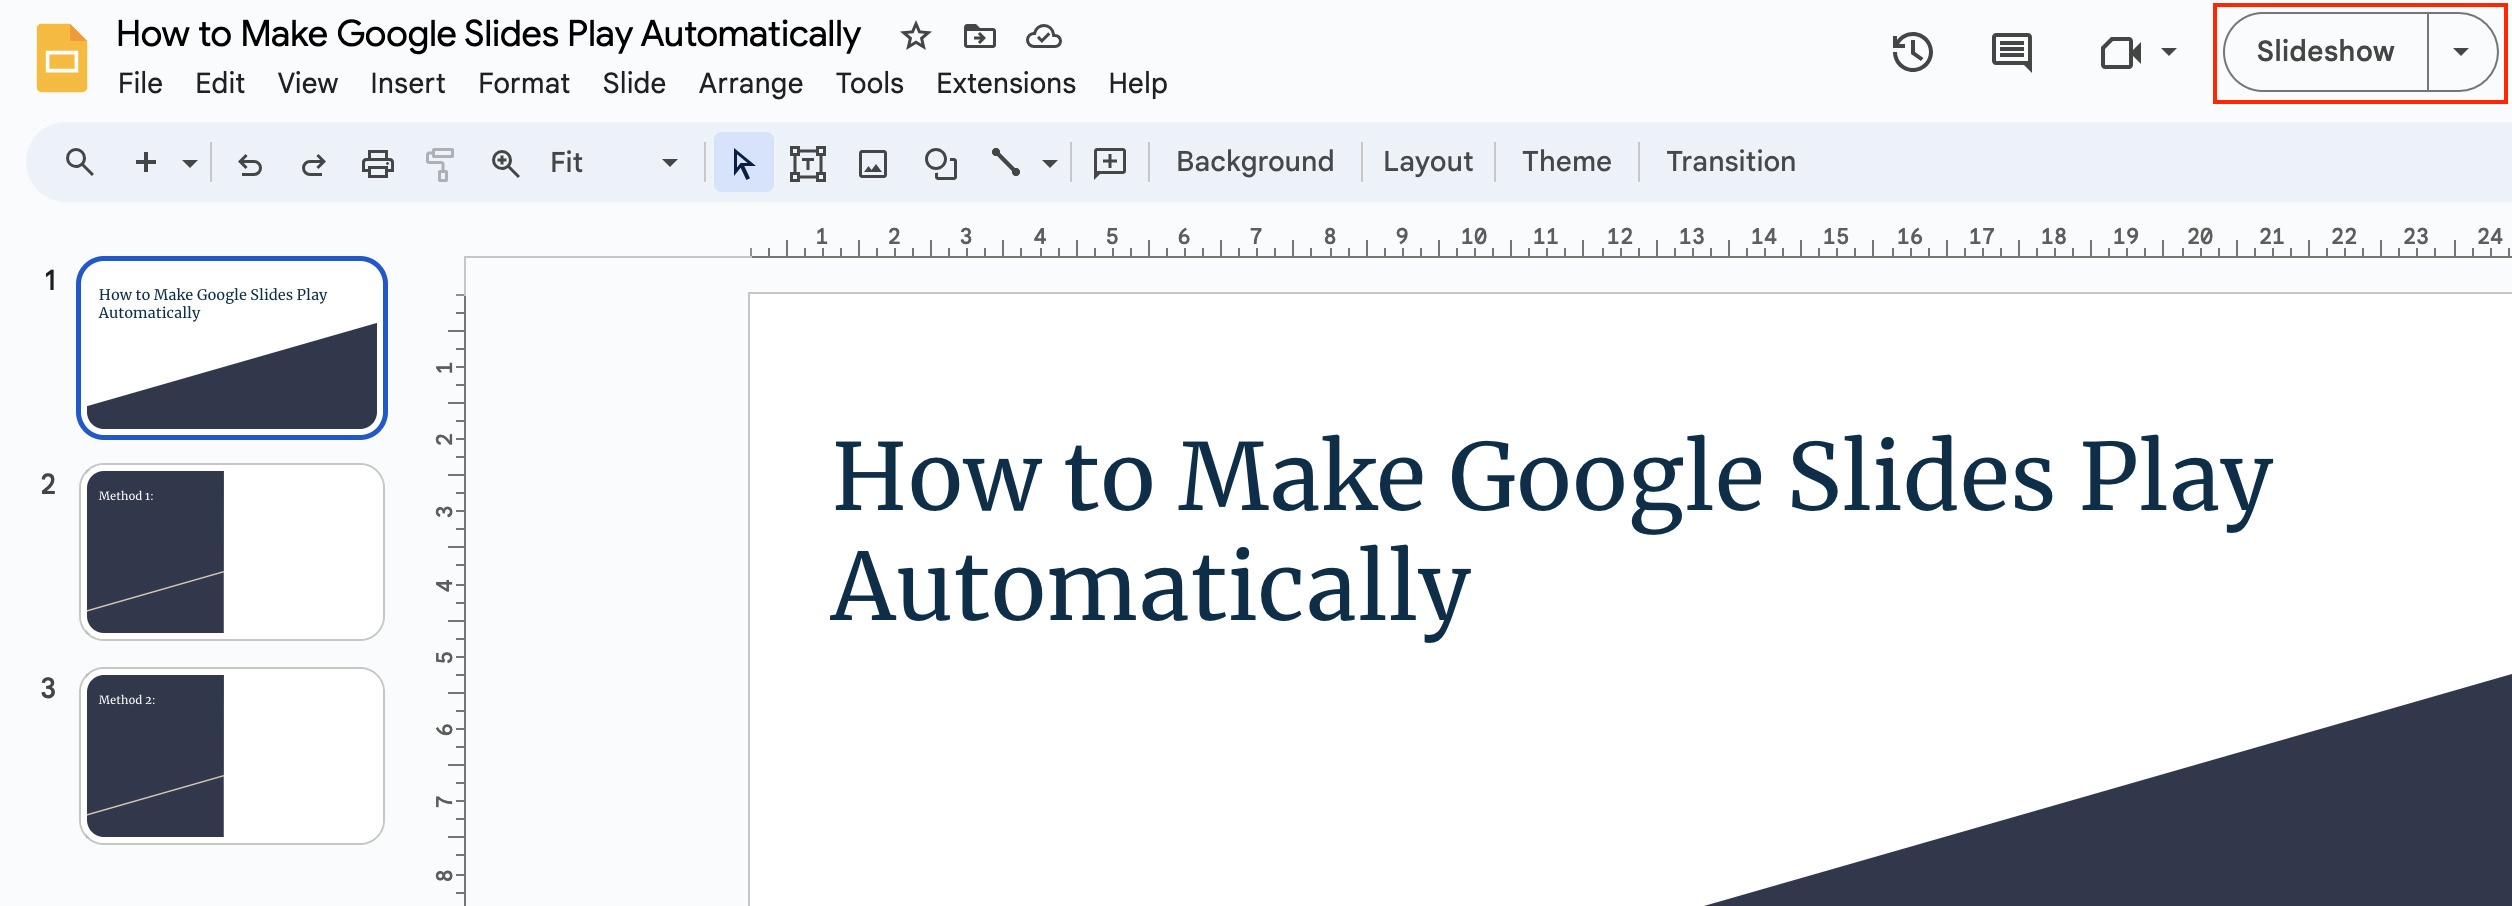
- Select the “Slideshow” option in the top right corner as highlighted in the screenshot below:
- Alternatively, you can use Ctrl + Shift + F5 keyboard shortcut to begin the presentation.
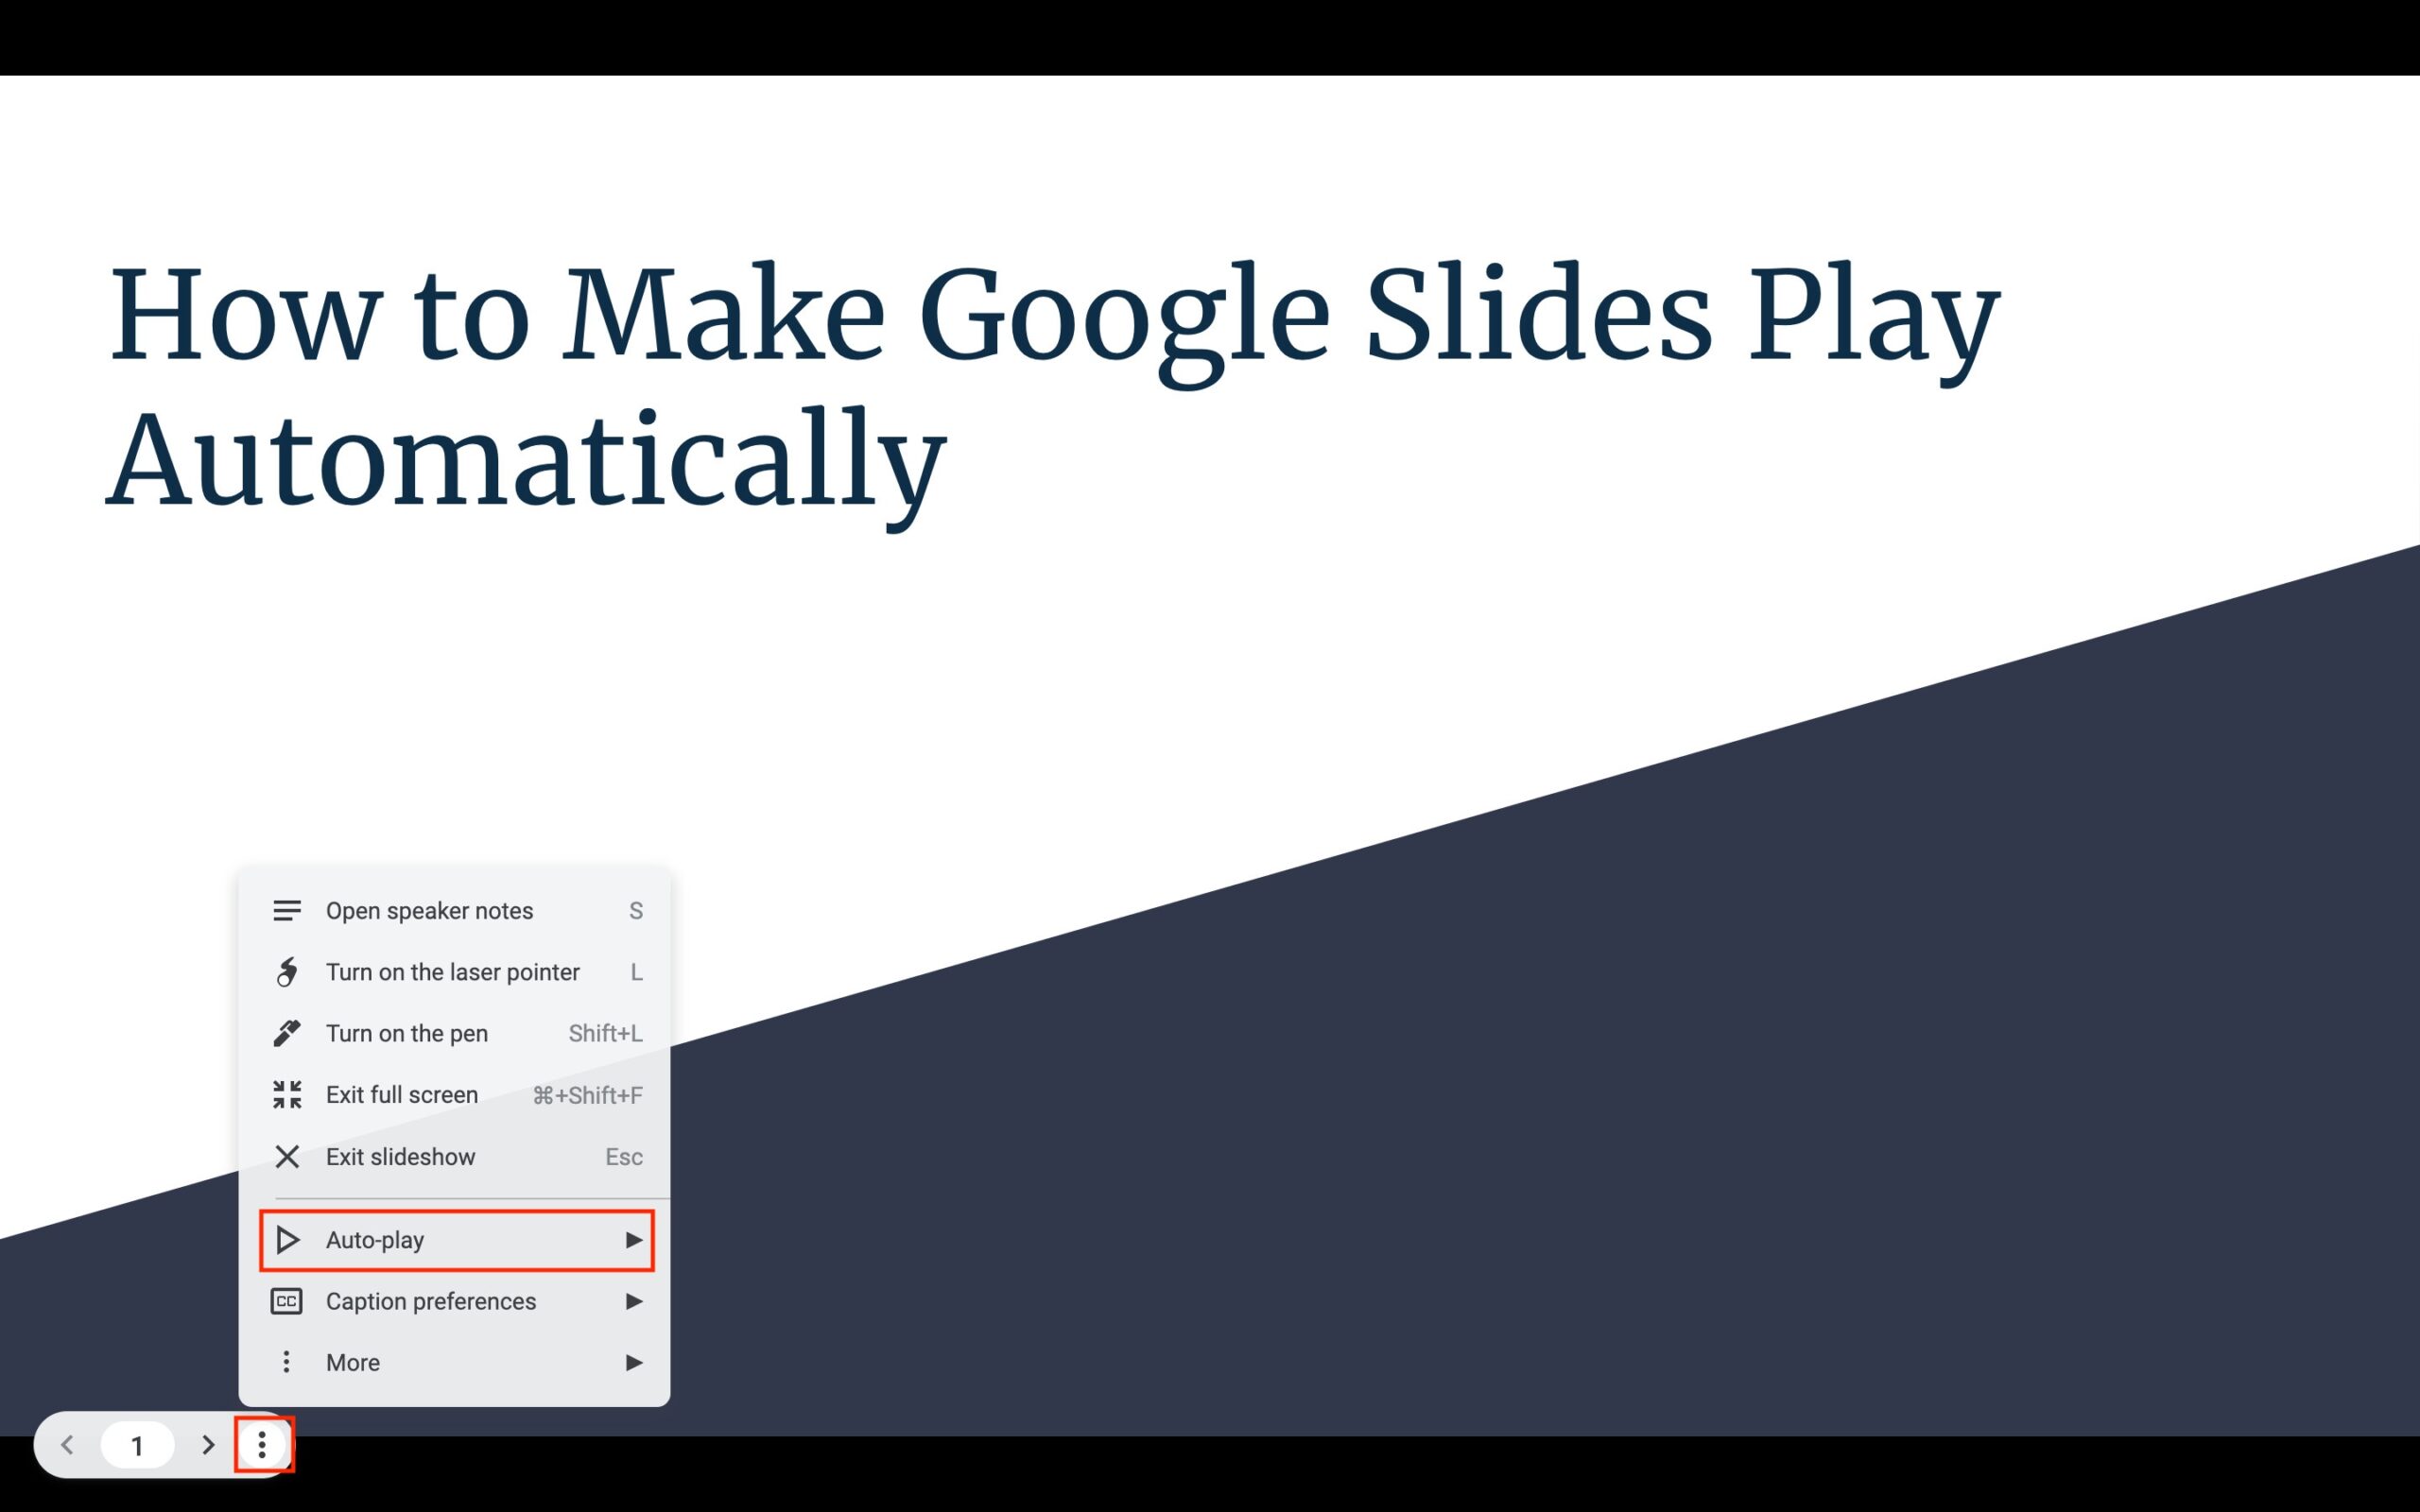
- When the slideshow starts, hover your cursor on the bottom left of the screen where a small menu indicates the number of slides and navigates to the next or previous slide options.
- Select the three vertical dots.
- Select “Autoplay” from the pop-up.
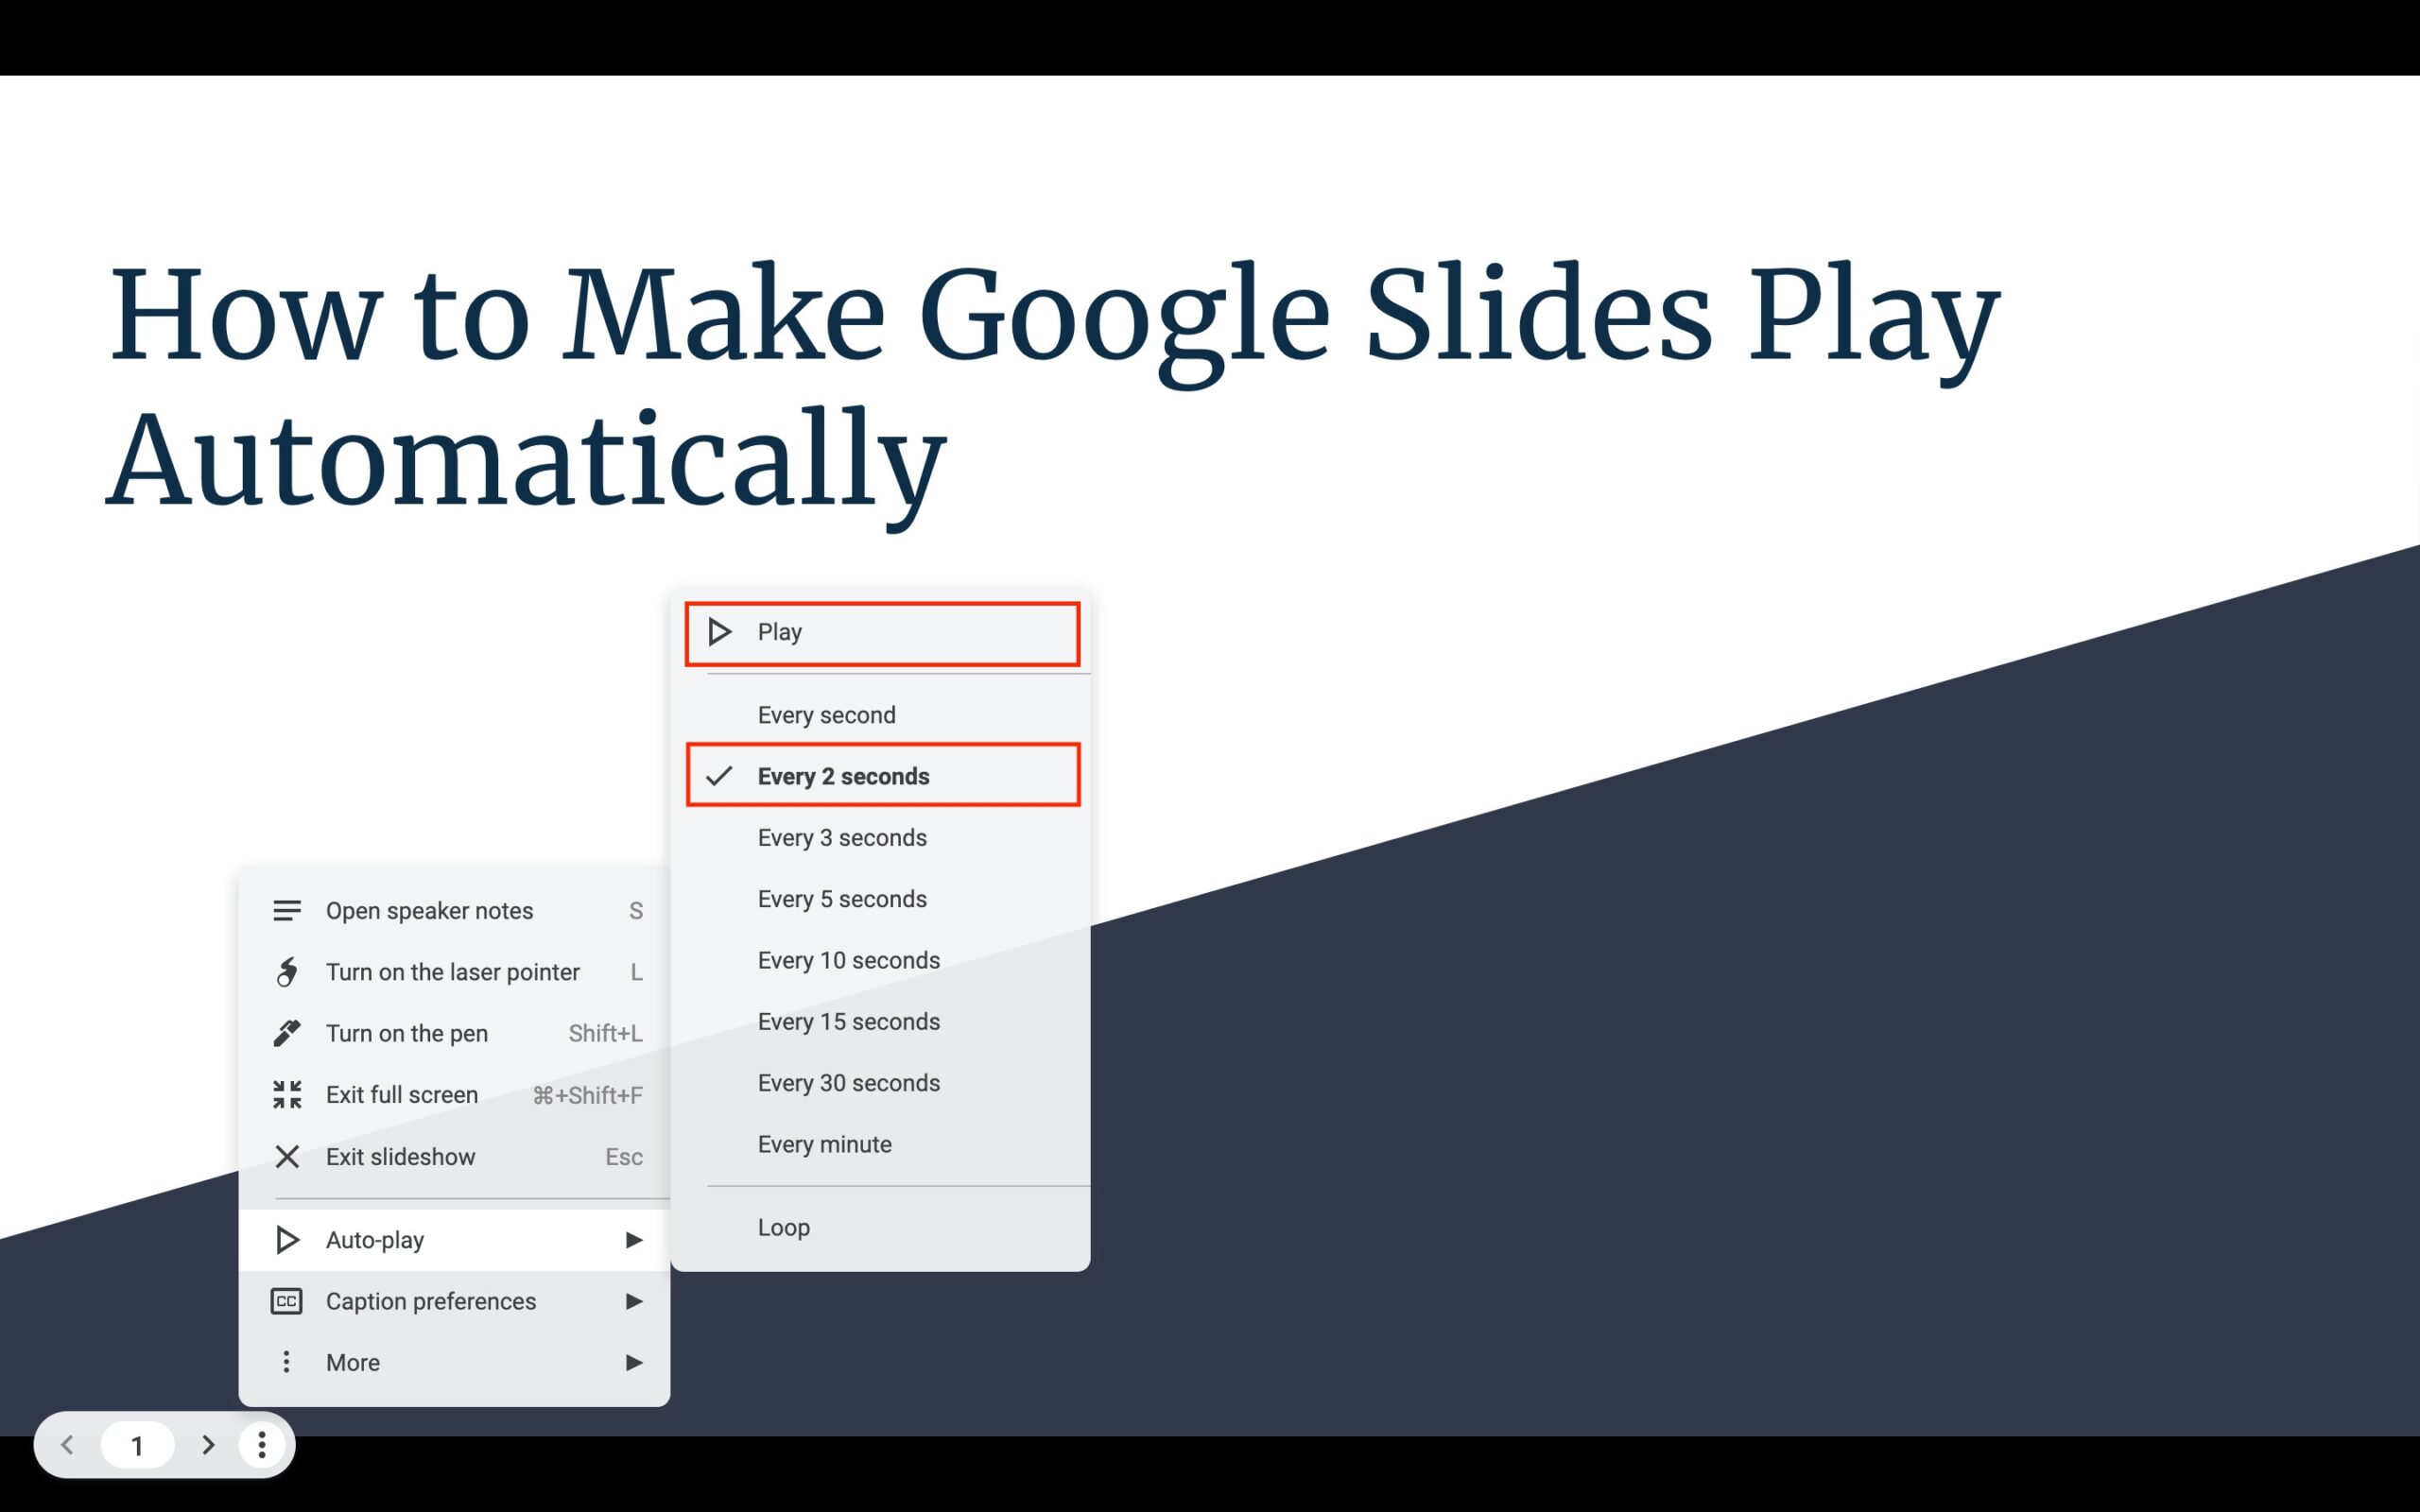
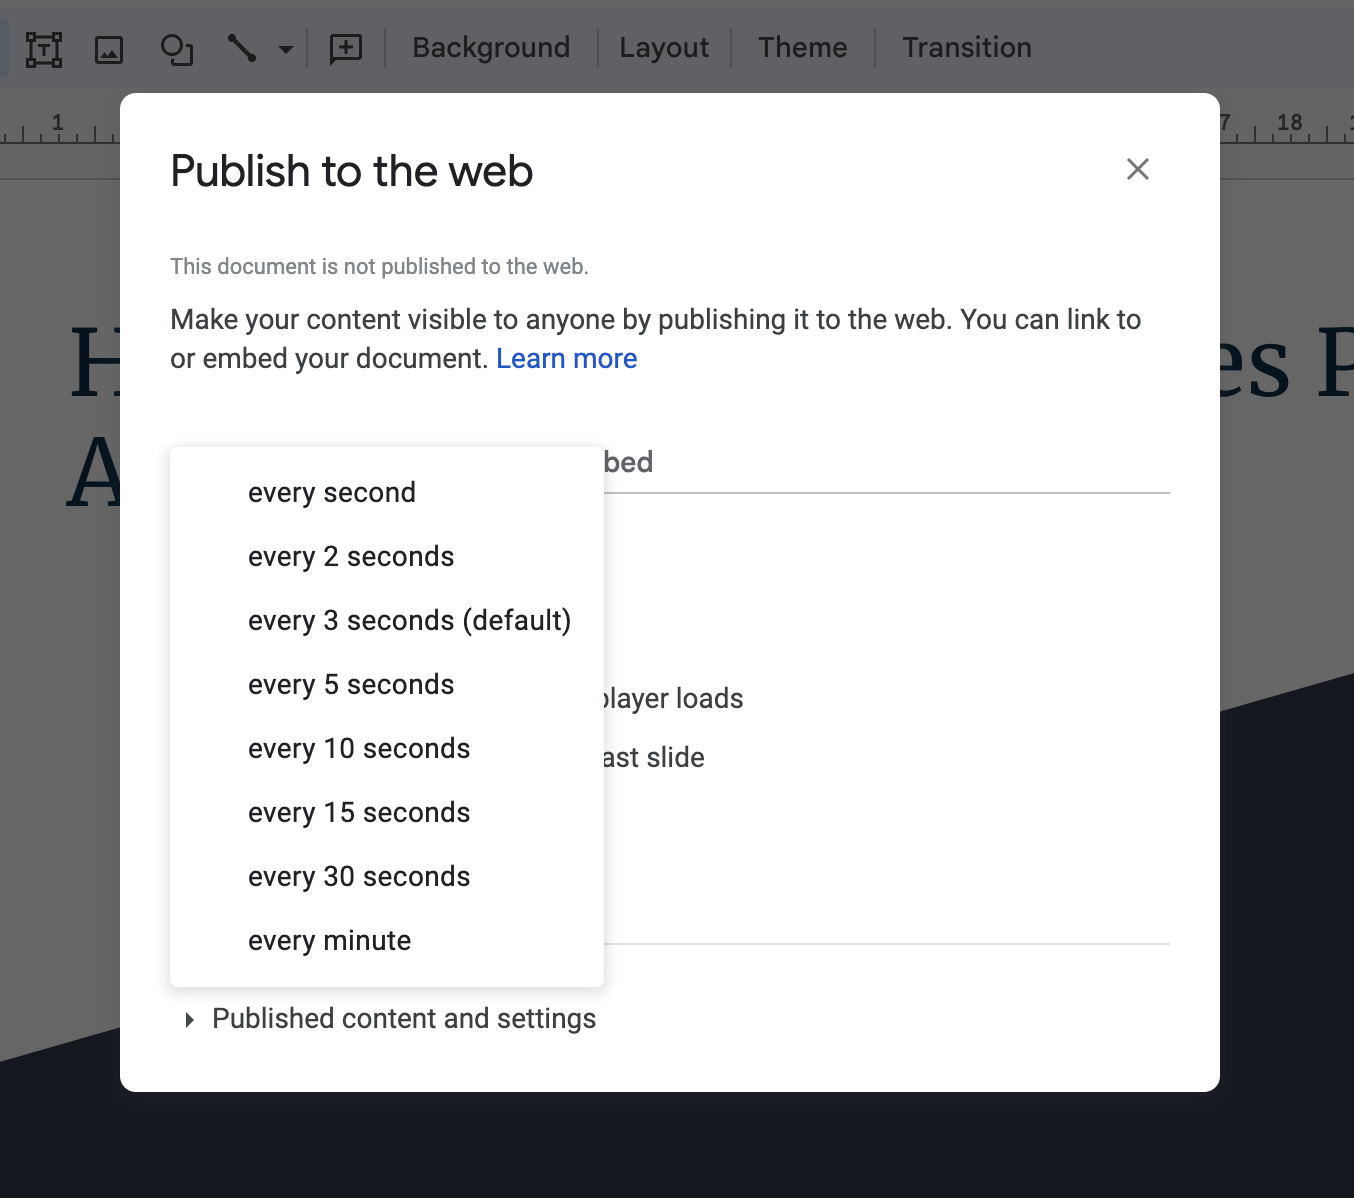
- Select the delay you want between every slide transition. You can select between 1 second to 1 minute.
- Click on Play after you select the delay options. That is it.
Note: You can also make your Google Slides play on a loop. It restarts your presentation from the first slide after it ends.
2. Using Publish To Web
If you are one of those who like to make your presentations on your website instead of playing it locally on the browser, then you also have an option to make your slides play automatically.
In this case, your slides are embedded on your website instead of being on the browser. Follow these simple steps:
- Open the file.
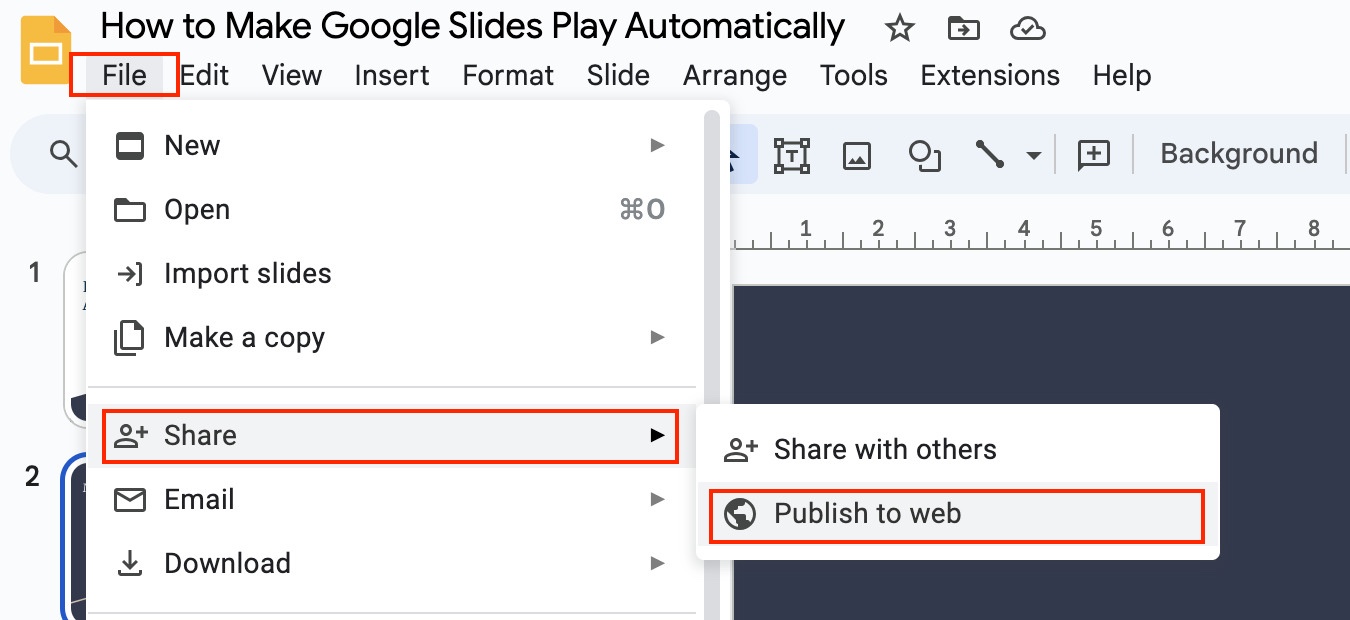
- Select “File” from the main menu.
- Select “Share” from the dropdown.
- Select “Publish to web” from the sub-dropdown.
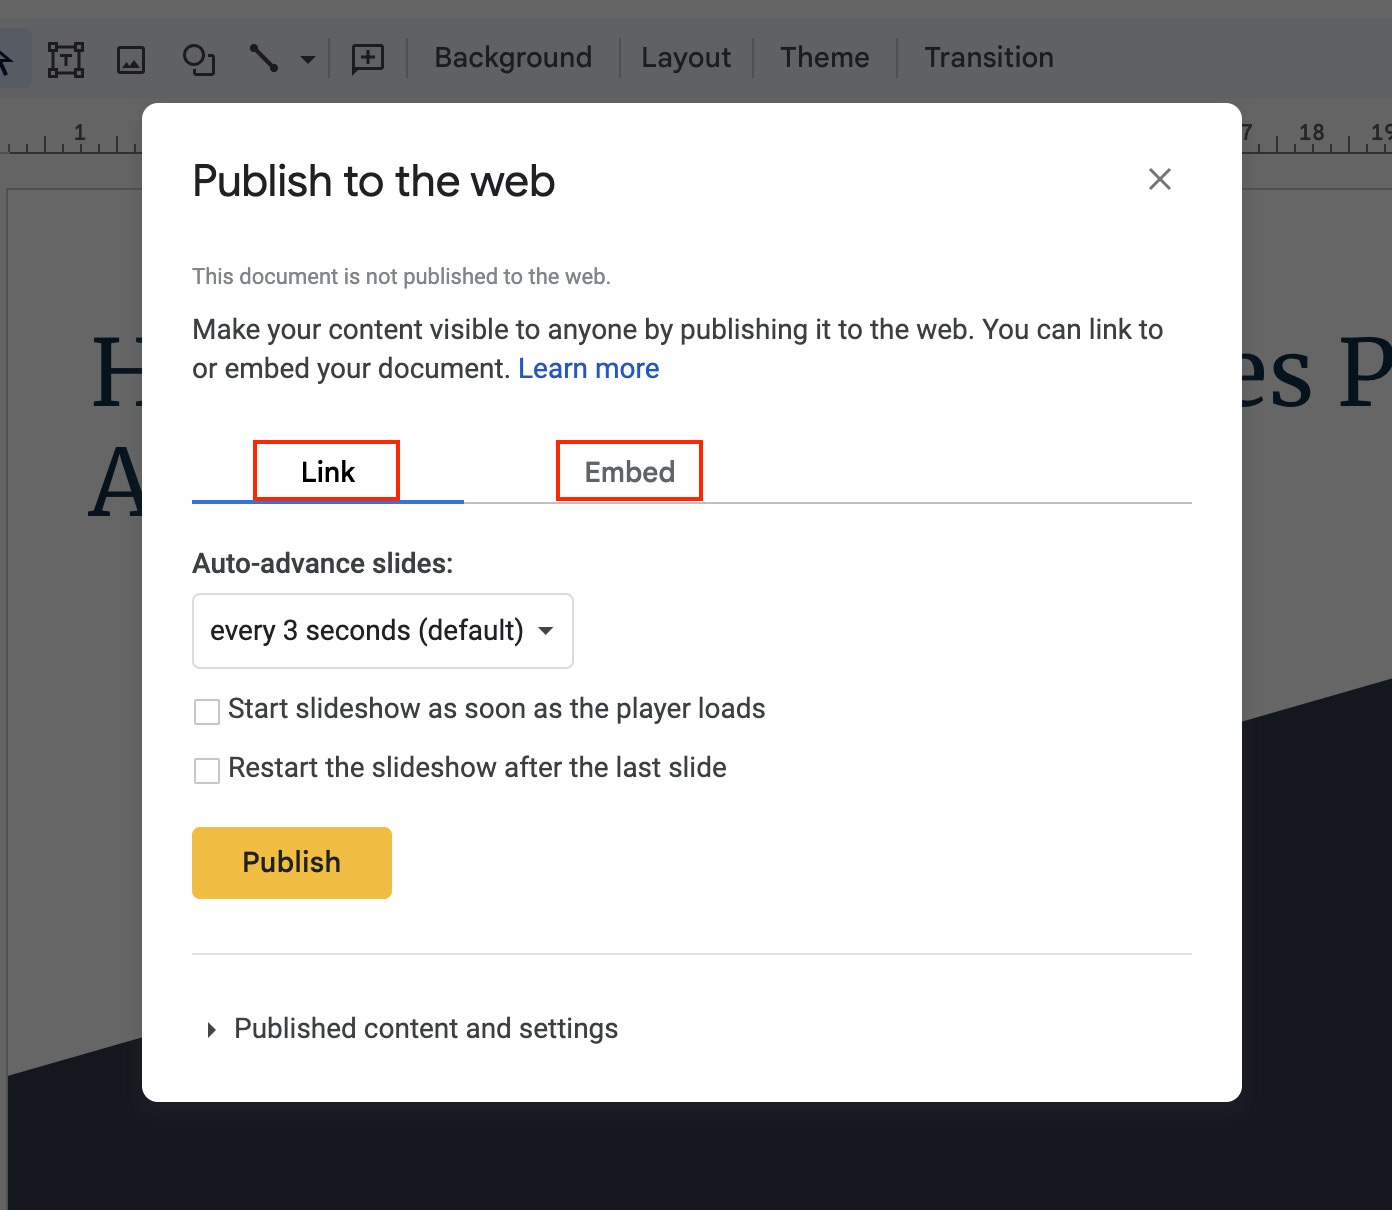
- Select if you want to add a link or if you want to embed the video.
- Select the transition delay between two slides from the “Auto-advance slides” tab.
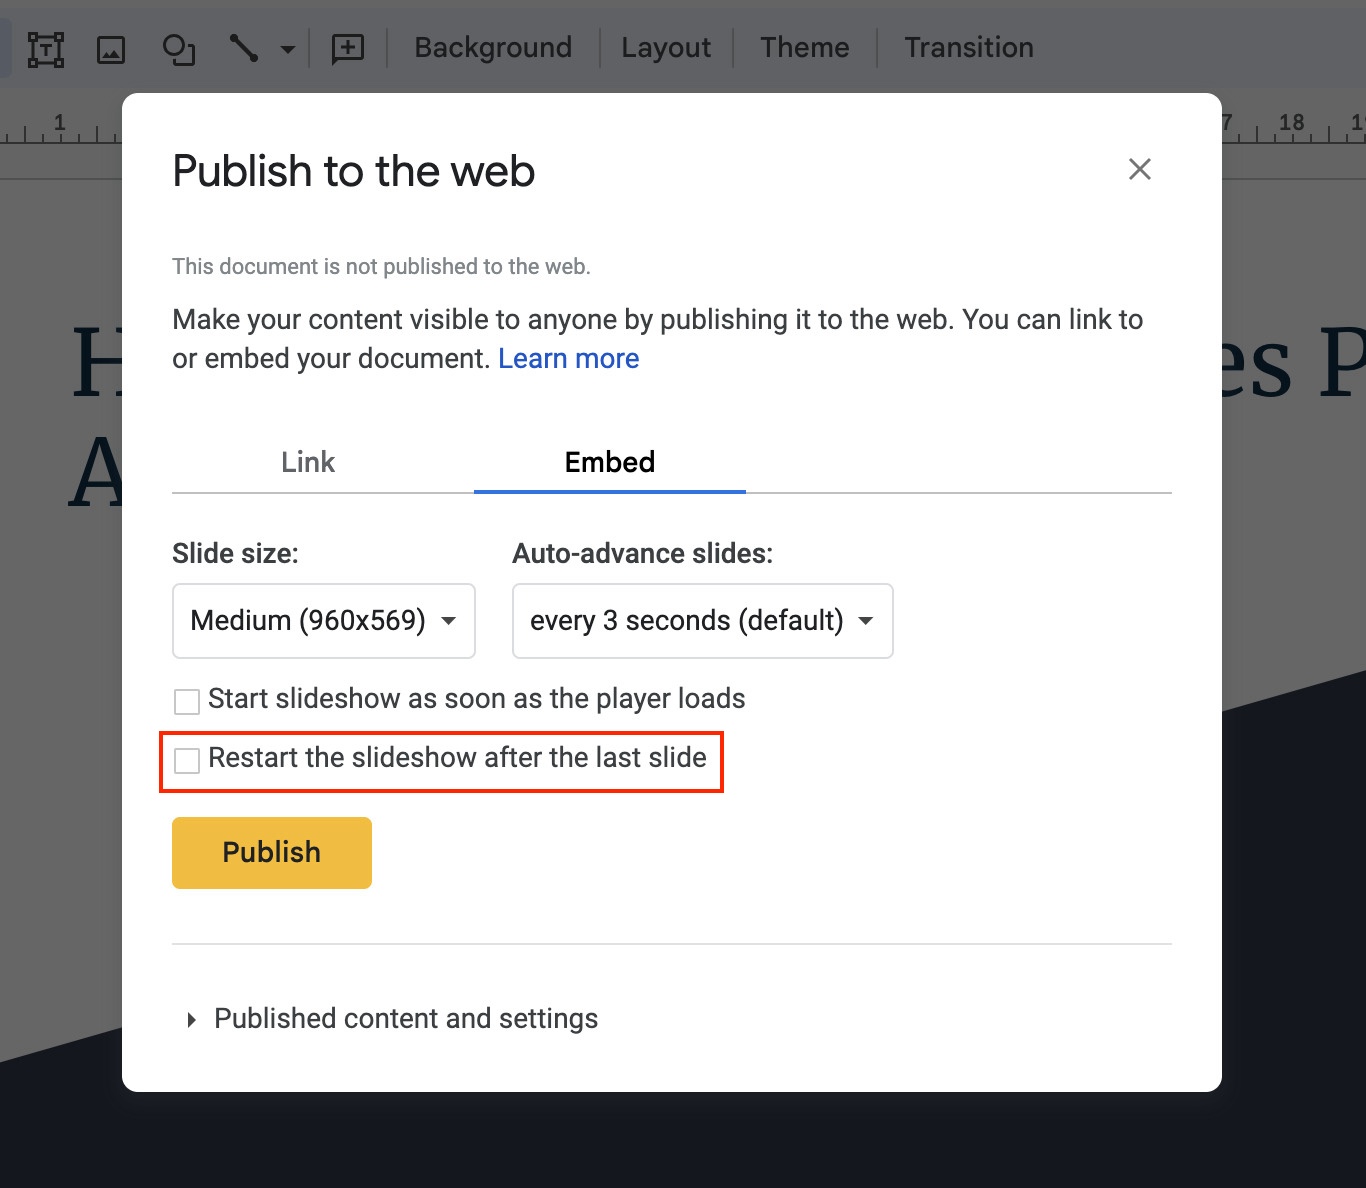
- Alternatively, select the loop option by checking the box below that says “Restart the slideshow after the last slide”.
- That is it. Upon copying the link or embedding the slides into your website, you should be able to see an autoplay of all the slides when you launch the website or the destination webpage.
Making Google Slides Move Automatically on a Timer
Unfortunately, Google Slides does not have a built-in timer feature. However, there’s a workaround to it. You can put a video from YouTube that shows the countdown (there are tons of them) and put the transition delay exactly the length of the timer video.
Follow these simple steps:
- Open your Google Slides file for which you want the slides to play automatically on a timer.
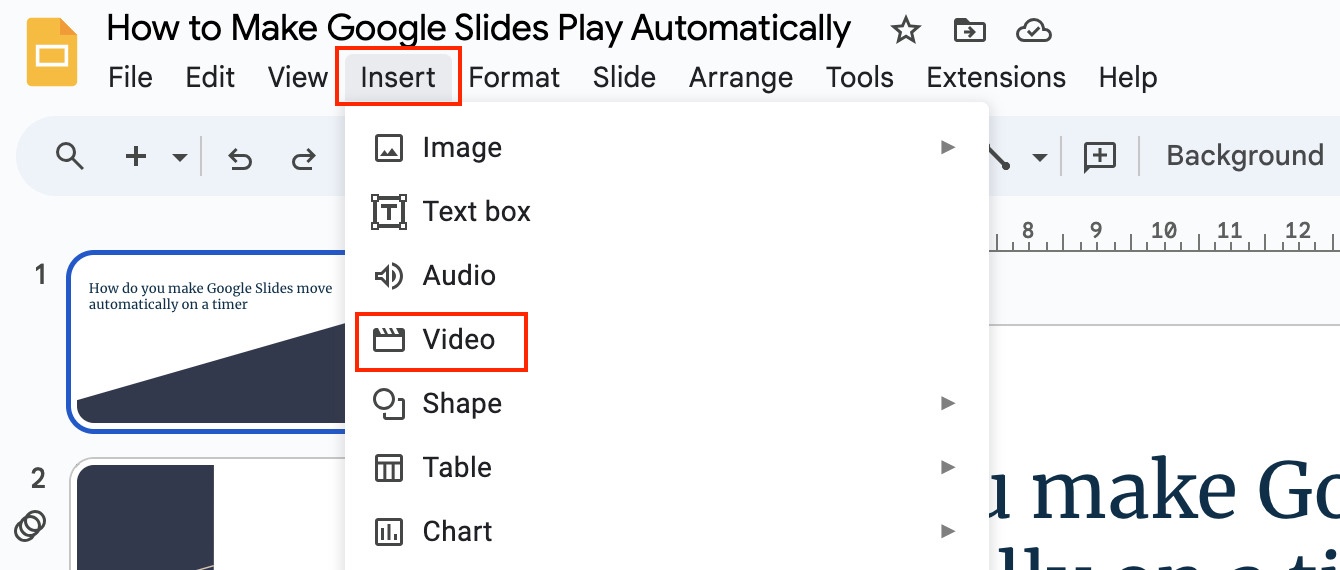
- Select “Insert” from the main menu.
- Select “Video” from the dropdown.
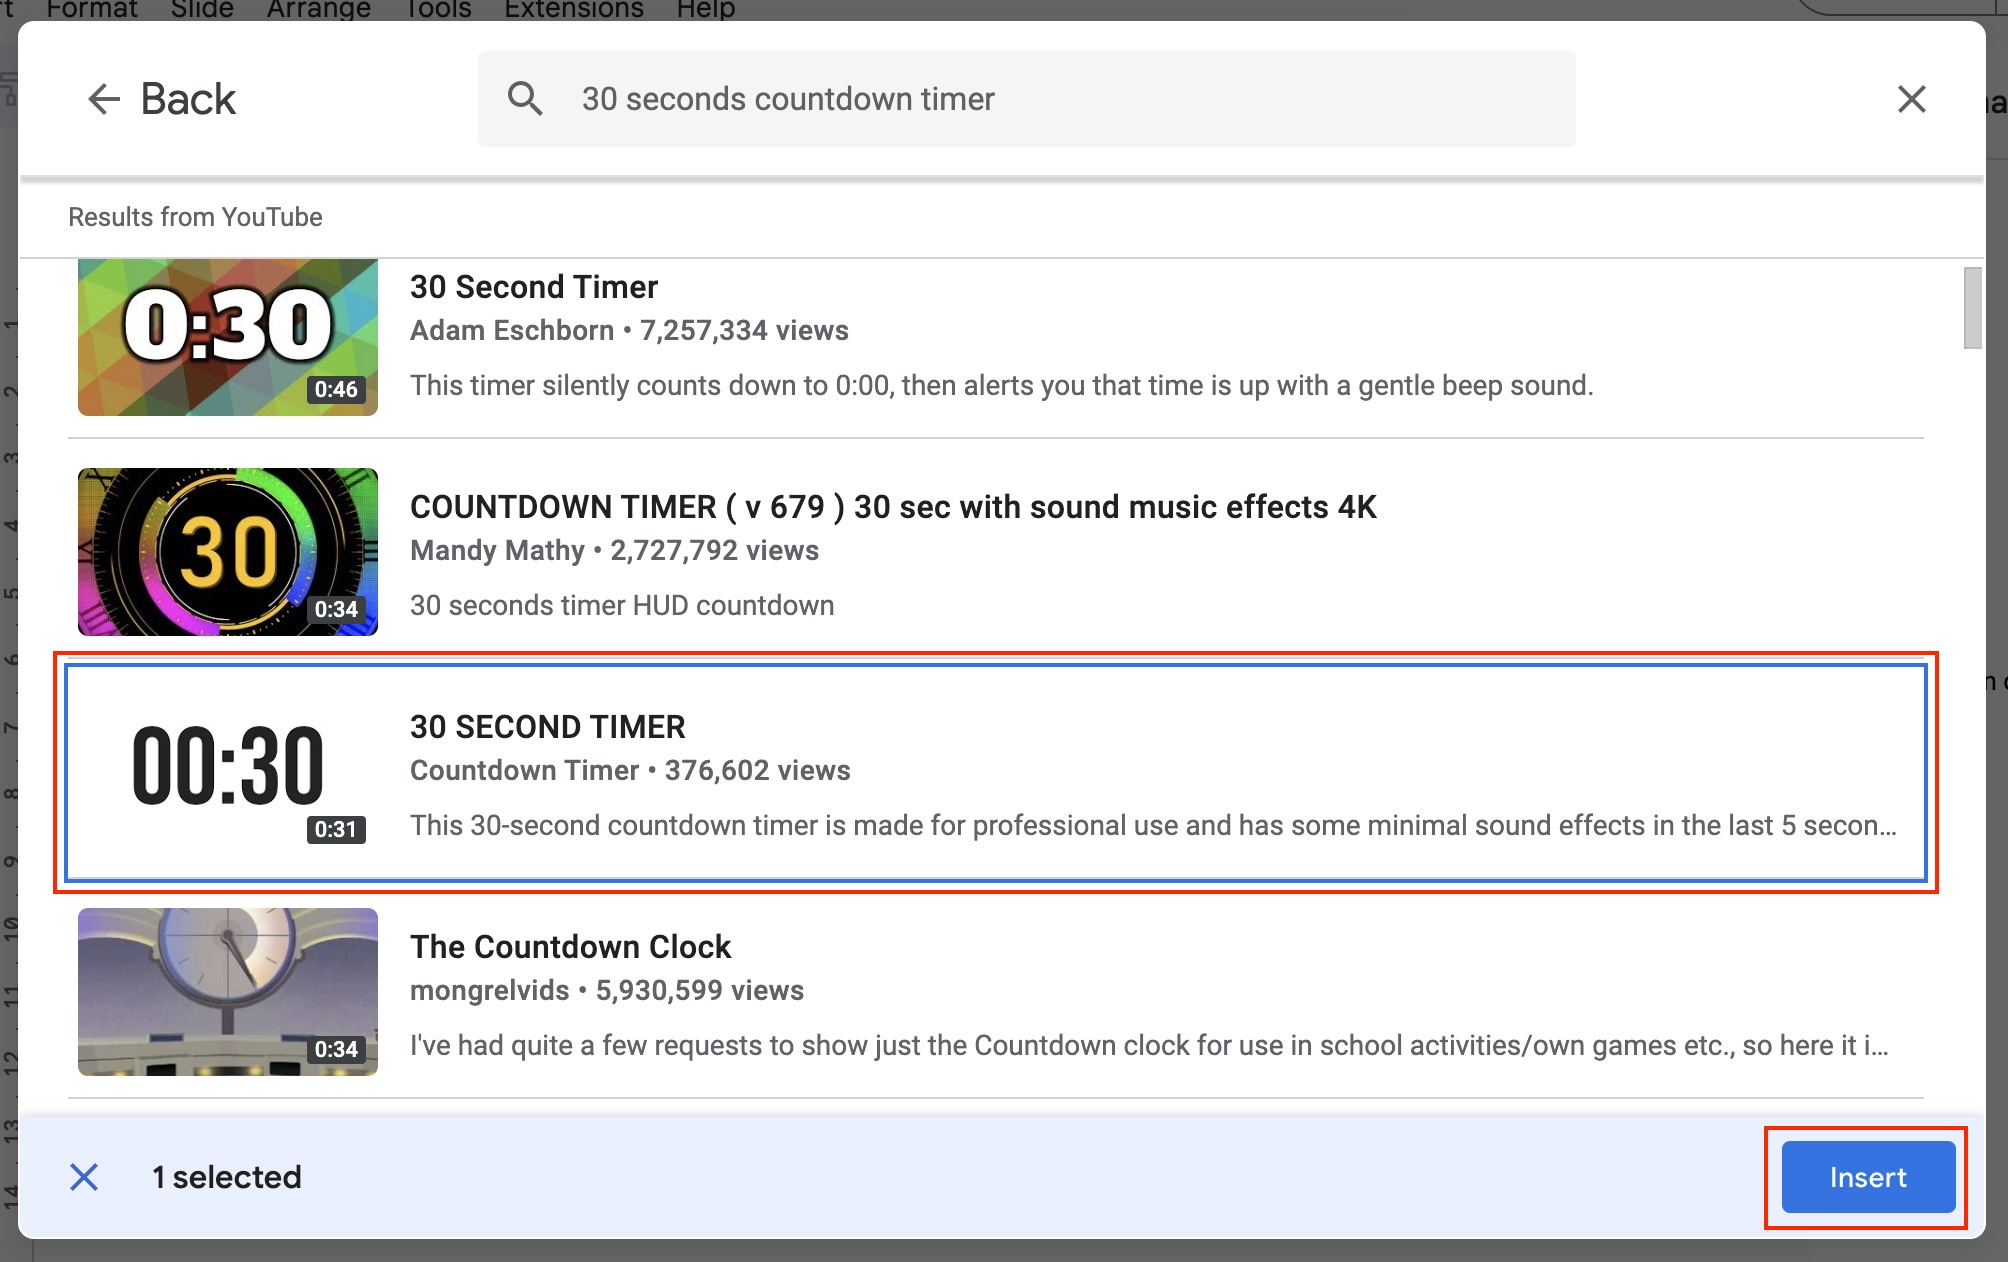
- In the search bar (which is powered by YouTube), search for countdown timer videos. If you want your slides to change every 30 seconds, search for “30 seconds countdown timer”.
- Select the appropriate video from the search results. There will be plenty of countdown timer videos with a lot of graphics. Select the one you like.
- Resize and adjust the video on the slide. Ideally, you should keep the countdown timer at the bottom right.
- Add the same video to all your slides by copying and pasting it.
- Right-click on the video and select “Format options”.
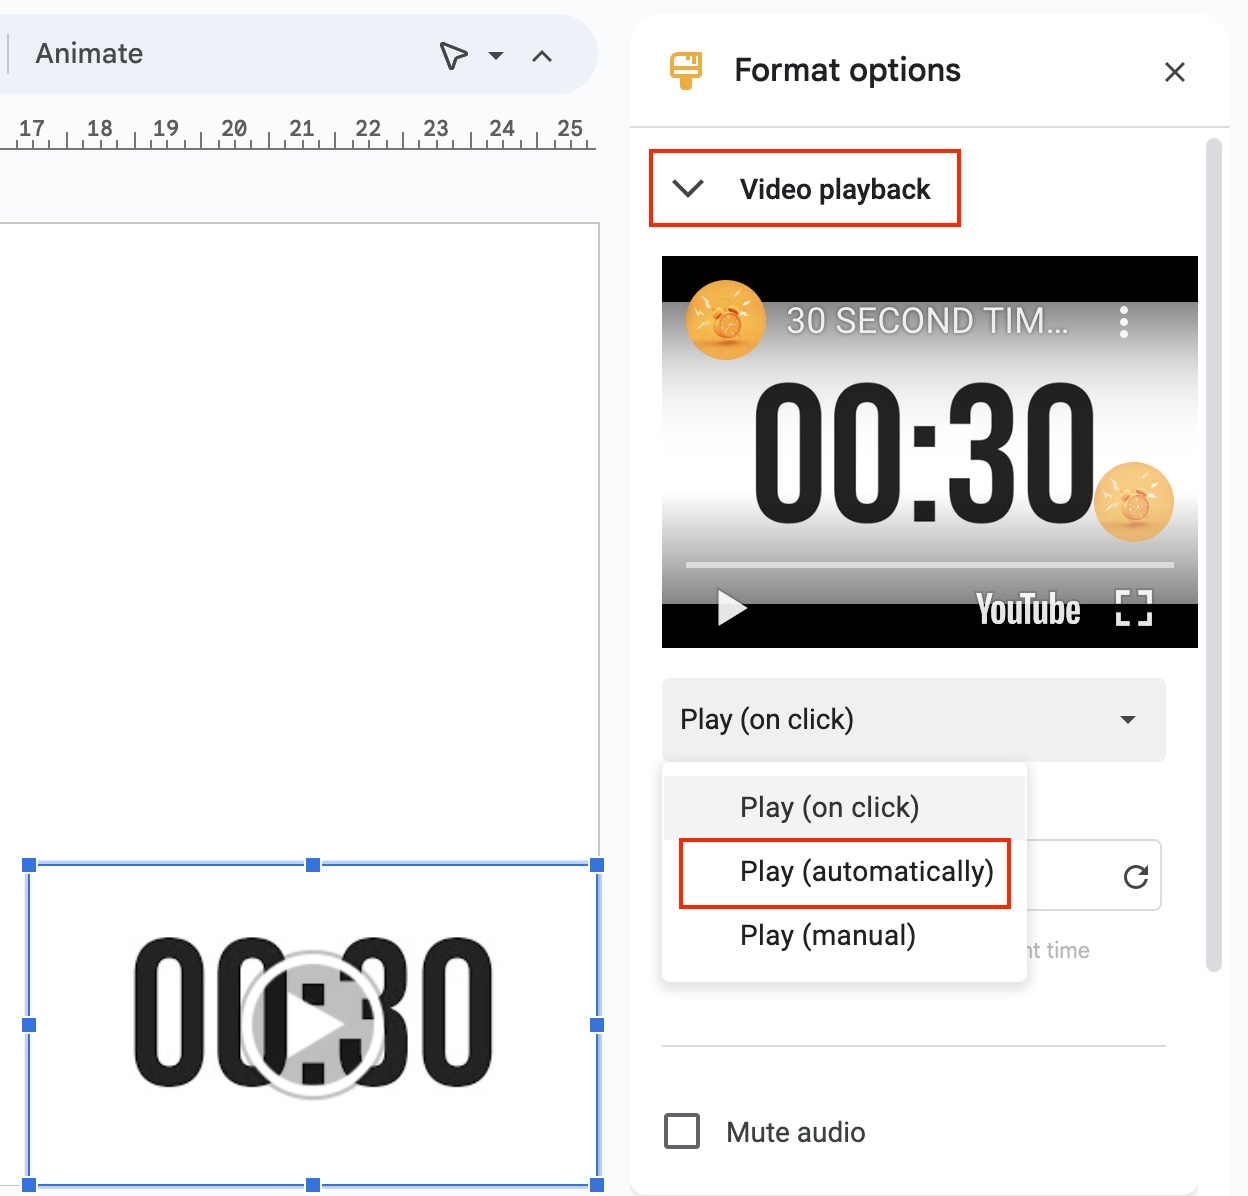
- Go to the “Video playback” tab when the format editor opens on the right side of the screen.
- In the dropdown below the thumbnail, select “Play (automatically)”. This will play the video automatically whenever the slide comes into the presentation.
- Do the same playback settings from the Format options for the videos on all the slides.
- Now hit “Slideshow” from the top right of your screen.
- Hover the cursor on the bottom left.
- Select the three vertical dots.
- Select “Autoplay”.
- Select the transition time. Note that the transition time should be the same as the duration of the countdown timer video that you selected earlier.
That is it. Now with every slide, the video will start with its playback which would be a countdown timer. The slide will make a transition at a set delay, which will then match the end of the countdown video.
This way, it will appear as if there is a small countdown timer right at the bottom of the slide, and the slide changes at the end of the countdown.
Frequently Asked Questions
It may happen if you have a video playback in one of your slides and you have selected “Play (on click)” or “Play (manual)” in the playback option. In this case, you will have to manually play and pause the video with a click to allow the slide to make the next transition automatically.
Automatic rolling of slides gives enough cues for subsequent discussion. Moreover, the slideshow also restarts from the first slide once it is over, just in case you want some cues or rewind the whole presentation quickly.
Wrap Up!
Wouldn’t it be great if you didn’t have to worry about rolling over the slides while making a presentation? Didn’t you want a countdown timer right there on your slides during the slideshow so you don’t go overboard?
Well, guess what? I just laid out a perfect combination of autoplay and loop for your next presentation.
Leave a Reply