One good thing about Google’s documentation tools is that there are multiple crossovers of features across the platforms.
You can put horizontal and vertical lines and make them look like a table, but there is a better and more authentic way to add columns to Google Slides. All you have to do is to access the Insert option and choose a table.
While we associate tables with Google Sheets, the need to present data in the form of rows and columns cannot be completely ruled out. There will be a whole editor dedicated to the things you can do with a table.
So, without further ado, let’s dig in!
Ways To Make Columns in Google Slides
Since Google Slides is a dynamic design tool, the possibilities are endless. So, adding columns can be done in various ways just like any other task. What you have to do is to narrow down the most convenient and straightforward method for your use case.
So, based on what I have been doing for years, here are the five most straightforward ways to do it.
Method 1: Using a Table
Yes, you can add a table in Google Slides as in Google Sheets or Docs. You can choose the number of columns you want in your table at the time of adding it through the Insert option.
Here are a few simple steps to follow:
- Open your presentation file in Google Slides.
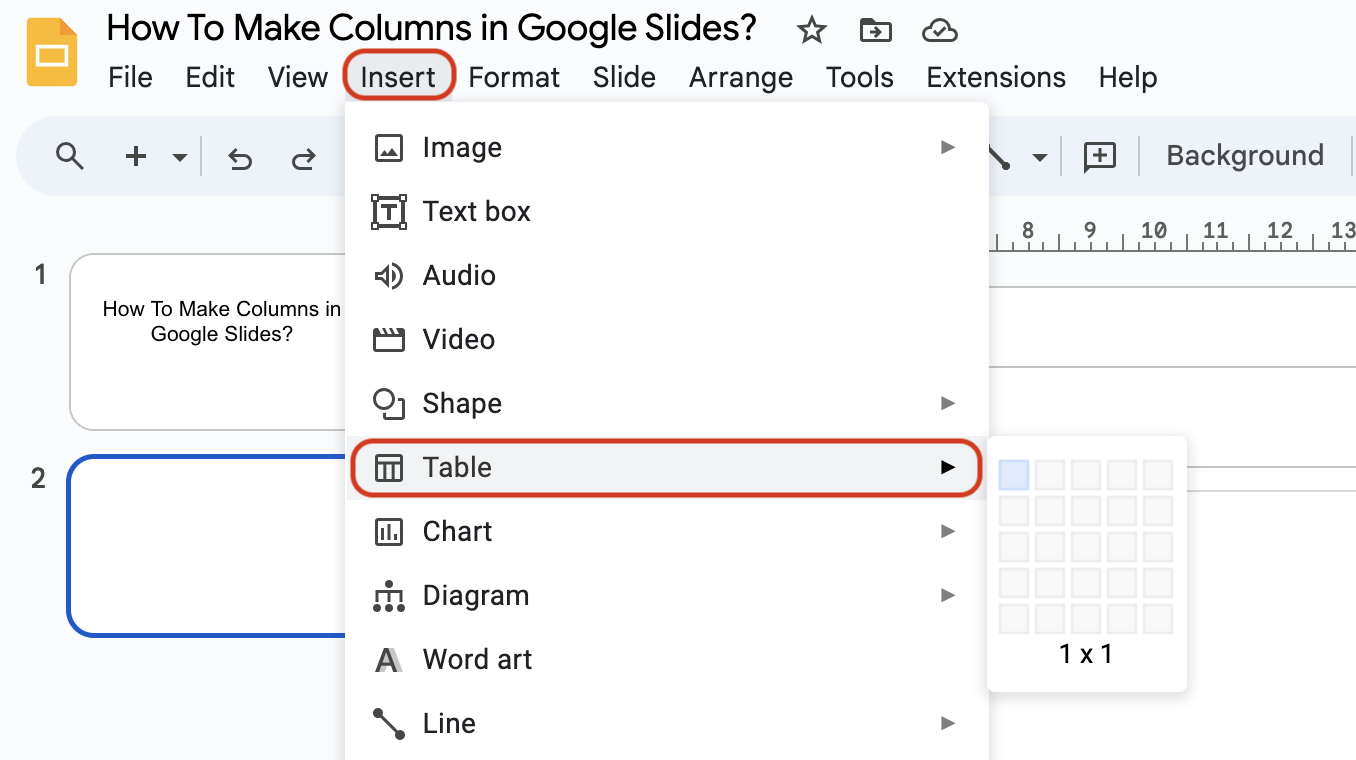
- Click on the “Insert” option from the main menu.
- Hover over the option “Table” from the dropdown.
- Now, hover the cursor over the table from the sub-dropdown and slowly move it to the right and downward to select rows and columns.
- Notice the table dimensions mentioned below the selection as you move the cursor.
- Select the number of columns and rows you want and click on the selection at the end. That’s it. The table will be added to your G slide.
Method 2: Using a Pre-designed Layout
You can create a standard two columns text box using a predesigned layout. You can always copy these columns and paste them if you want more columns.
Here is how you can add columns using text columns:
- Open your presentation file in Google Slides.
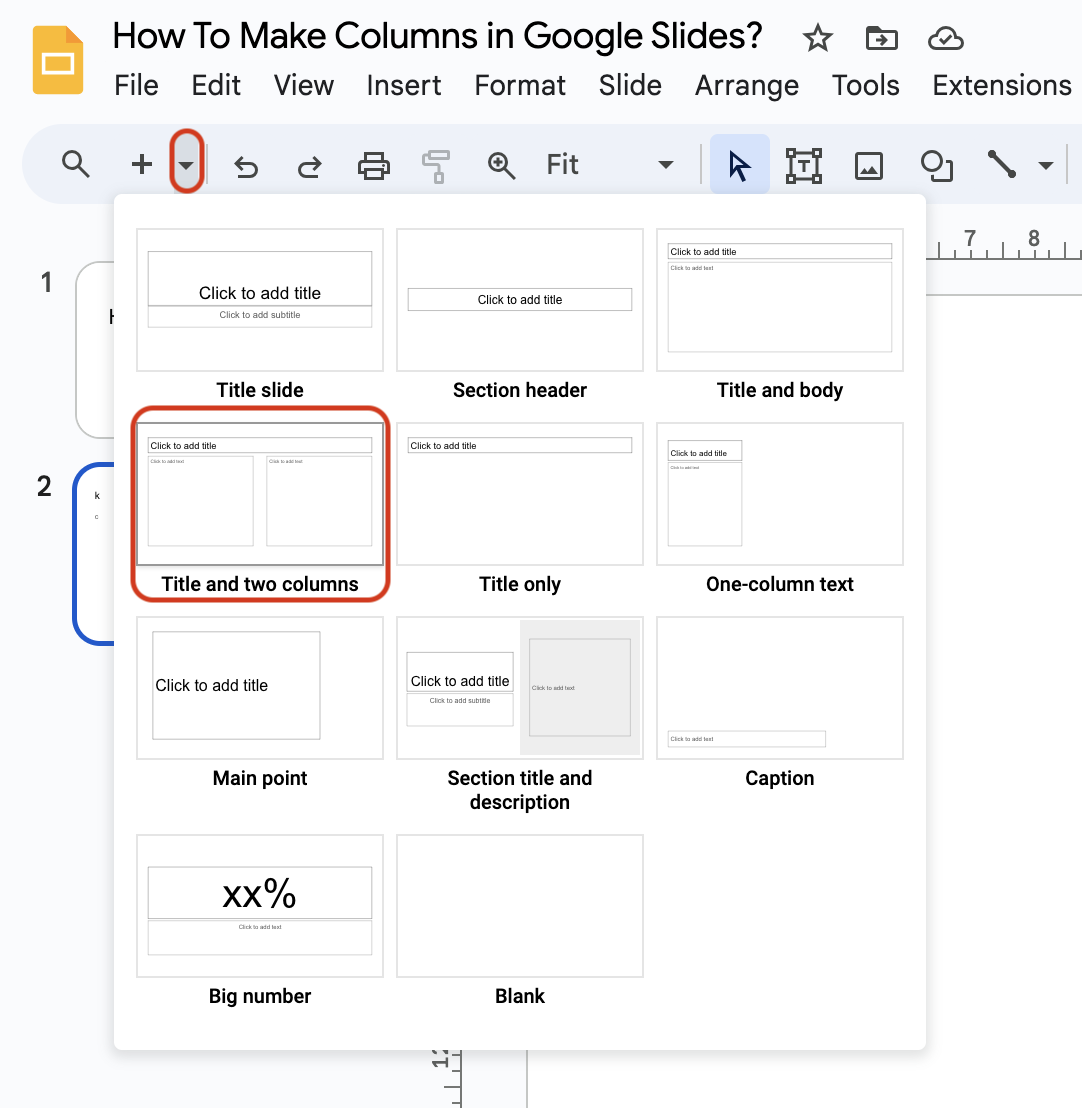
- Find the “+” sign on the ribbon menu to add a new slide.
- Locate a dropdown next to the “+” sign and click on it.
- This will preview various types of layout options for the new slide. One of these options would be “Title and two columns”, which will have 2 columns and their title. Click on that.
- Resize the text boxes that look like two parallel columns.
Method 3: Using Templates
Many websites offer different templates for Google Slides. There are dozens of great templates containing tables that you can import into Slides.
Here is how you can add one with columns:
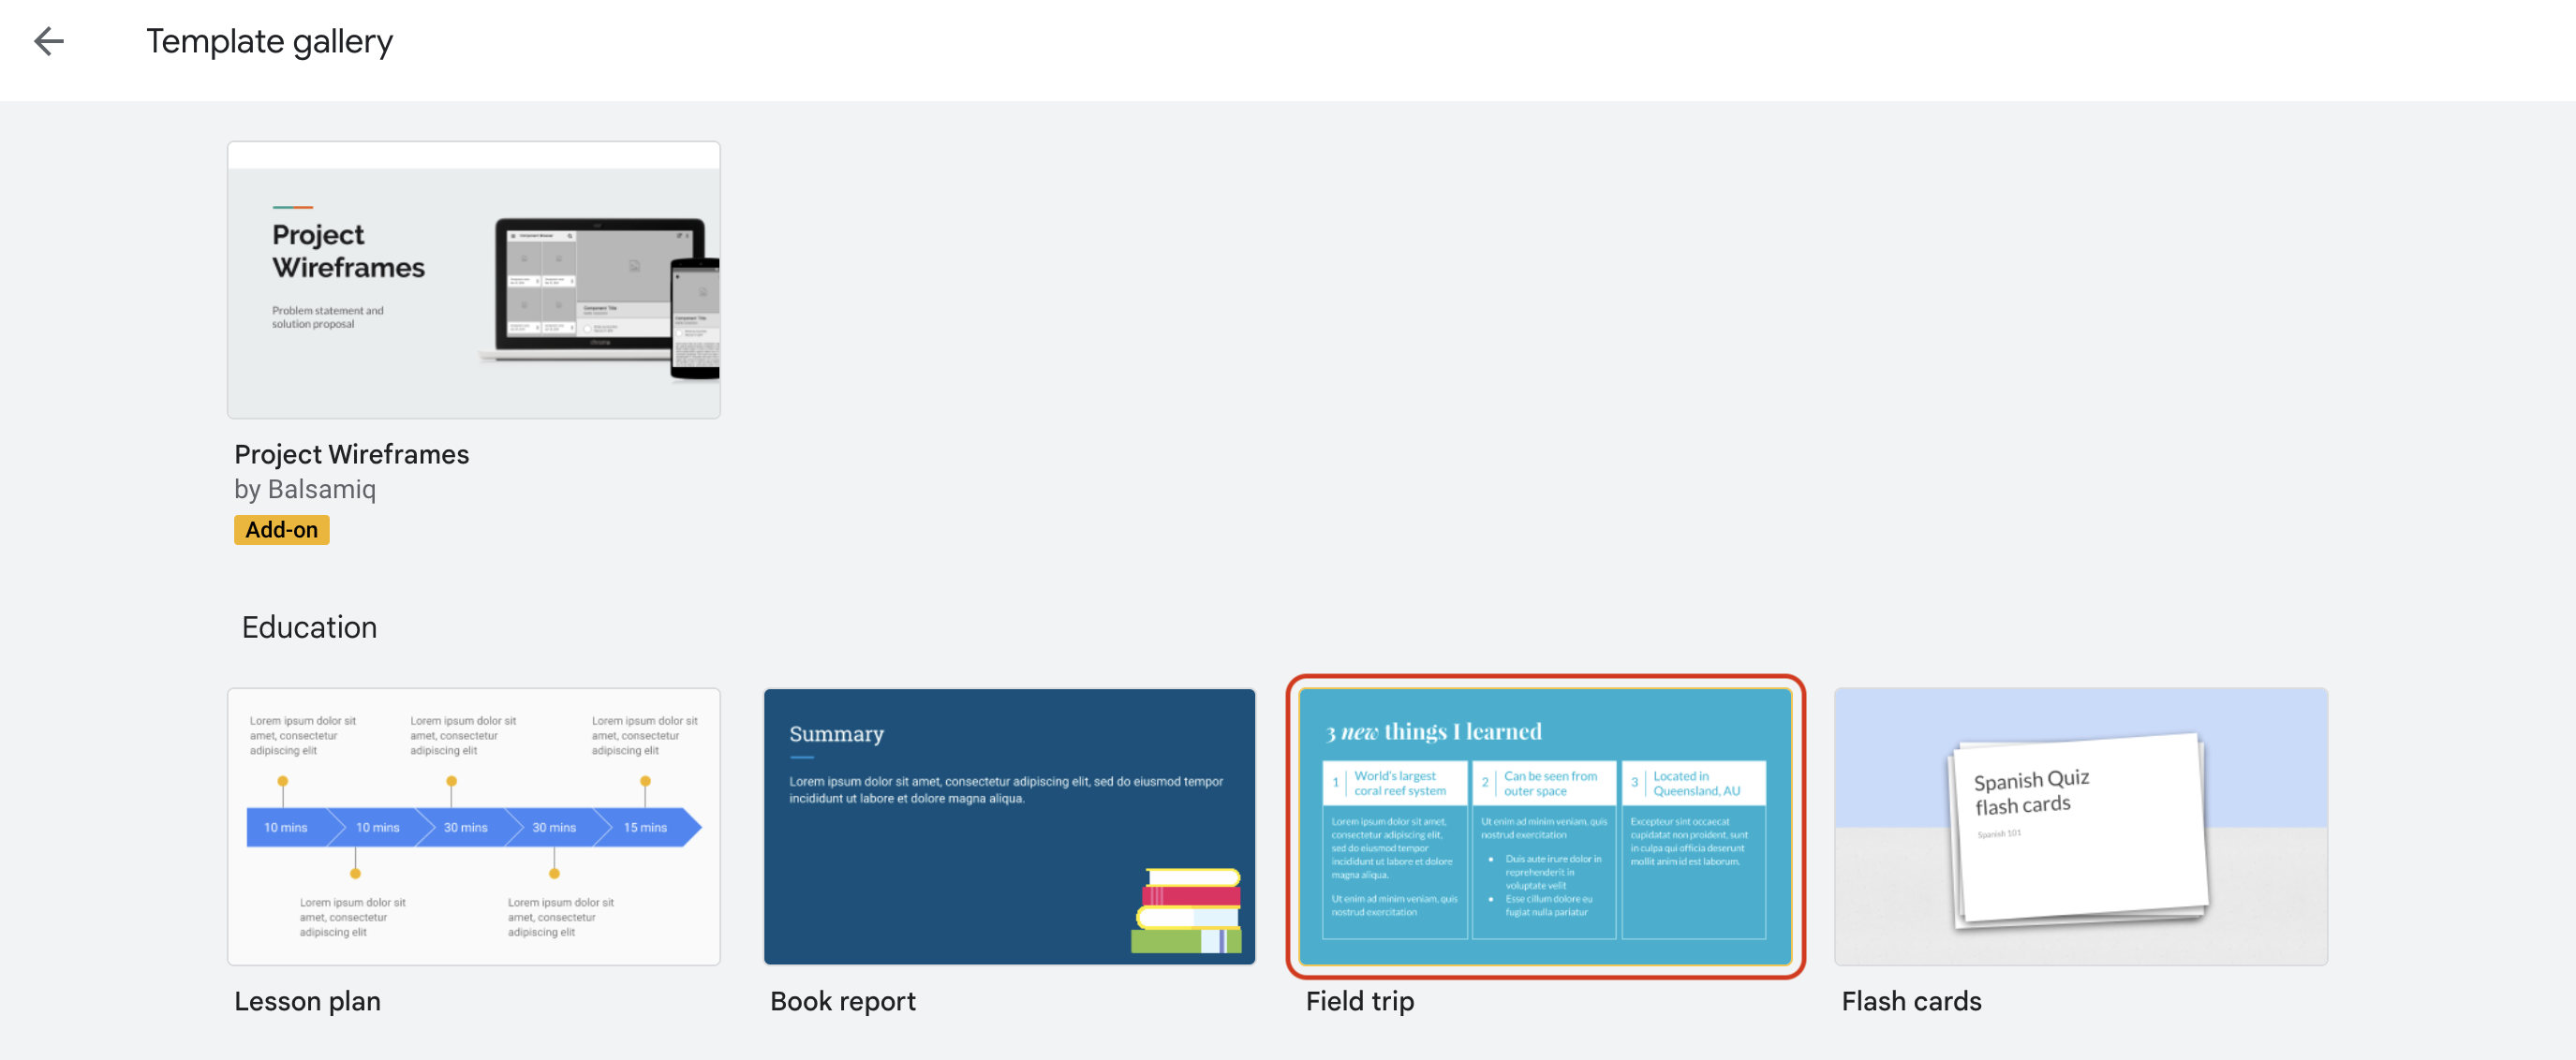
- Go to Google Slides Template Gallery.
- Open the Template that has the columns as per your need.
- Adjust the designs and enter your text into the tables.
Tip: You can also download the template from other website and then import it. Once imported you can easily adjust the designs and edit text.
Method 4: Using Design Elements
Another simple yet lengthy way to do columns is by drawing them with the help of designing tools within Google Slides.
Here is how you can draw:
- Open your presentation file.
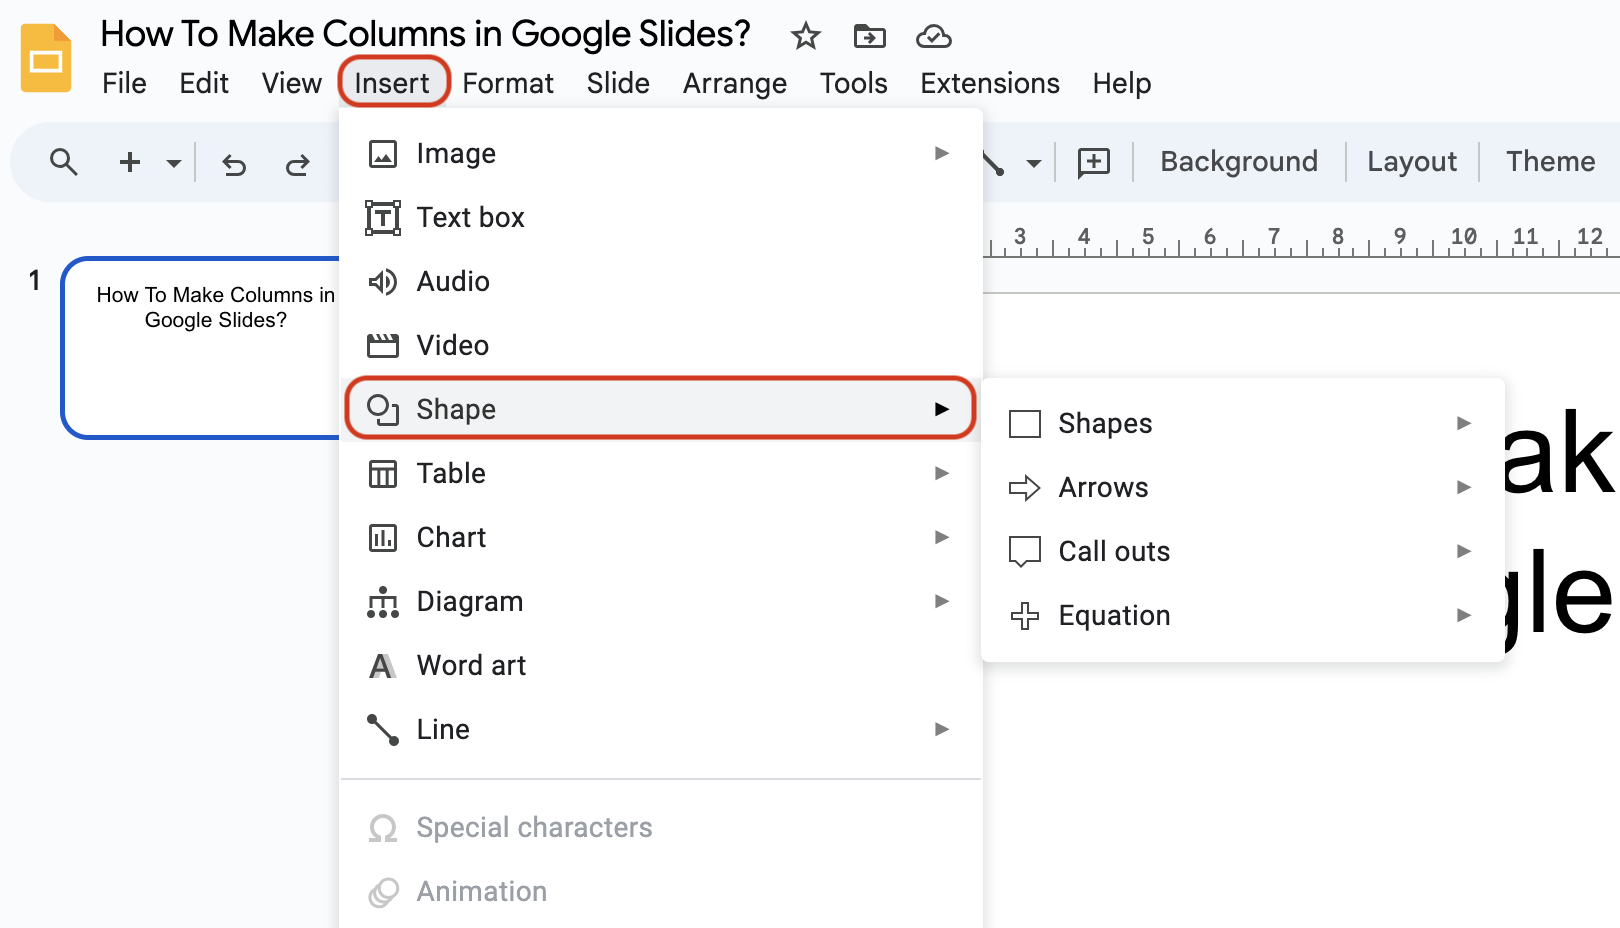
- Select “Line” or “Shape” from the ribbon bar.
- Draw horizontal and vertical lines to draw a table with the desired number of columns.
- Alternatively, add shapes (preferably rectangles) to draw a table. Copy and paste the shape to design a table with the desired number of columns.
- Now, enter text into this design using the text box.
Method 5: Using Images
This is probably the most unorthodox way of adding columns or tables in Google Slides. You can download a PNG or SVG image of a table from the internet and import it into your slides.
Here is how:
- Download an image of a table of desired dimensions from the internet.
- You can alternatively draw a table using any design tool and save it as a PNG or SVG file.
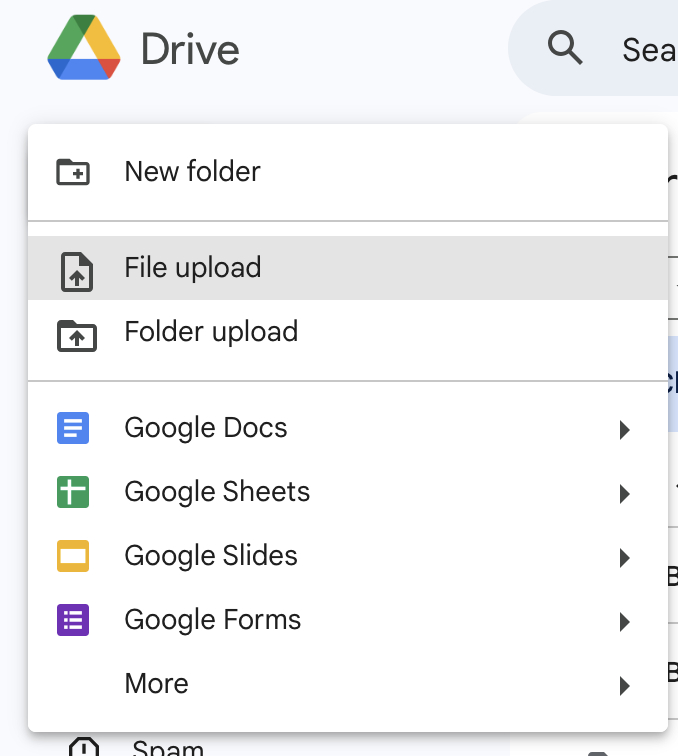
- Upload the image to your Google Drive.
- Open your presentation file.
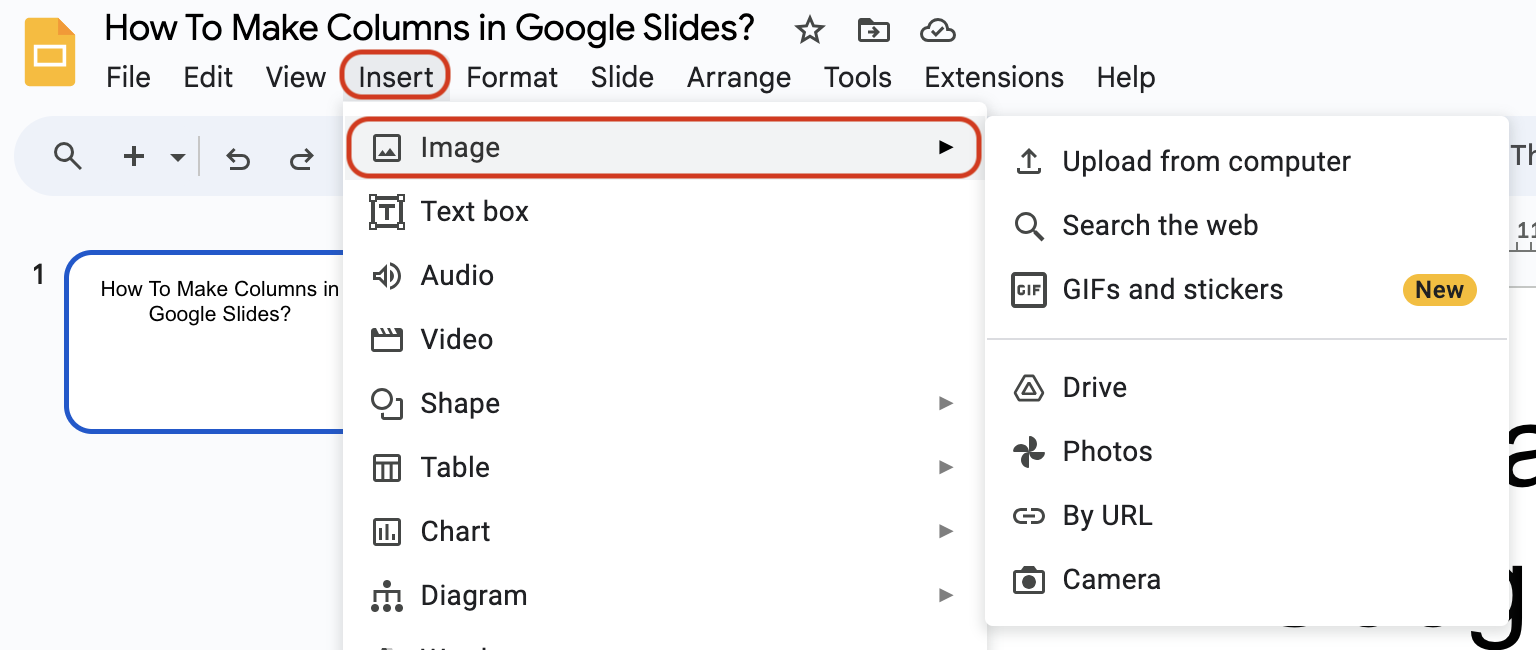
- Go to “Insert” from the main menu.
- Select “Image” from the dropdown.
- Import the image of a table that you downloaded.
Adding More Columns To Existing Table
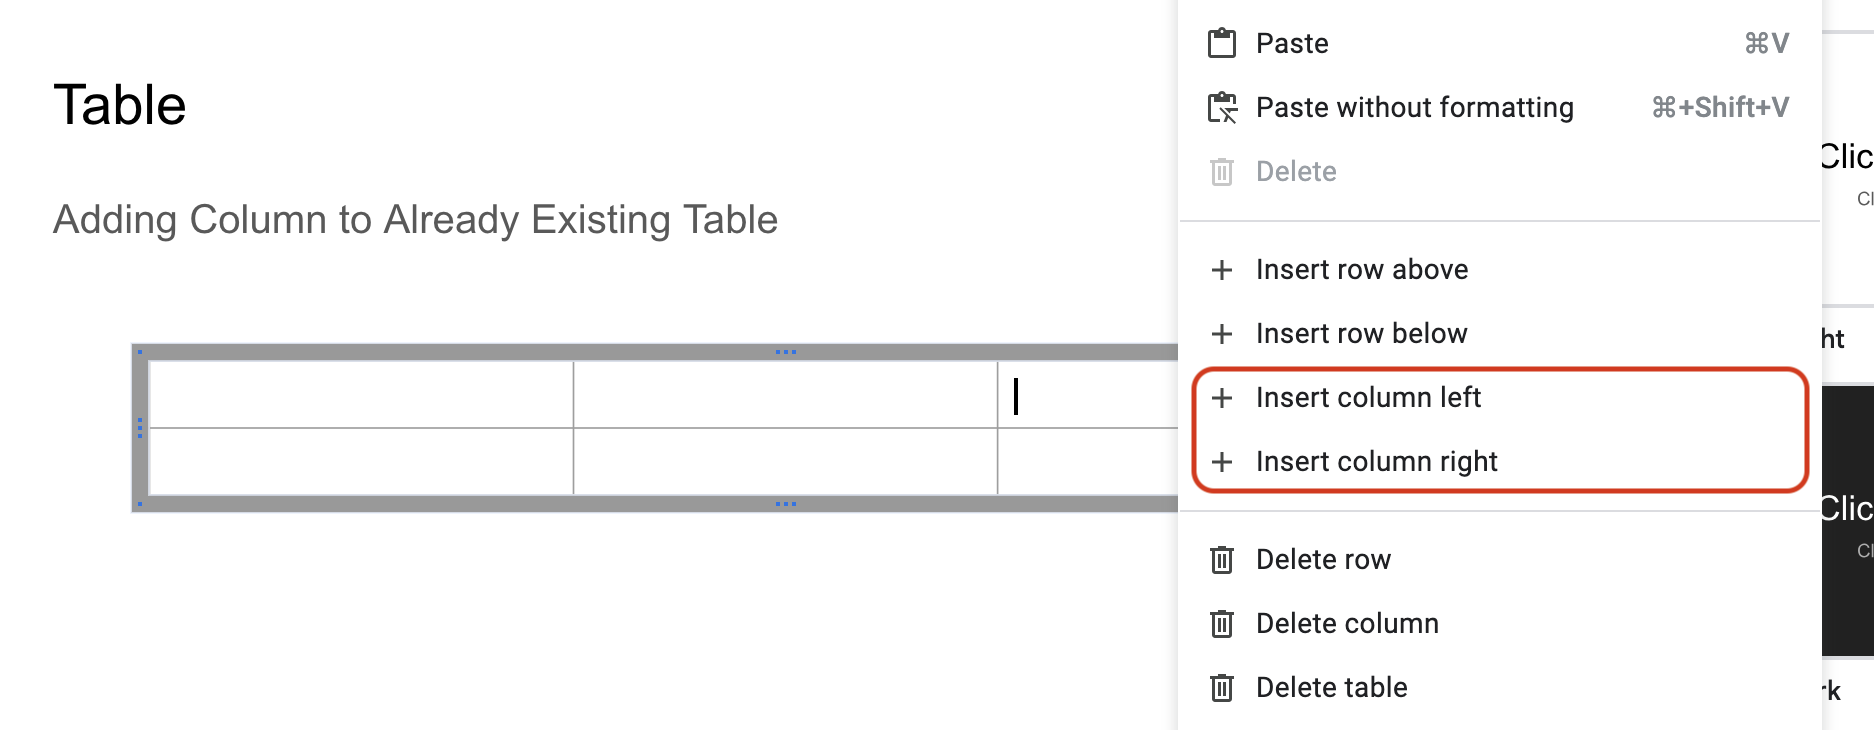
If you have already added a table and want to add more columns to it, then you have to go to any individual cell and right-click on it to add new rows and columns. Here’s a step-wise process:
- Open your presentation file in Google Slides.
- Go to a table where you want to add new columns.
- Right-click on any of its cells.
- Select “Insert column left” or “Insert column right” to add a column to either side of the selected cell.
If you want to improve your presentations further, you may try different things like rotating text, zooming in, adding a timer, and transitions (animations).
Frequently Asked Questions
You can add a table of desired dimension from Insert > Table and write text into the cells separately to split your text into columns.
You can add a new slide with the “+” option and choose “Title and two columns” as the desired layout. This will add a new slide with a title and two parallel text boxes that appear like columns. Now, add bullet points in these boxes/columns.
Wrap Up!
Google Slides may be a very dynamic tool for designing and presenting, but it has the same DNA as Google’s other documentation tools. That is why it inherits some popular features like adding tables and charts into slides.
Using columns to denote different data points could be a great way to enhance your presentation, and I hope now you know how to add them.

Leave a Reply