Curved text is a cool effect that can make your presentations stand out. As someone who uses Google Slides quite frequently, I know how important it is to make slides visually appealing. Curved text is an easy way to add some flair!
In this guide, I’ll walk you through two different ways of curving text in Google Slides. You’ll learn how to do it horizontally, vertically, or even in a circle. I’ll also touch upon the best practices.
So, get ready to take your Slides from boring and blocky to beautiful and sleek!
1. Using PowerPoint
The most common one, and perhaps the most convenient method is to use PowerPoint. It has a built-in feature to make text curve, which can then be copied and pasted into Google Slides. Let’s see how:
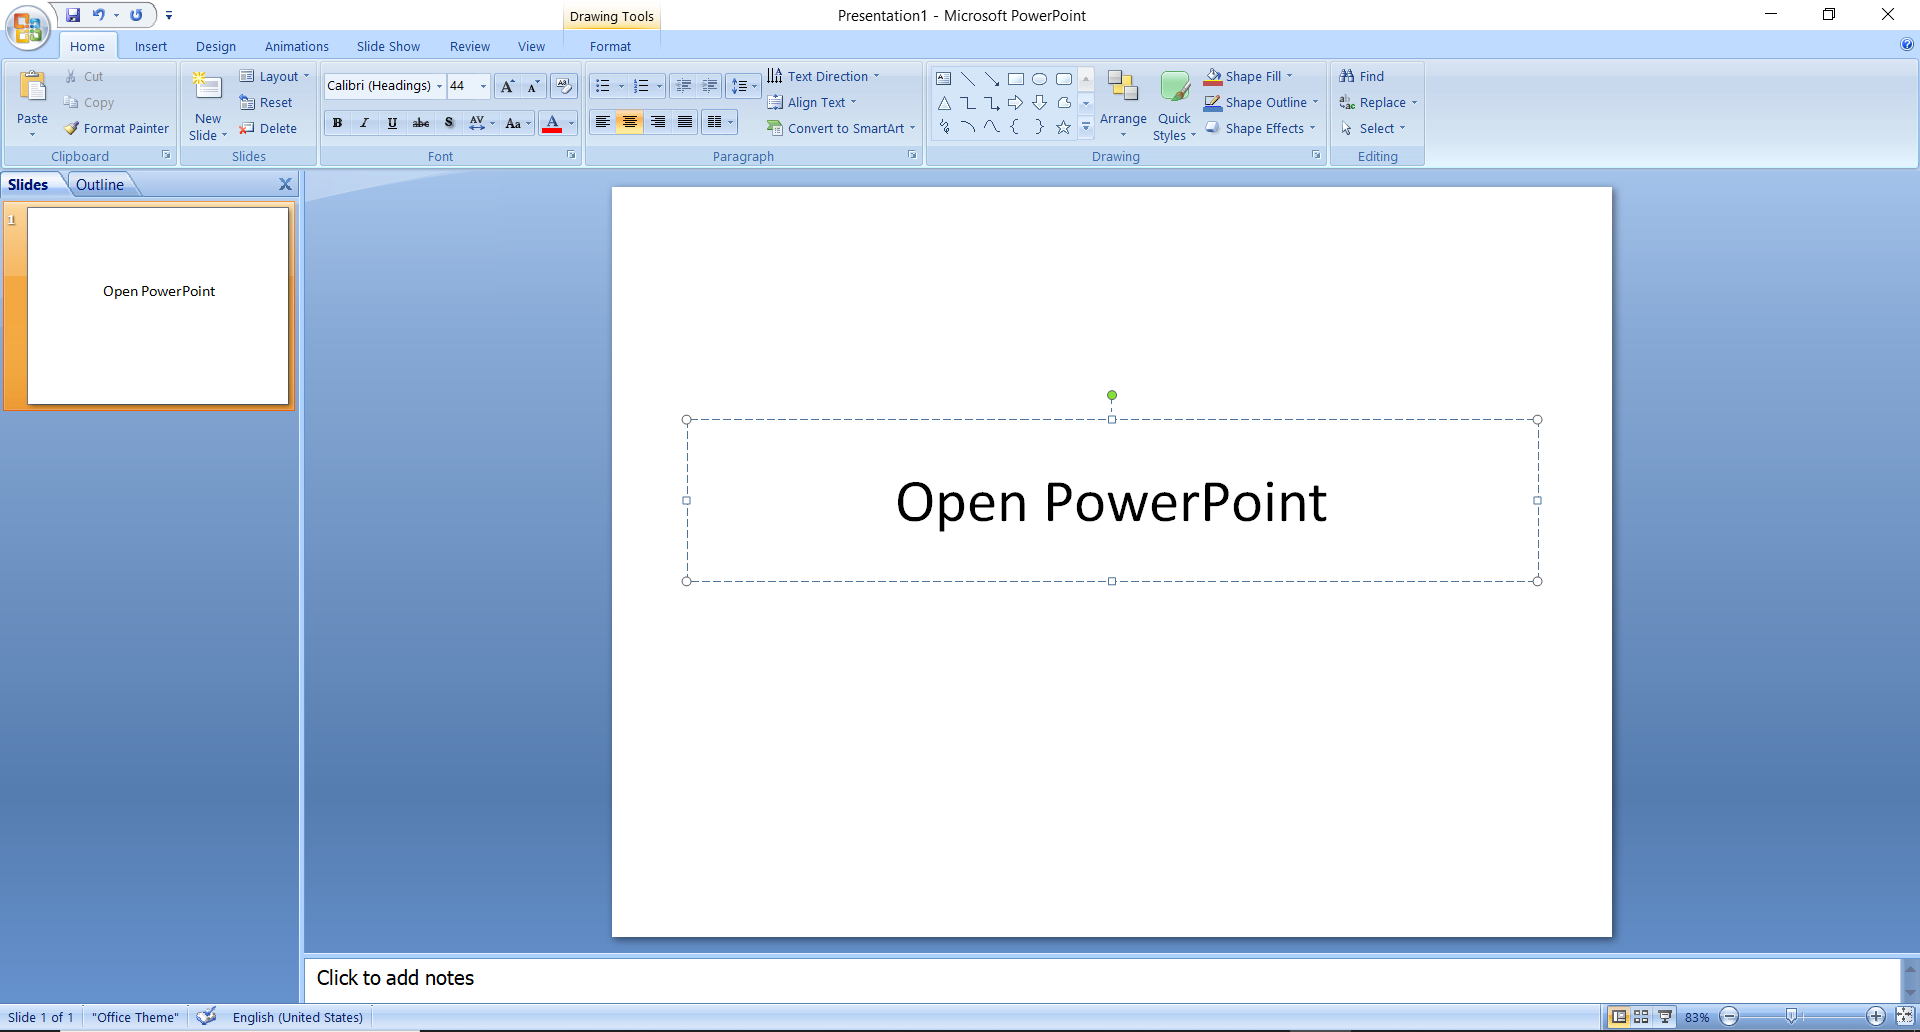
- Open Microsoft PowerPoint on your computer. Either go to the Start Menu and search for it from the search bar or locate it manually.
- Open a New File. Save this file locally on your PC so that you don’t lose your design or changes to the design.
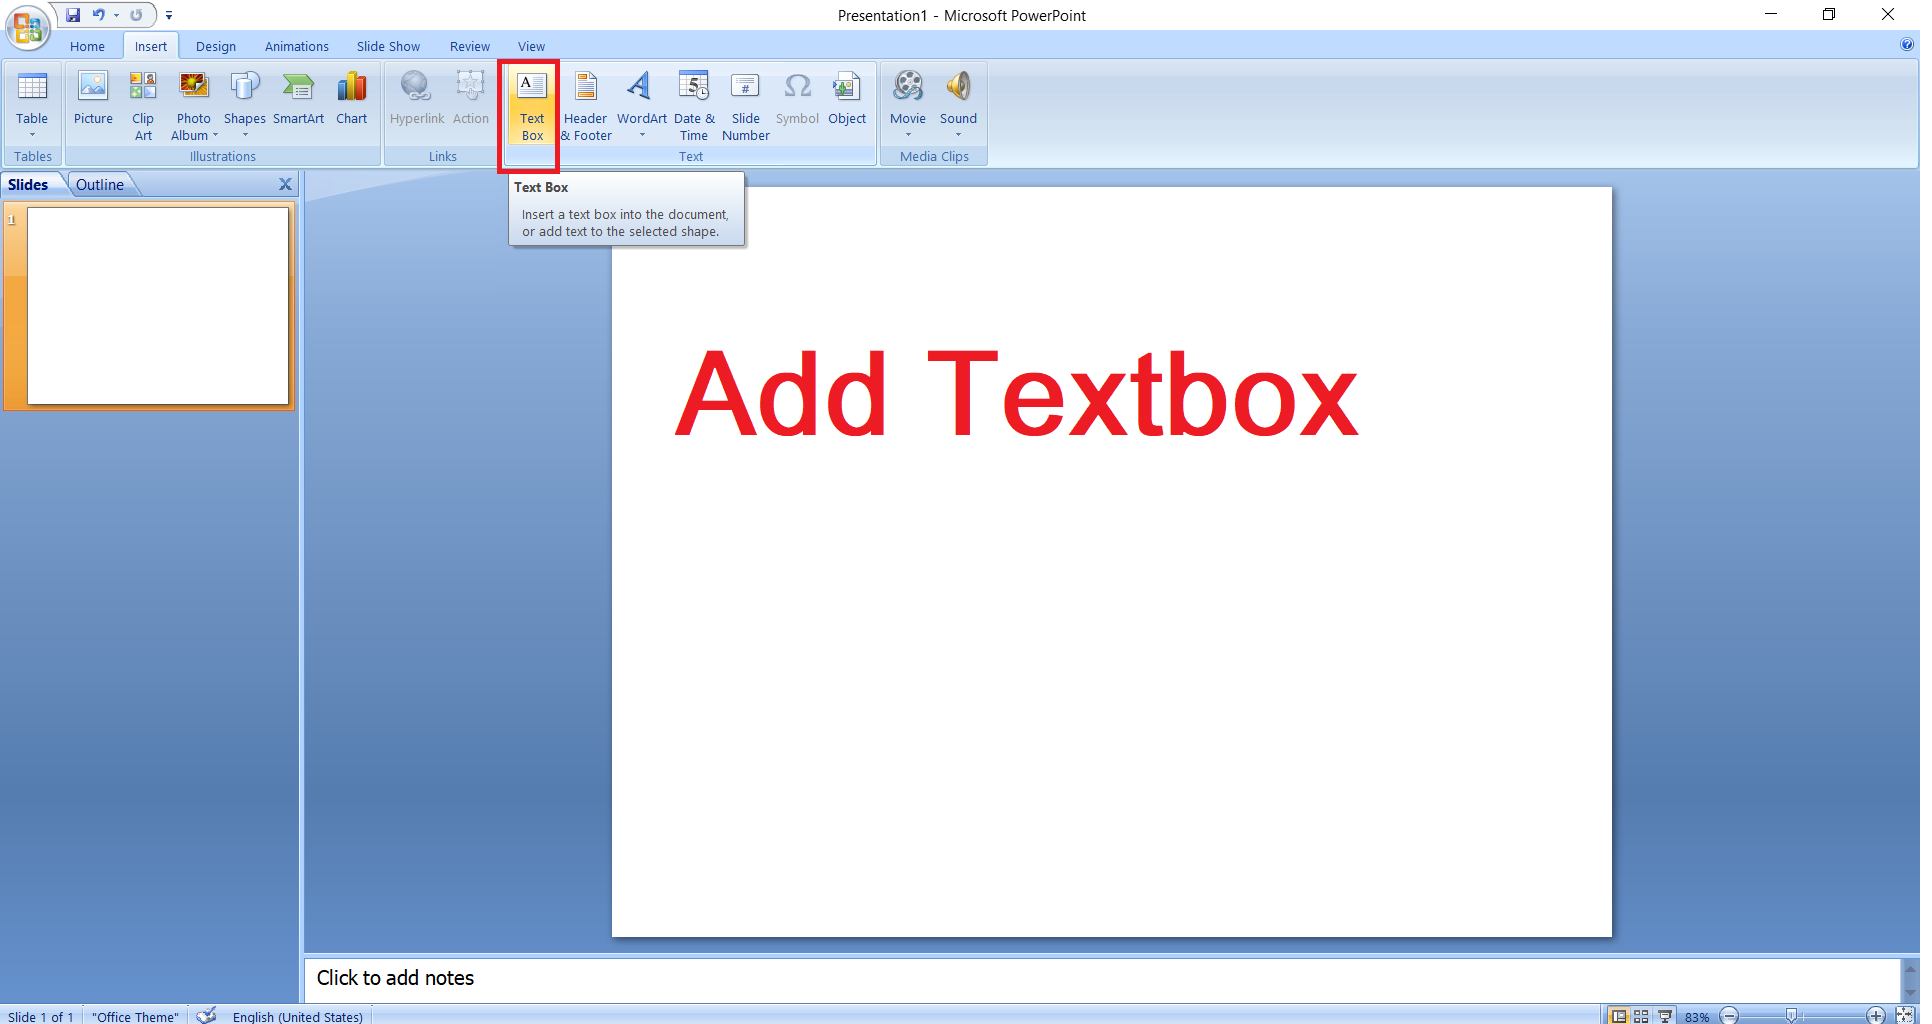
- To add a Text Box on the slide, go to the “Insert” tab on the top and select “Text Box”.
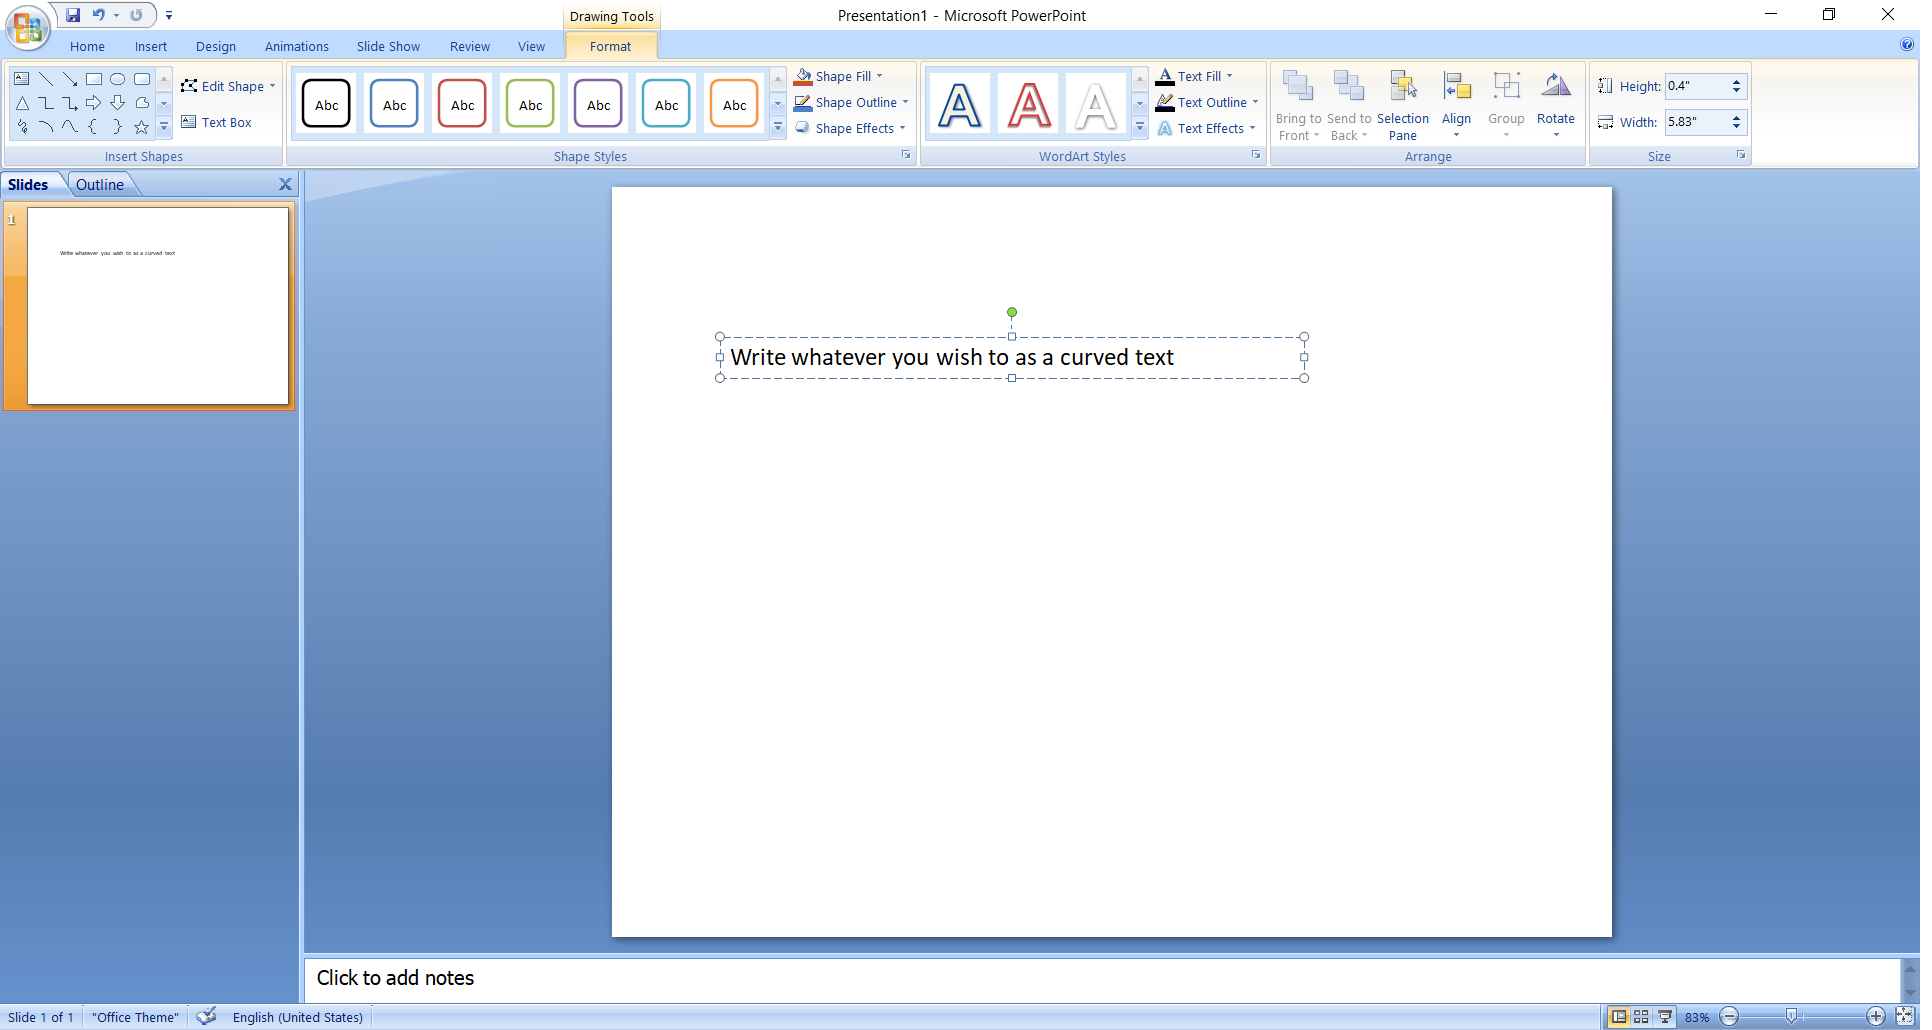
- Enter your text in the text box. You can copy and paste the text from other sources as well.
- After you finish writing the text, select the whole text box by hovering over the text box or the text. You can also press the mouse button and drag the cursor across the sheet to select the text box.
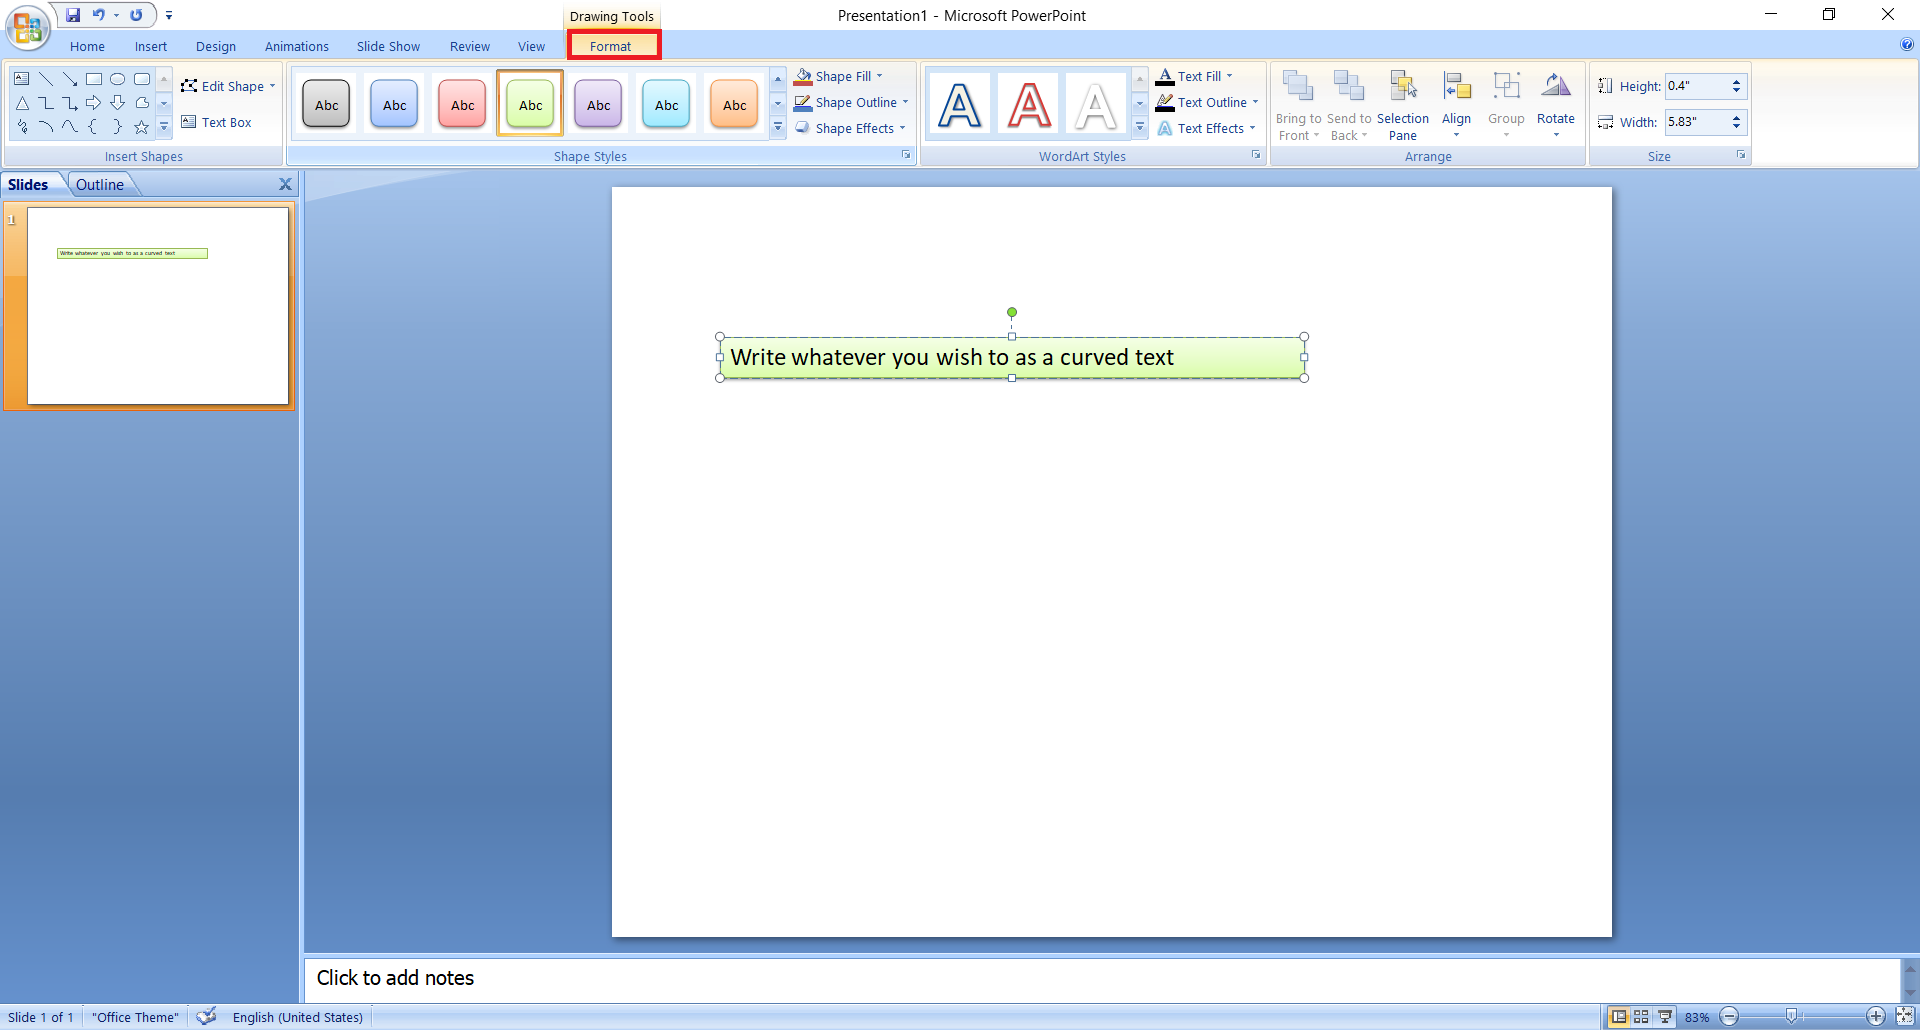
- Upon selecting the text box, a new tab on top will appear named “Shape Format”. The Shape Format tab will have a range of options that allow you to change the shape and format of the design element, which in our case is the text box.
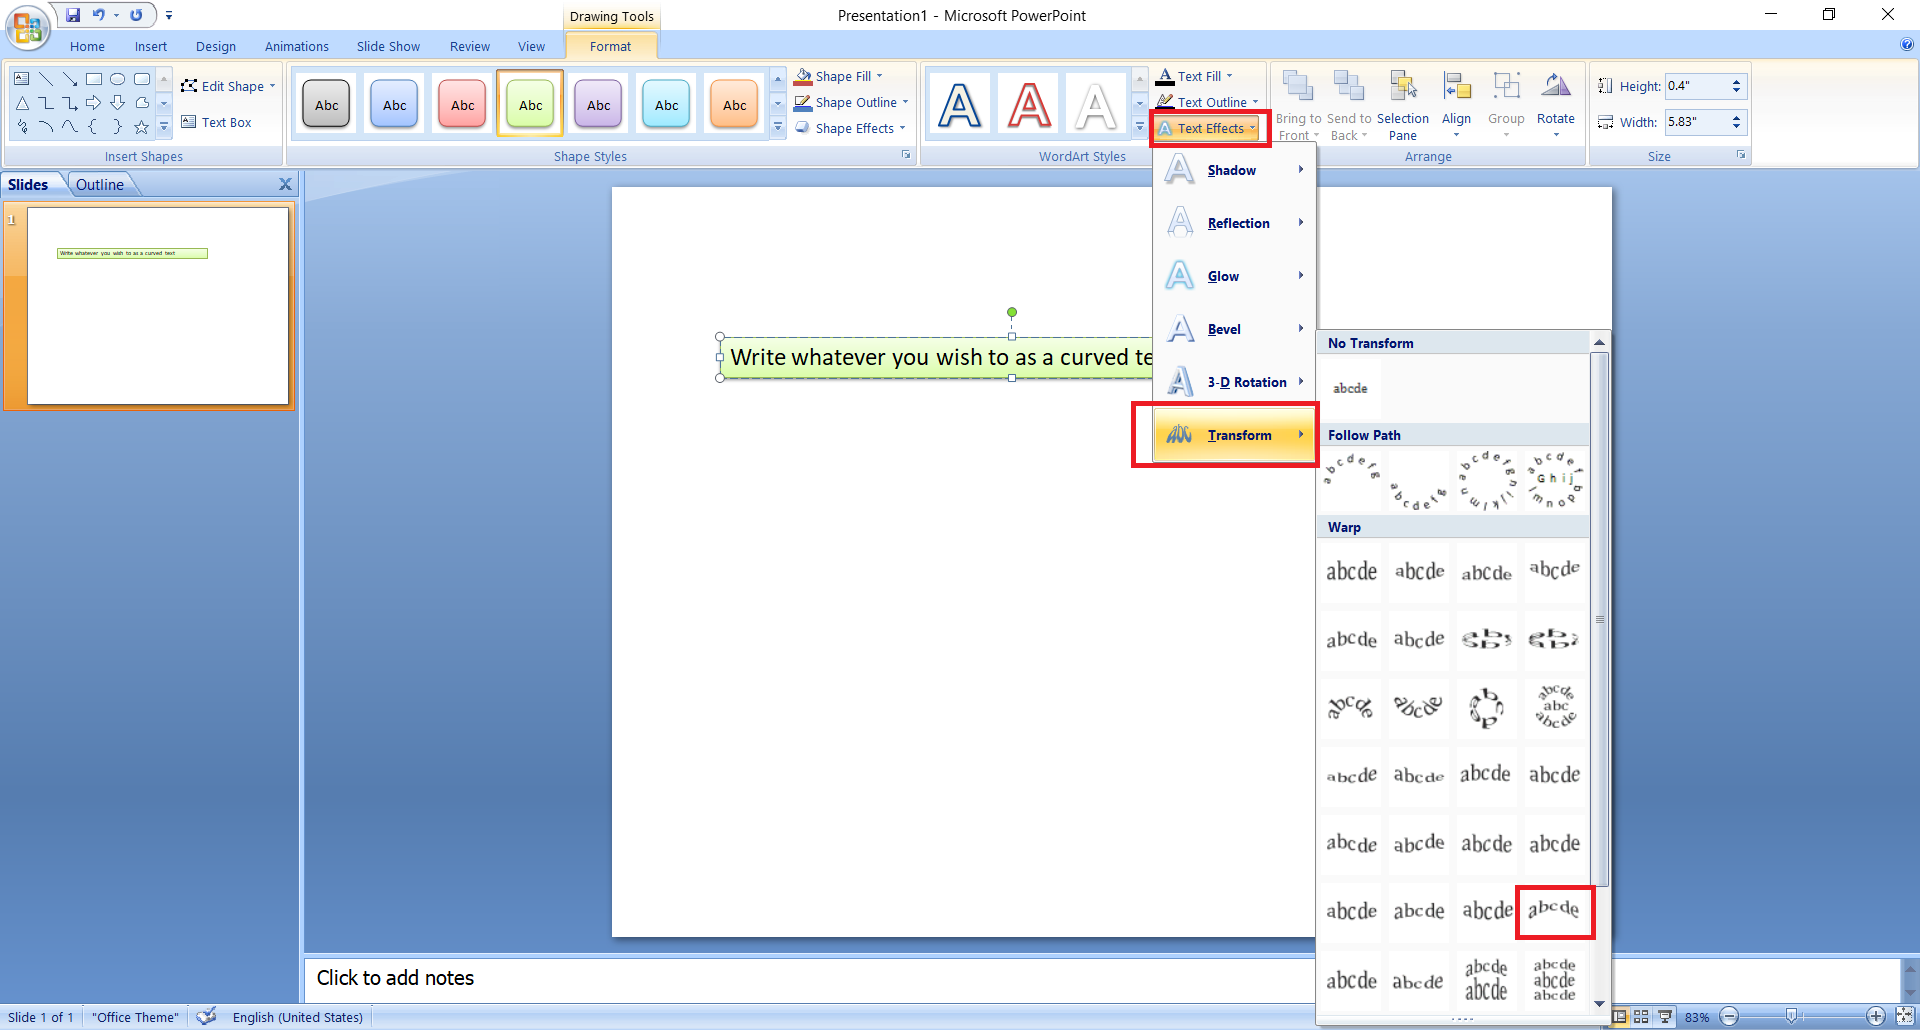
- Click on the “Text Effects” dropdown and select “Transform”.
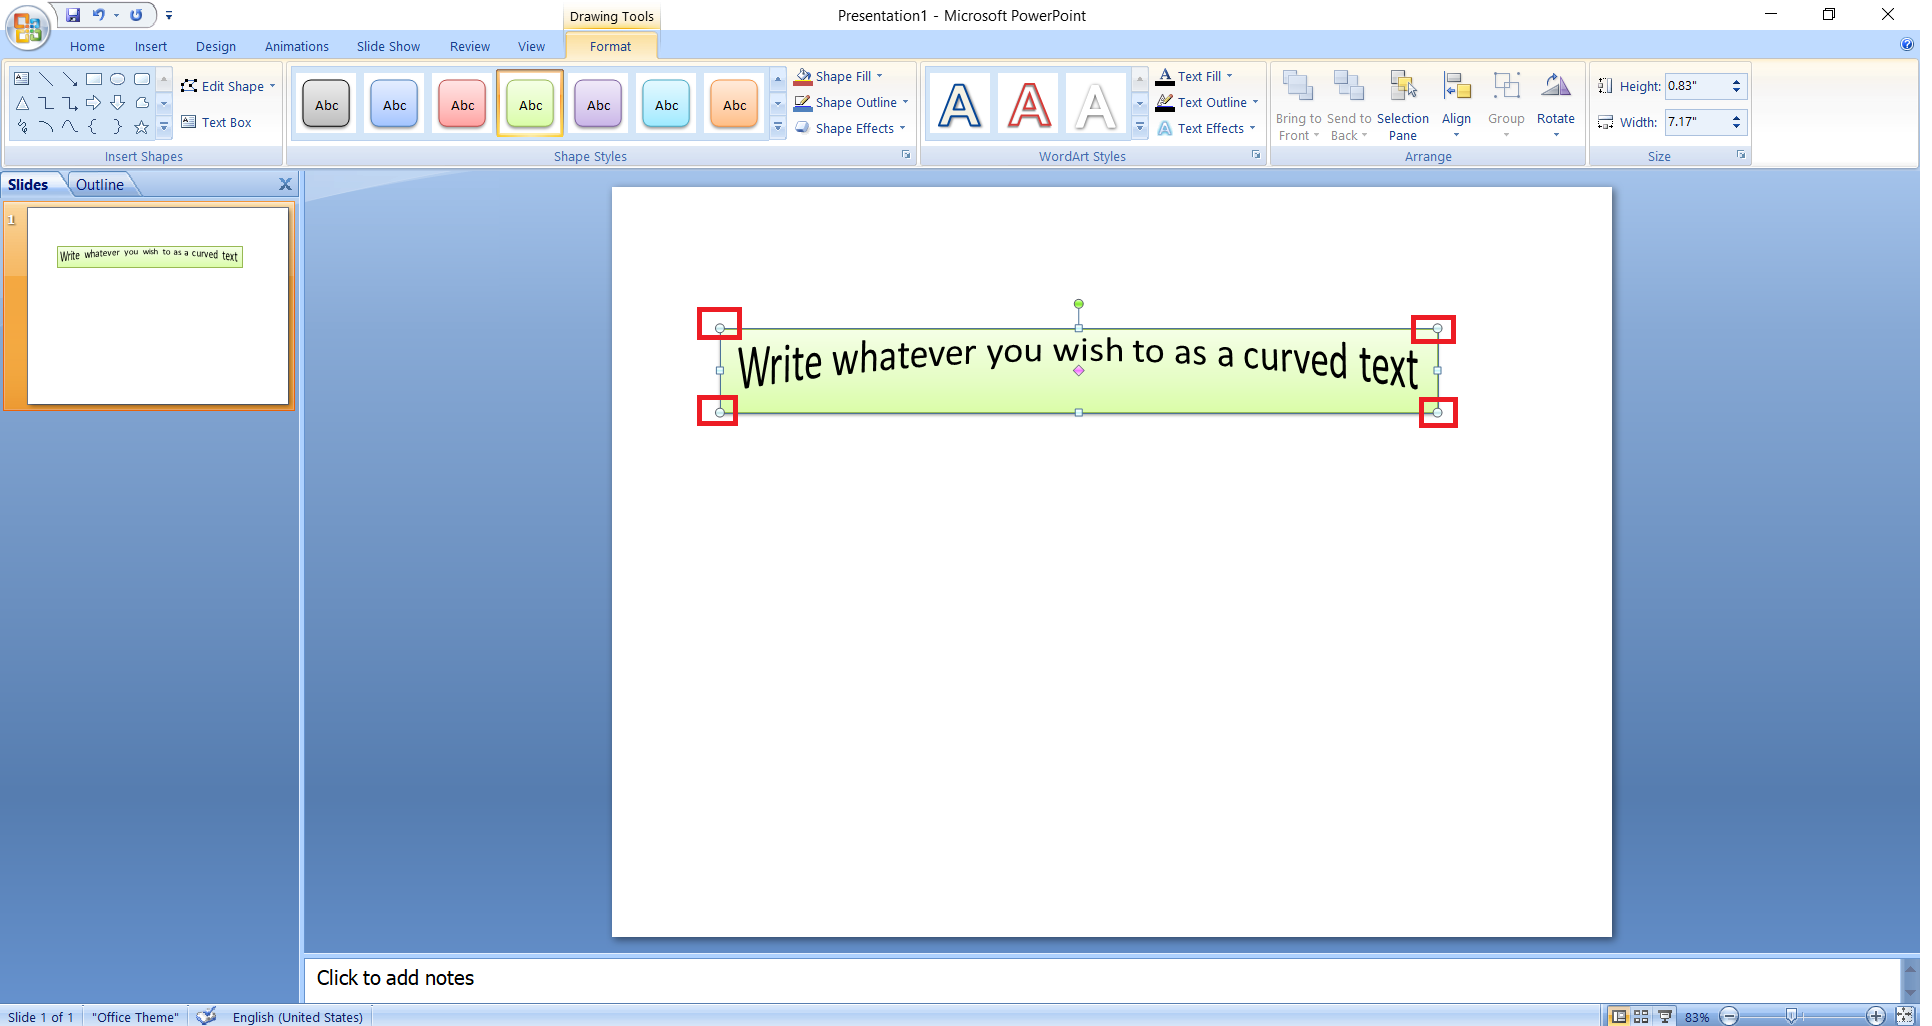
- Upon selecting a type of text effect from the Transformation tab, you will see your text appear in the curve style that you selected. You can adjust the size of the text from the dots at the ends of the text box.
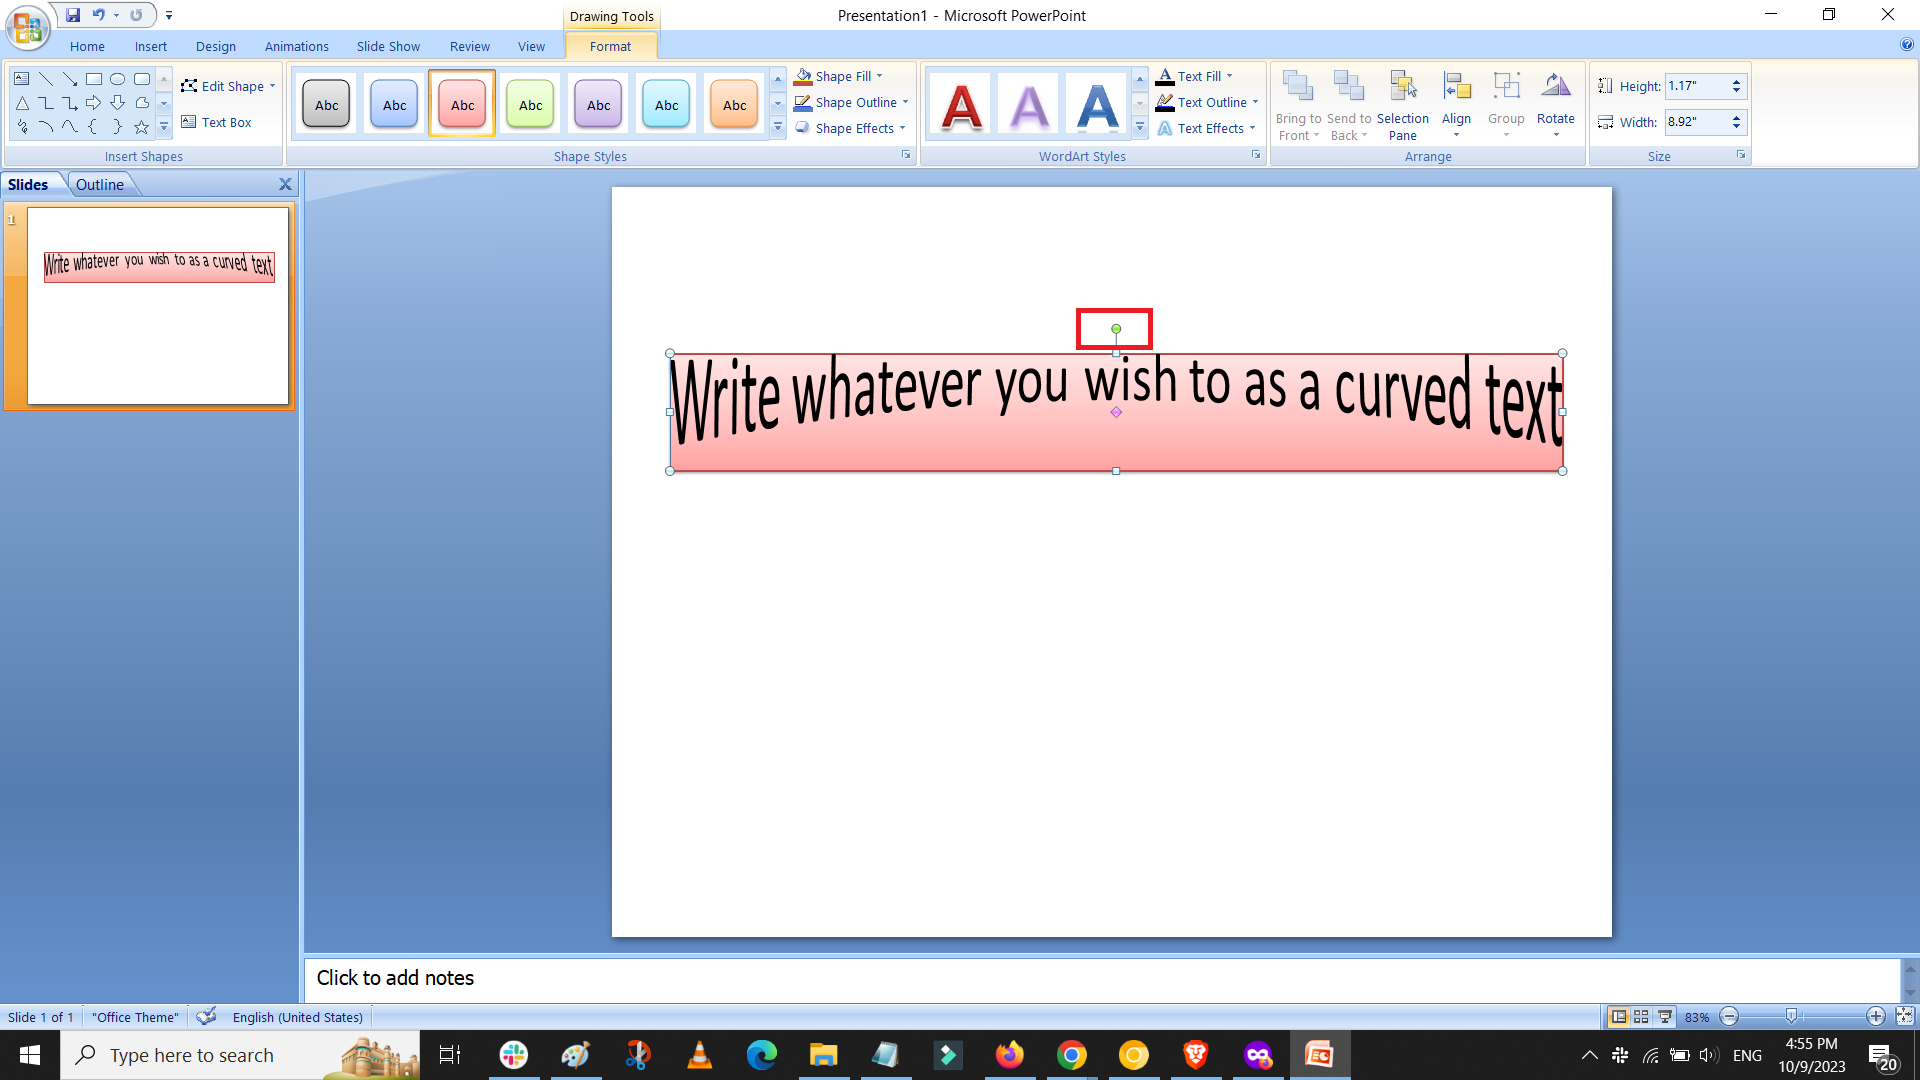
- You can rotate it with the help of the rotate icon that appears on top of the text box. Additionally, you can also adjust the size from within the “Shape Format” menu.
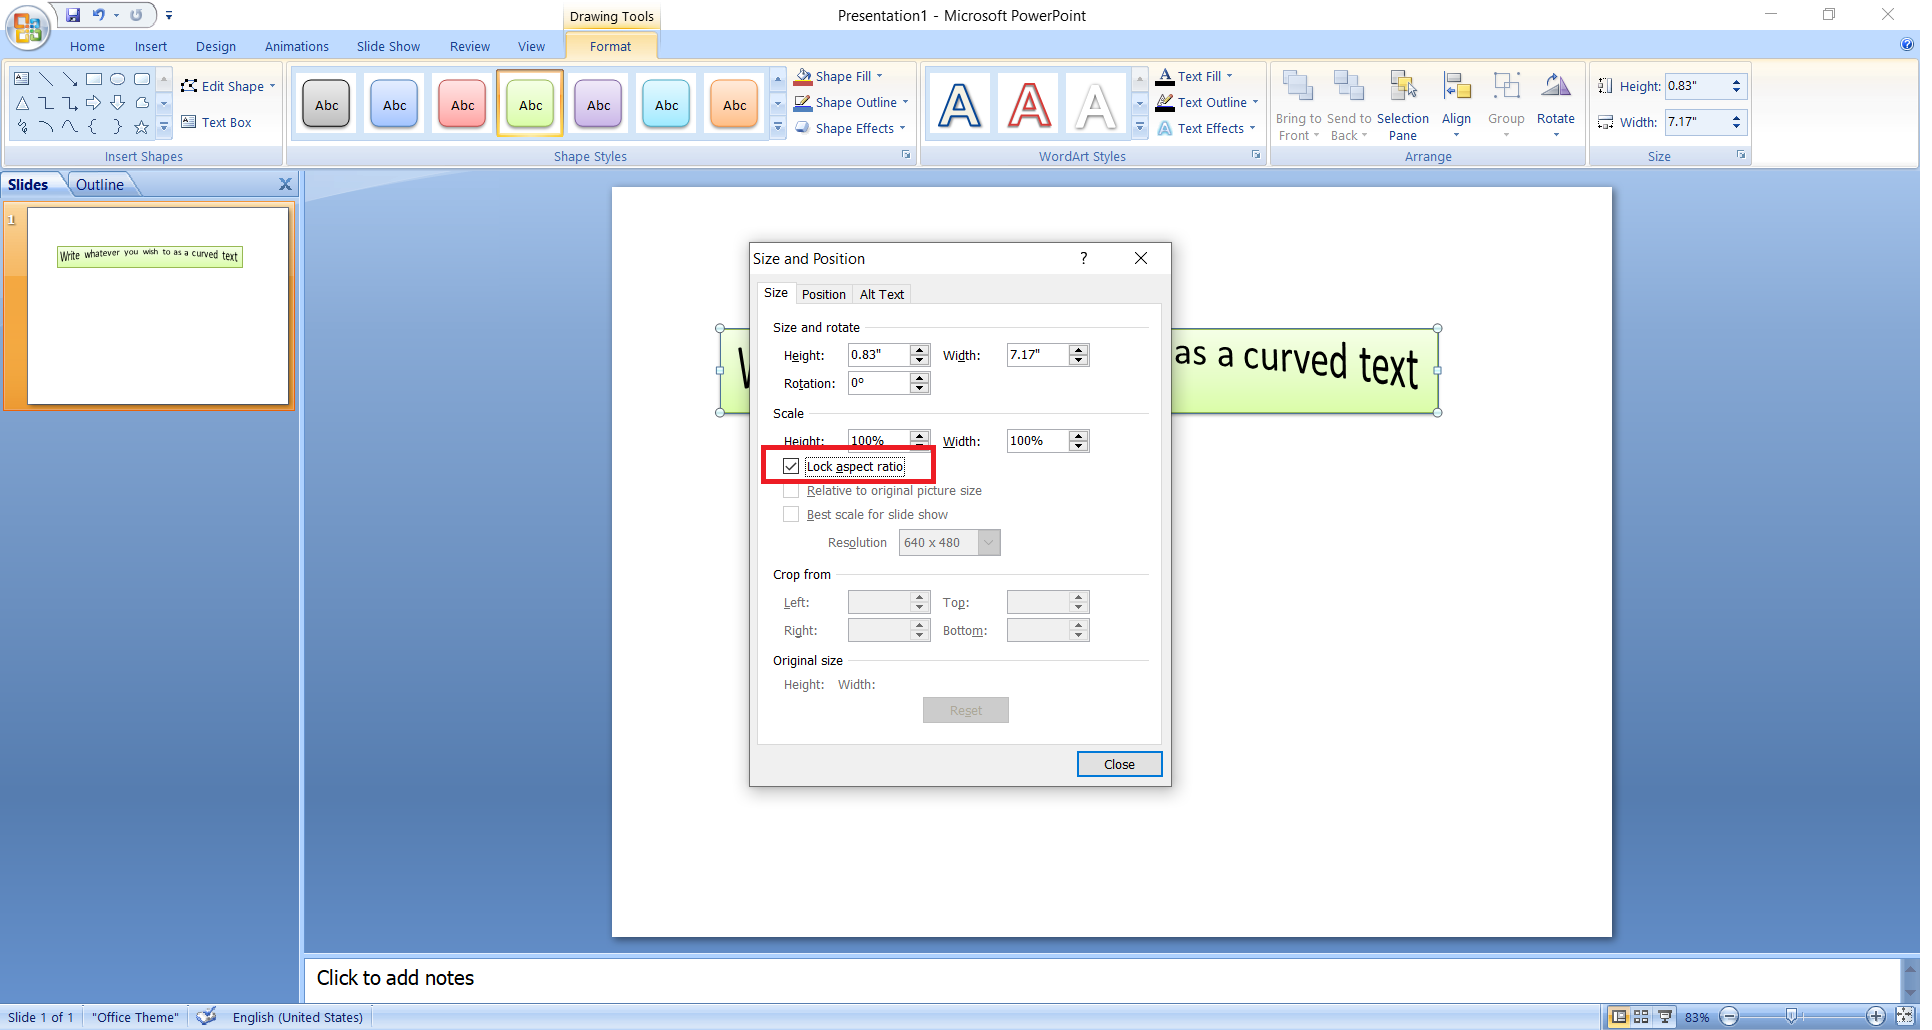
- If you wish to keep it at a perfect angle or as a perfect semi-circle, select “Lock aspect ratio” from the “Size” adjustment panel in the “Shape Format” tab.
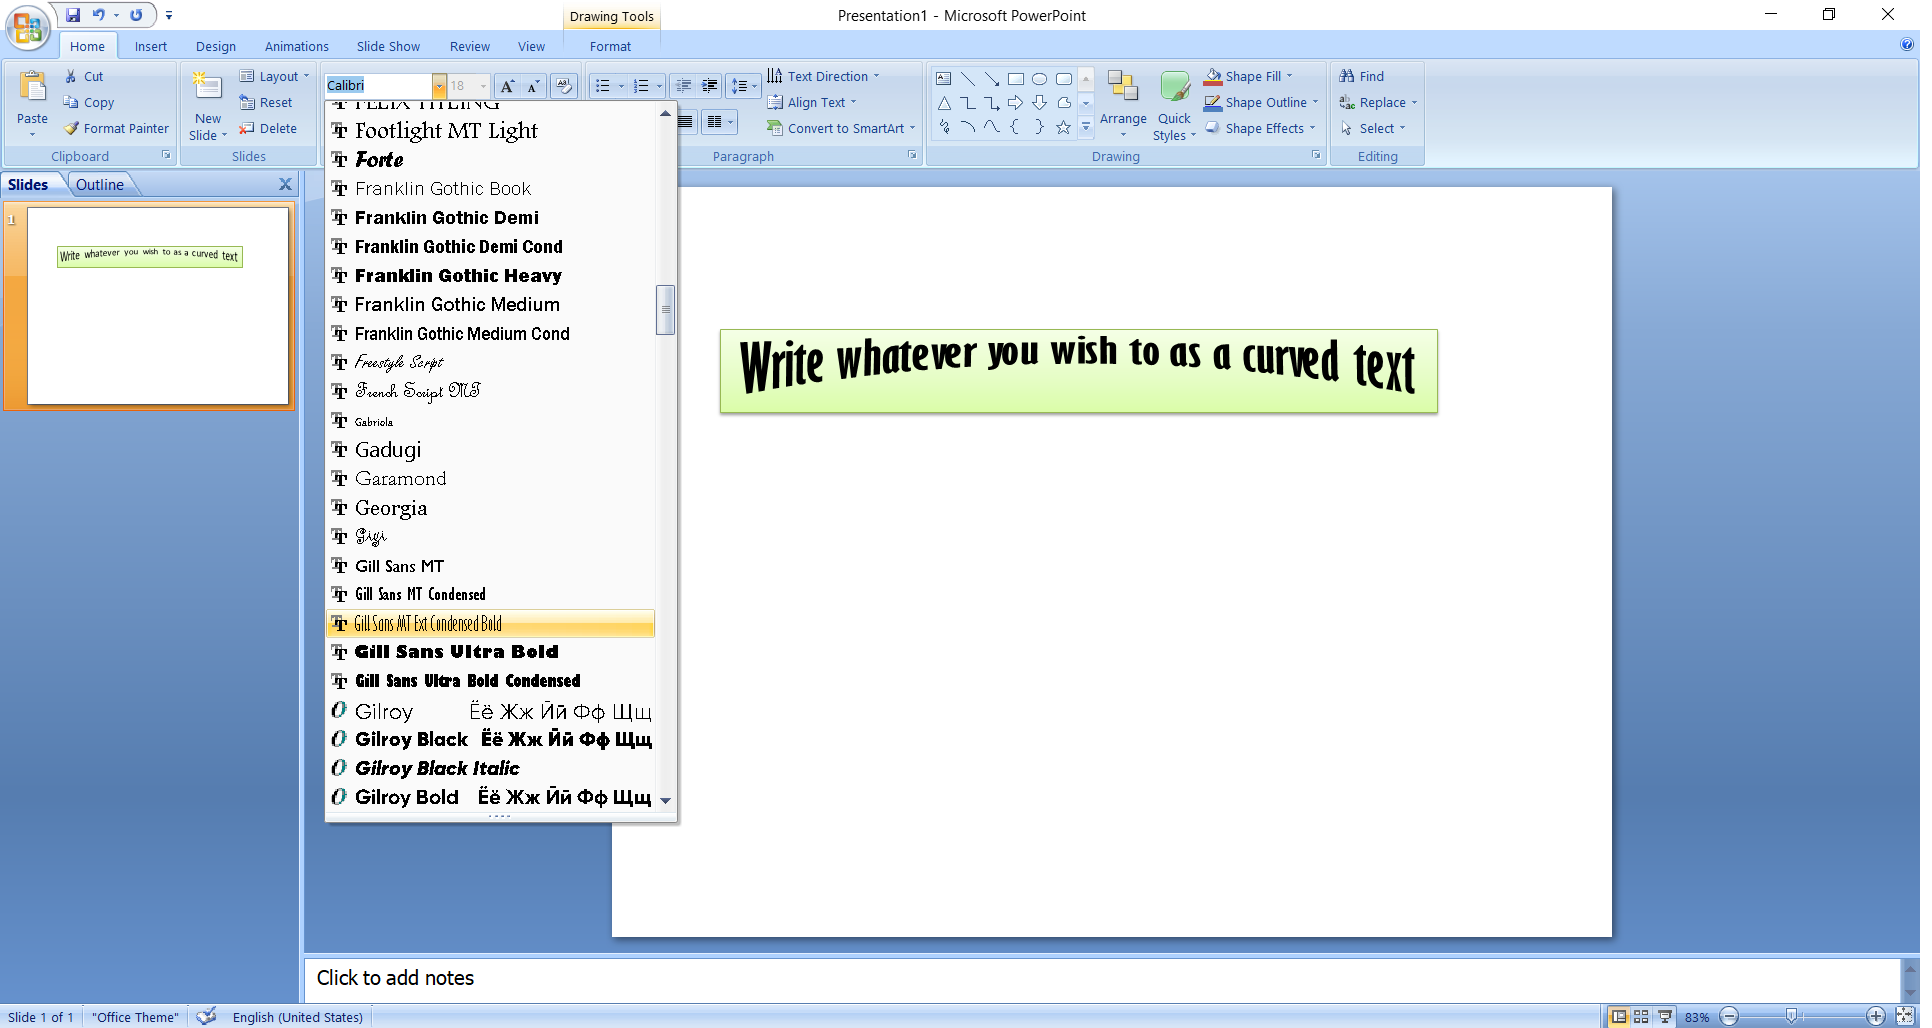
- You can change the font and its size through the usual font and font size selection panel in the “Home” tab.
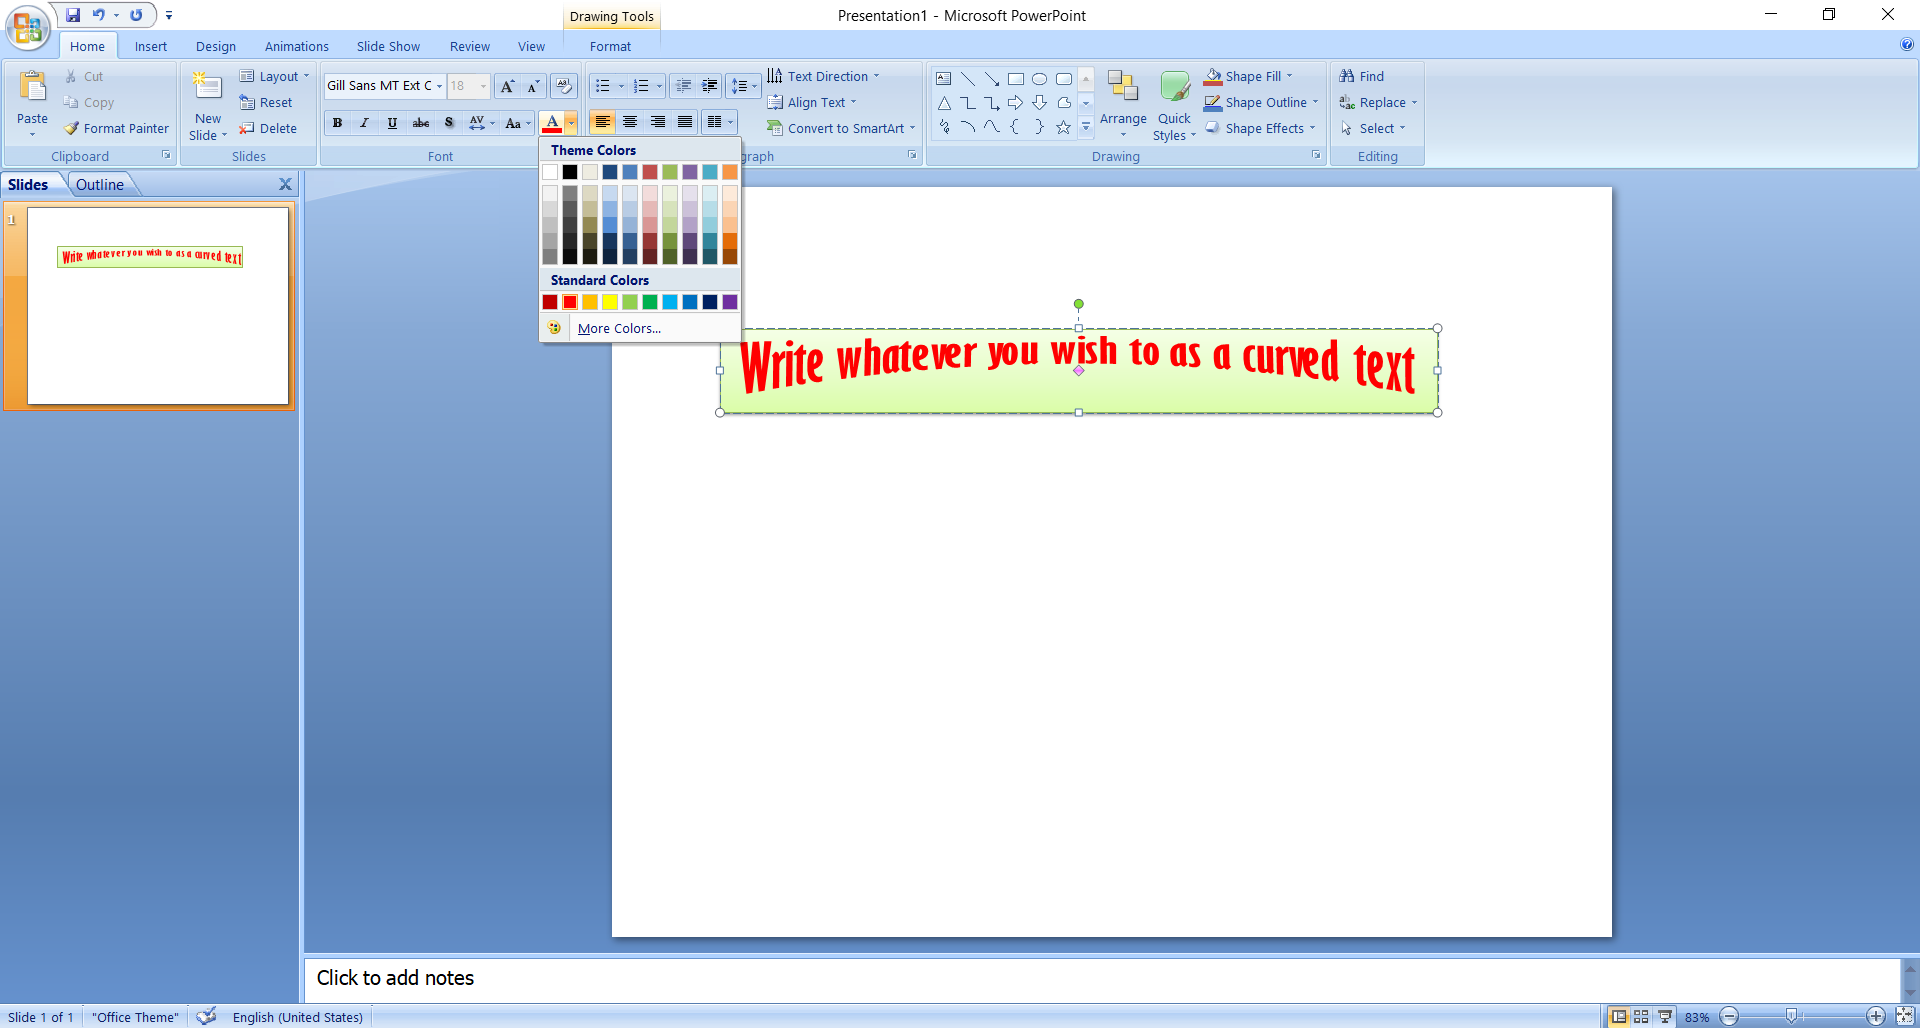
- You can add colors for the font or fill through the color selection panel in the “Home” tab.
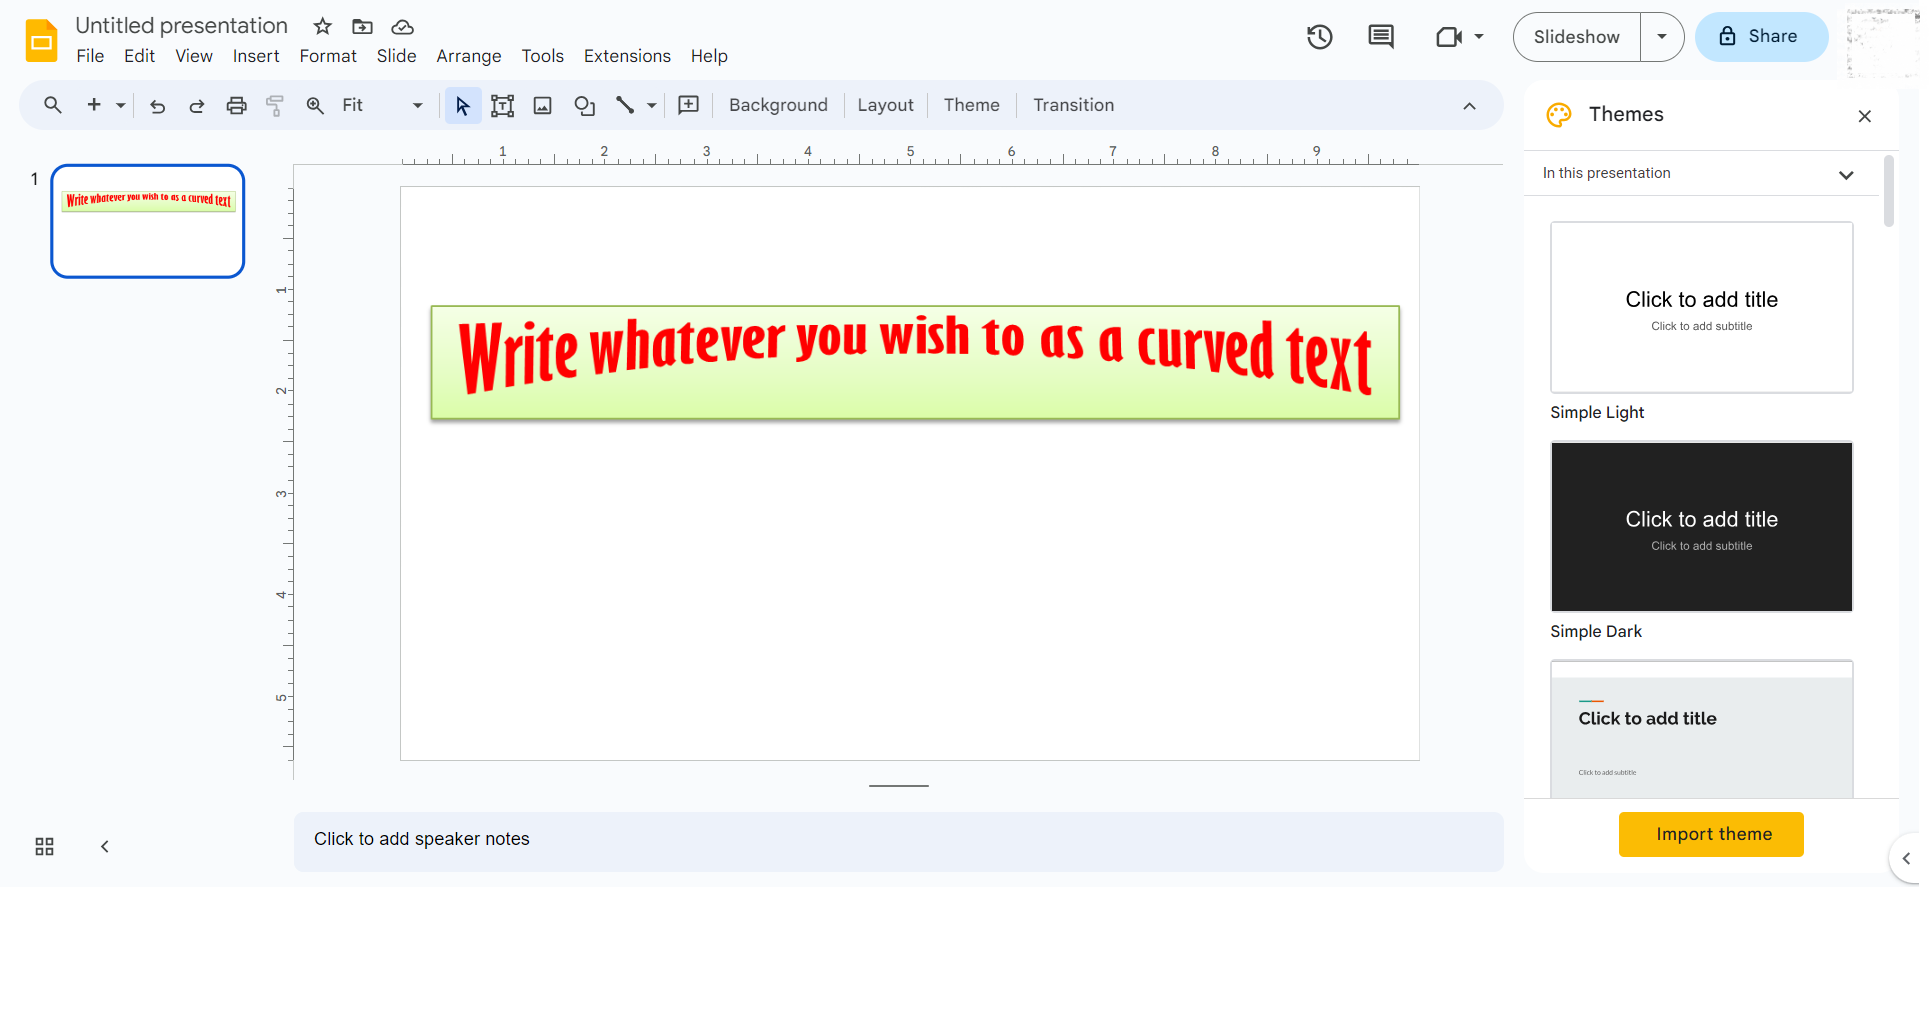
- Finally, after you are done with all your adjustments, copy the text box which is in a curved shape. Paste it wherever you want on the slide on Google Slides. The standard Ctrl + C & Ctrl + V would be fine. You can also use the Copy and Paste options through the right click.
- And Done! You have successfully curved the text.
2. Using Online Tools
Many people like more command or detailed design. The ease of adding simple designs quickly through PowerPoint comes with certain limitations. If you want to make your text a little bit more fun and creative apart from being in a curved shape, try using third-party tools like Canva, WordArt, or MockoFUN.
Canva is available as an application as well as a web app. Here is how you can add curved text using Canva:
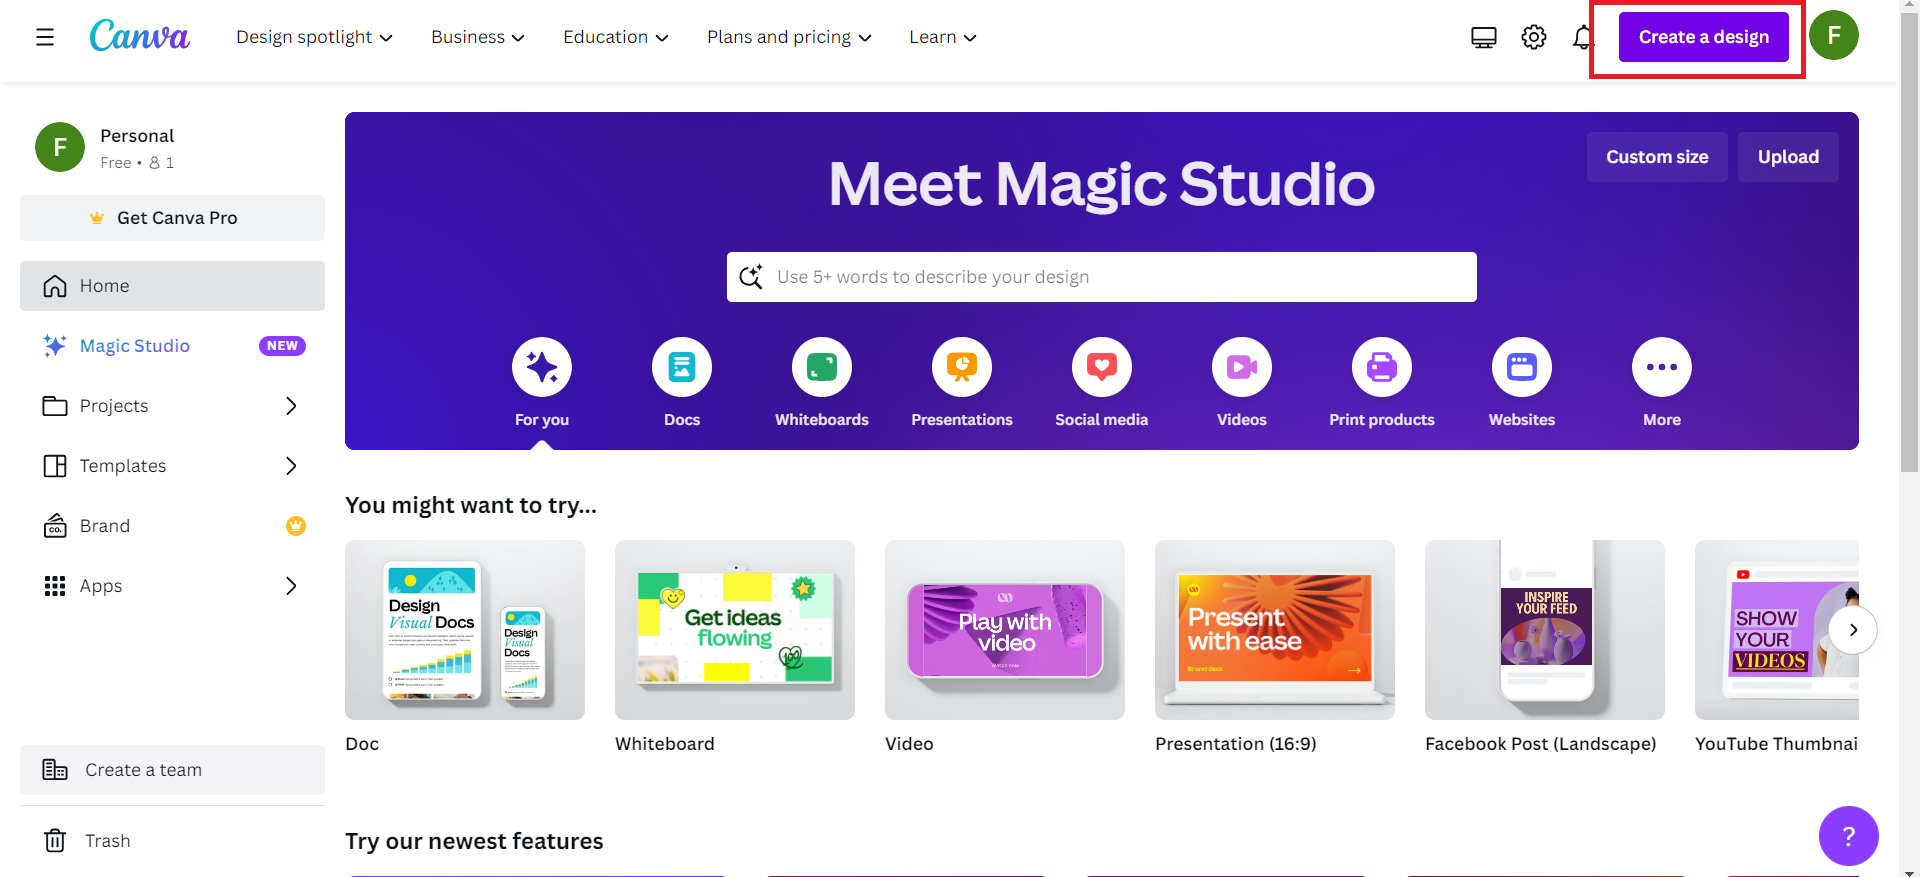
- Open Canva.com on your web browser.
- Tap on “Create Design” right on the home page.
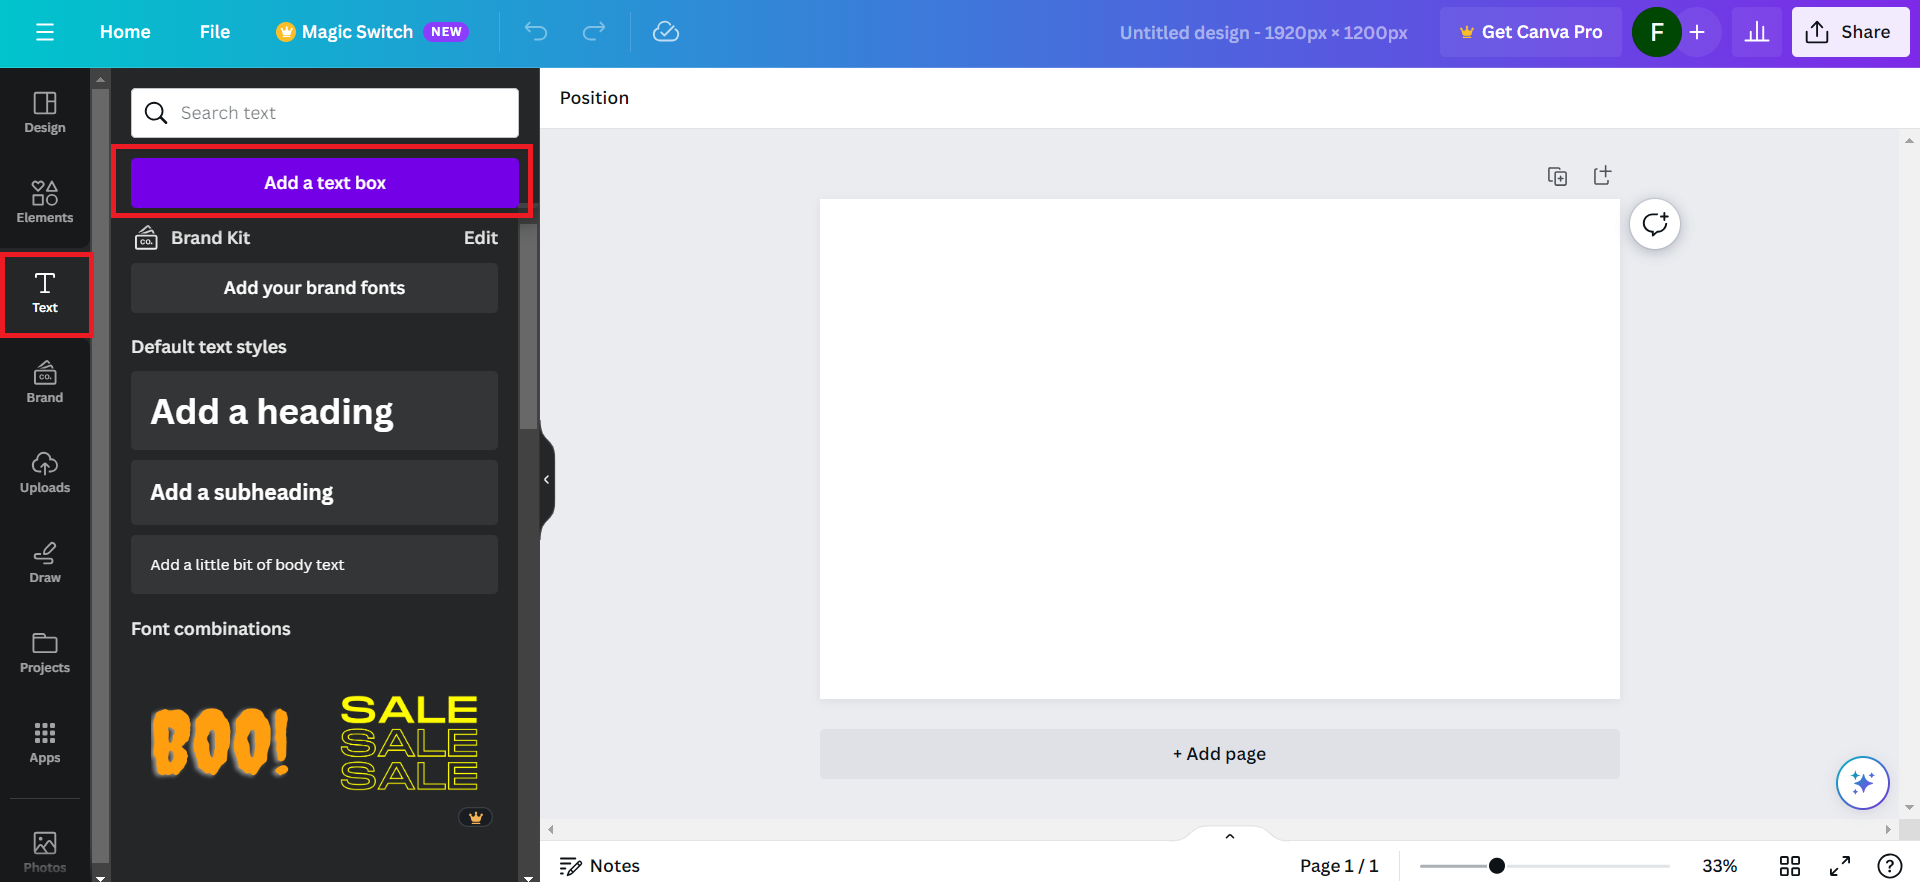
- Go to “Text” on the left panel, which will open a sub-panel on the left. Select “Add a text box” to add a new text box.
- Enter the text you want to appear curved. You can also copy and paste text from elsewhere.
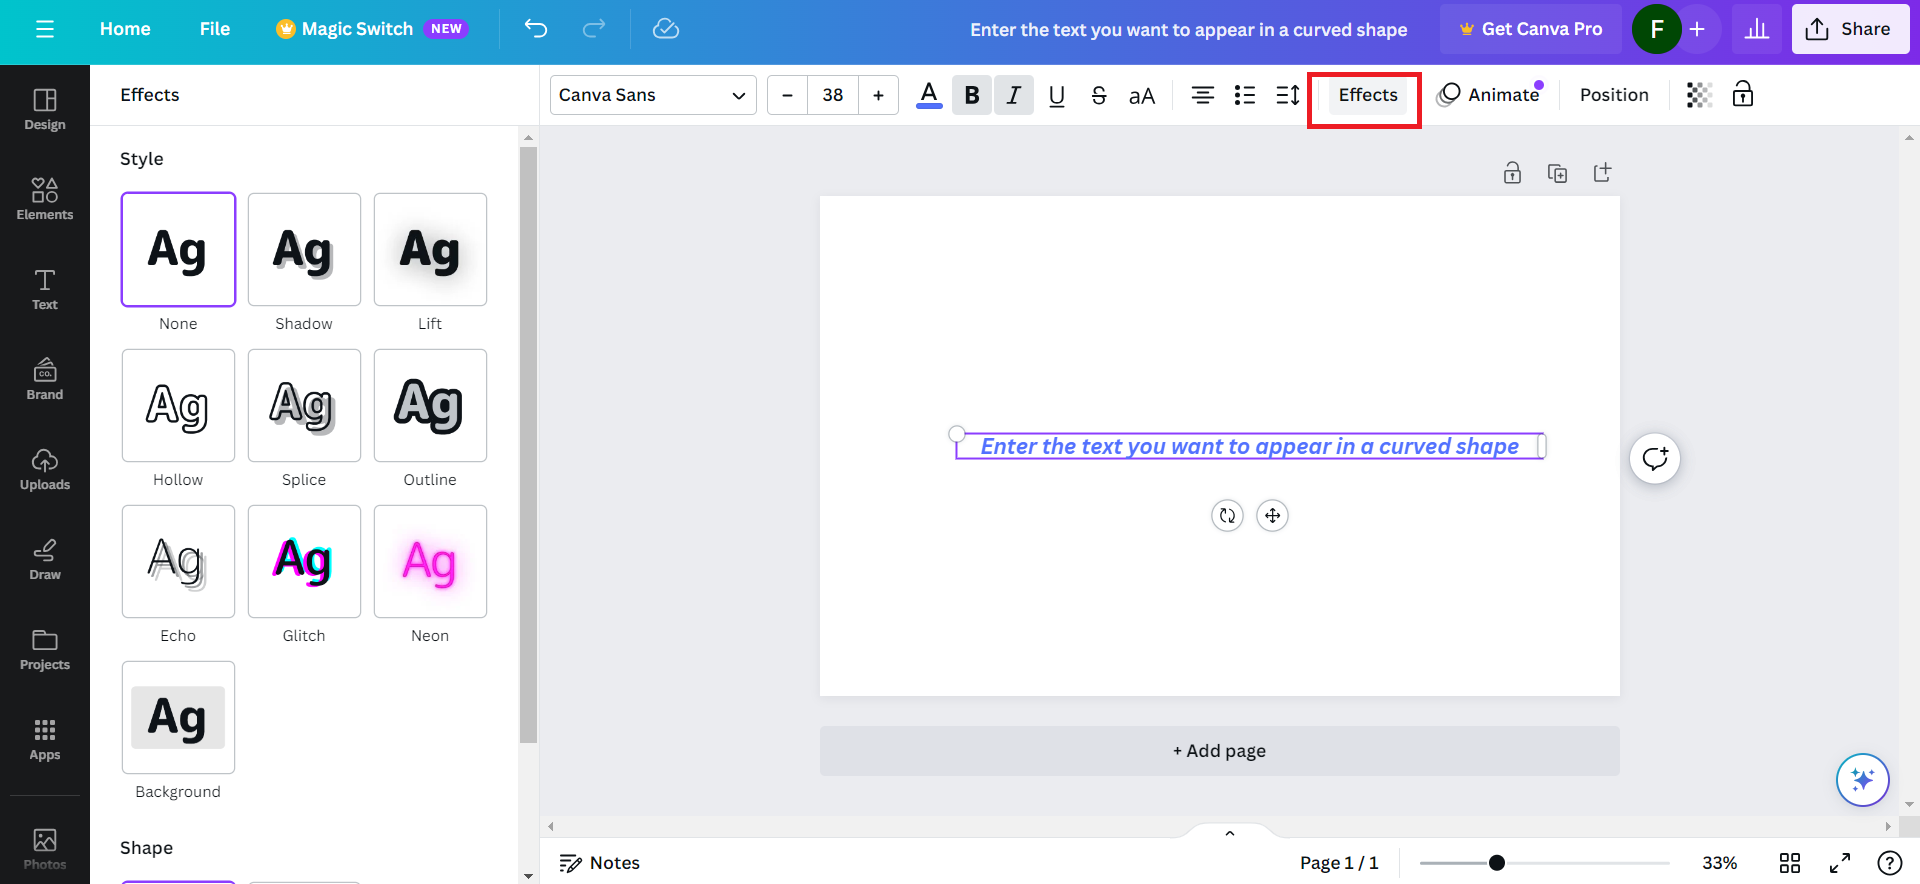
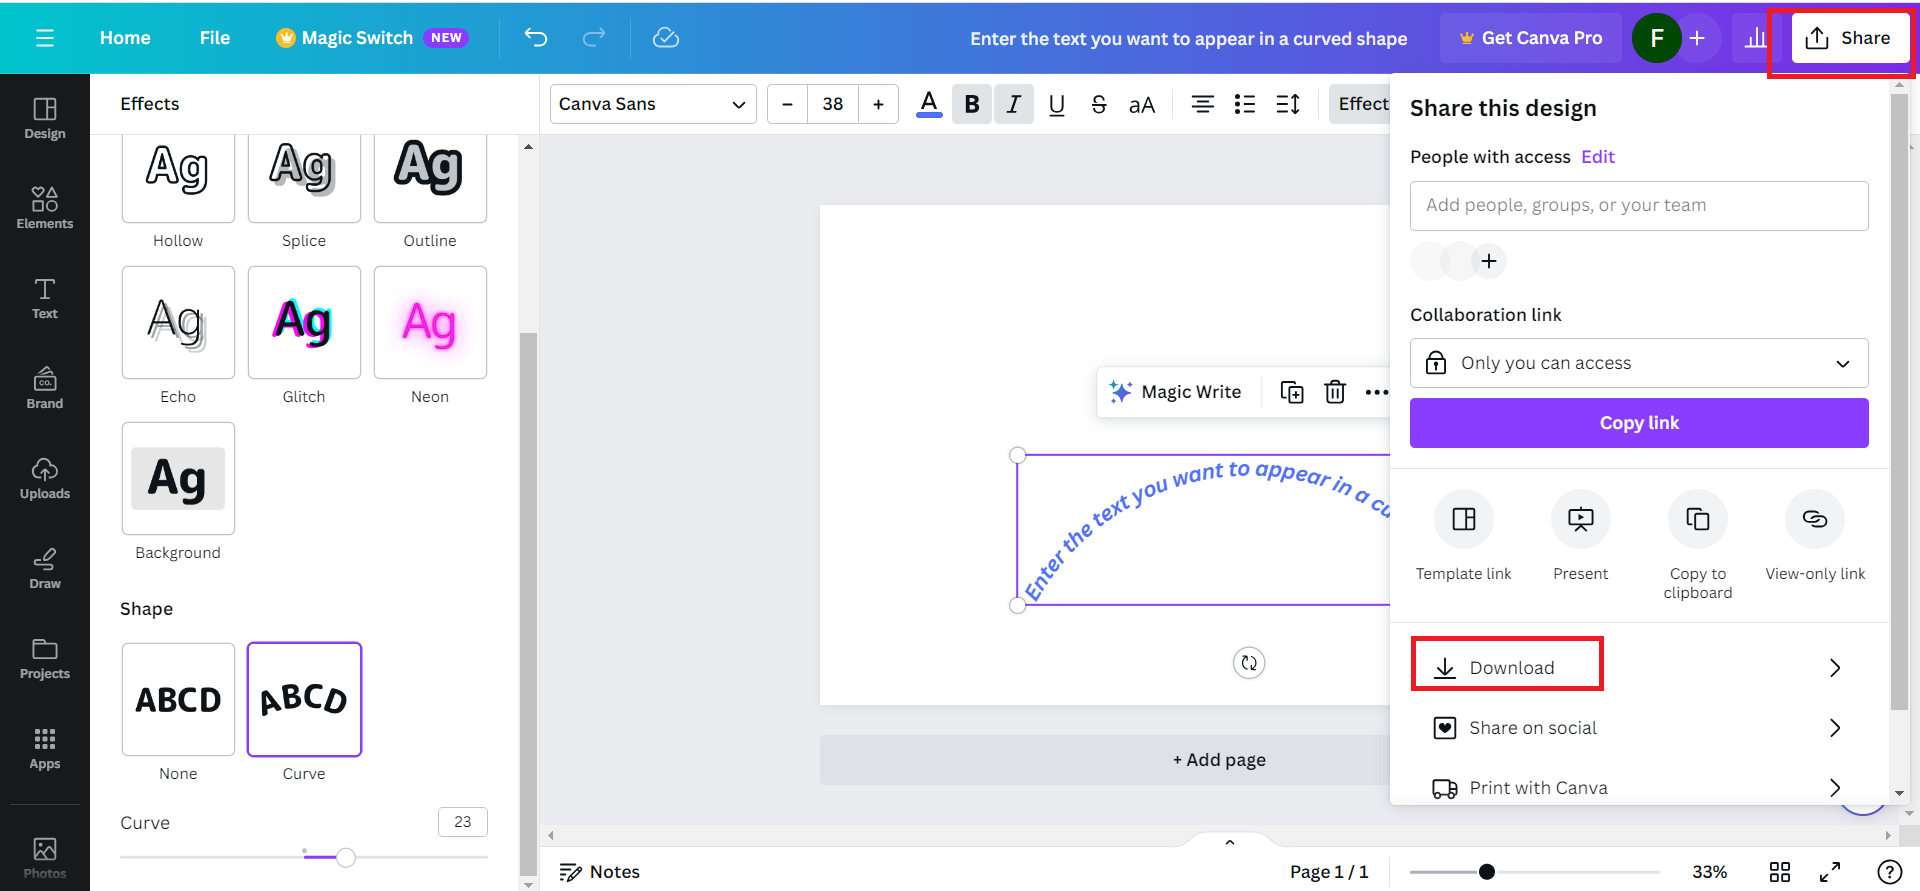
- Next, select “Effects” from the toolbar on top. This will open a bunch of tools to design your text.
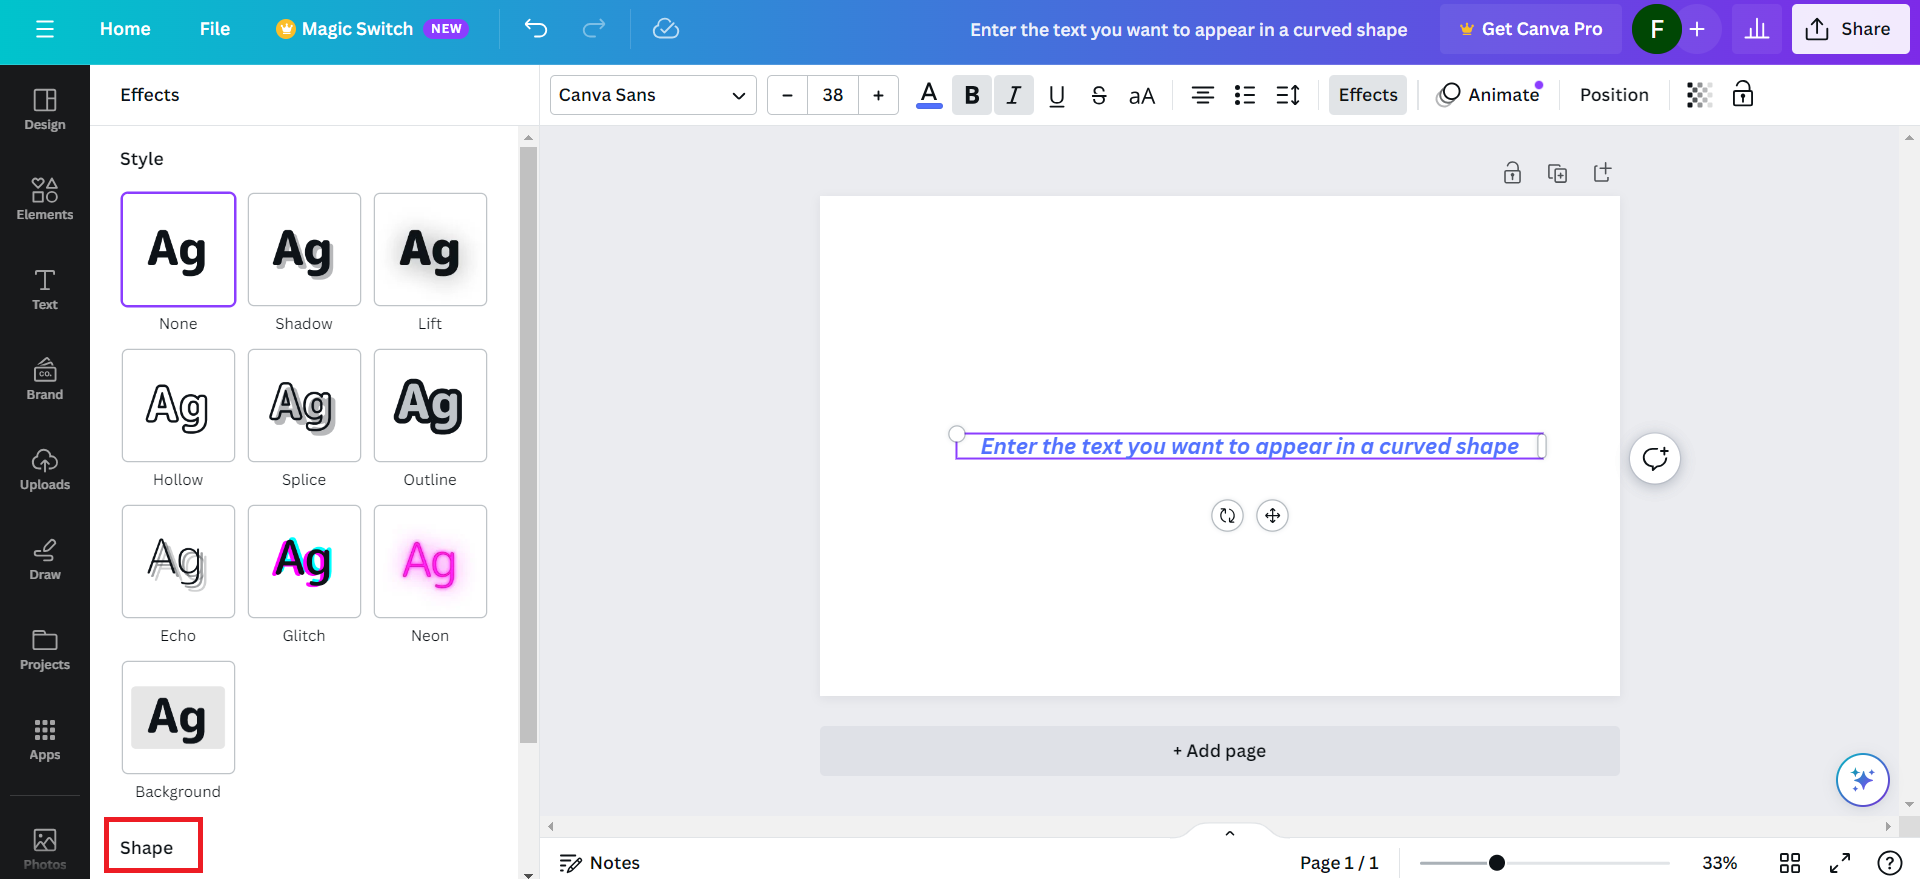
- Below the “Style” tab, there will be a tab named “Shape”. You can see different shapes of text alignment in that tab.
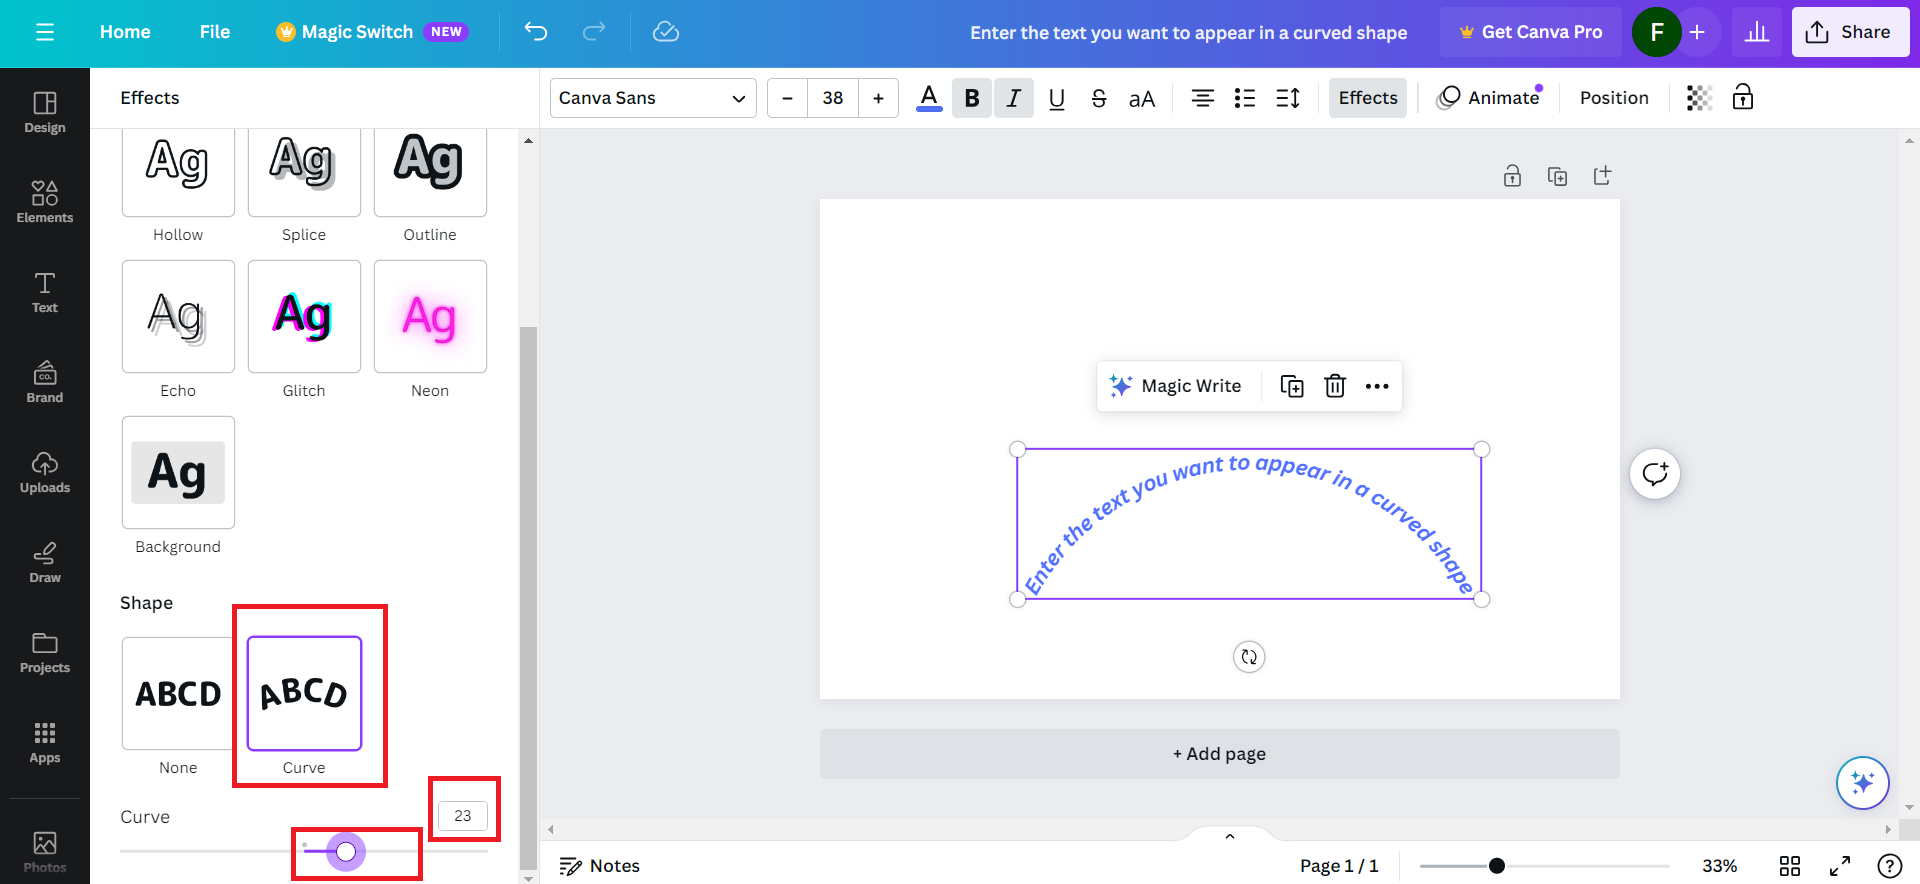
- Upon clicking on the “Curve” style, the simple text box will turn into curved text. Select the shape of the curve based on the degree of the curve you want your text to appear in.
- Upon finishing the design, you can download this element as a PNG image. Select “Share” and then the “Download” option to locally download your design element.
- Upon selecting the “Download” option, you will be able to select the file type. Make sure it is set to PNG.
- Hit Download after selecting the file size.
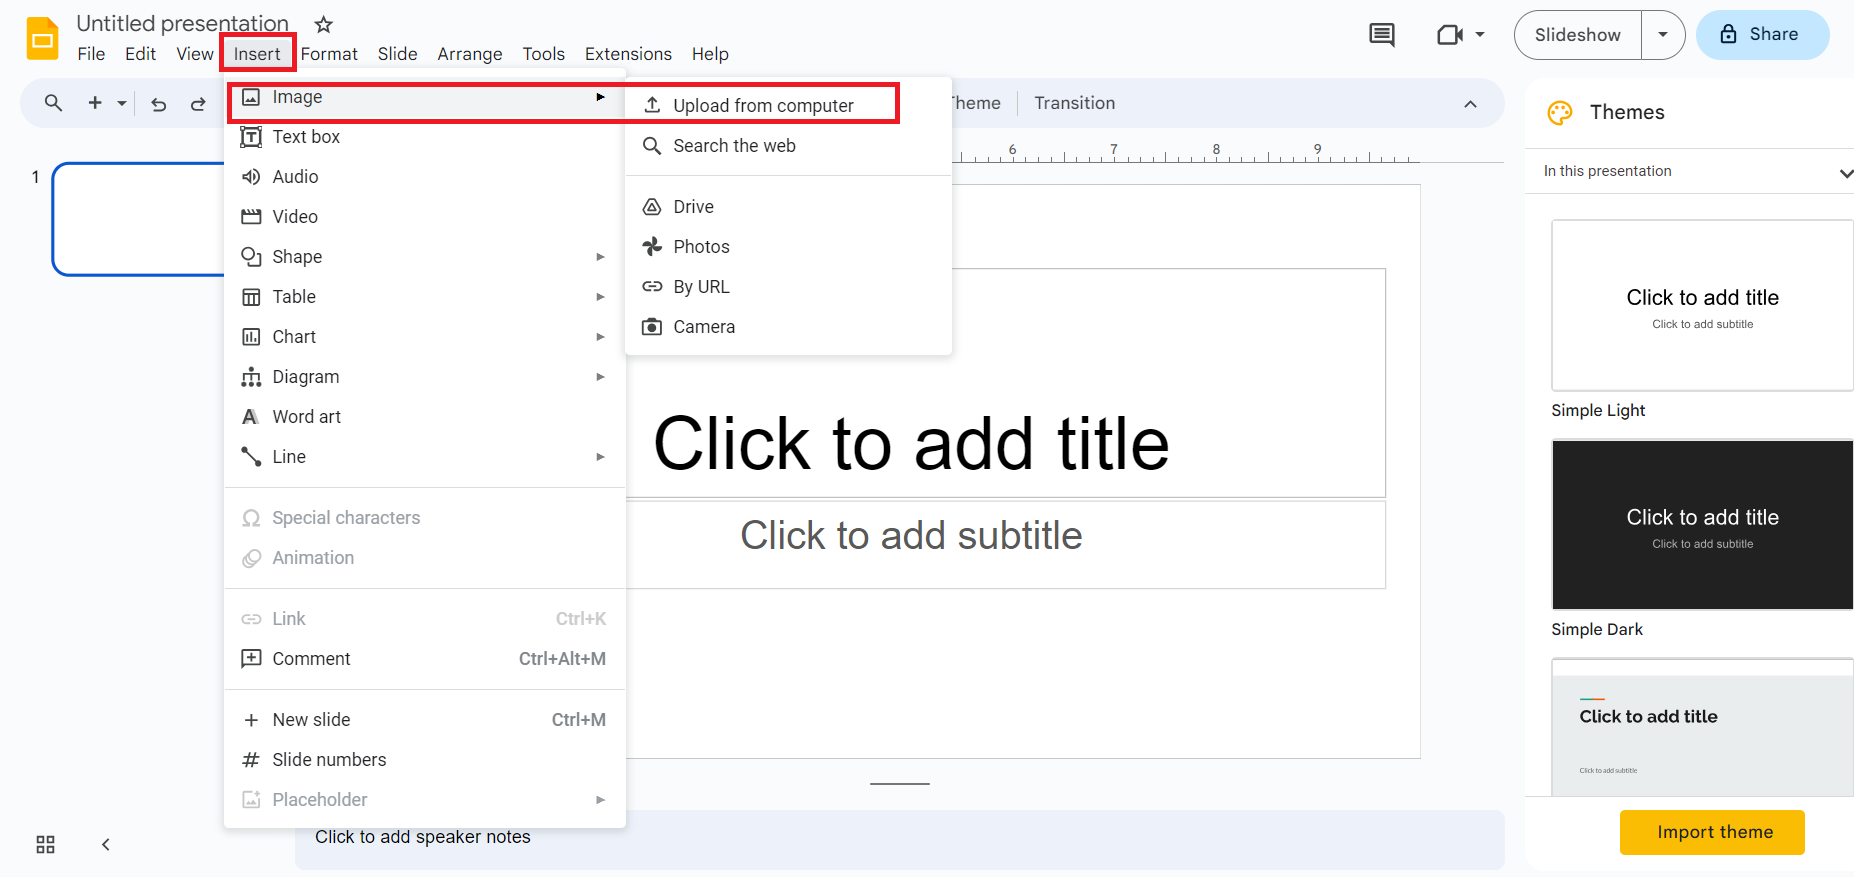
- Now, take it to Google Slides. Add “Image” from “Insert” menu.
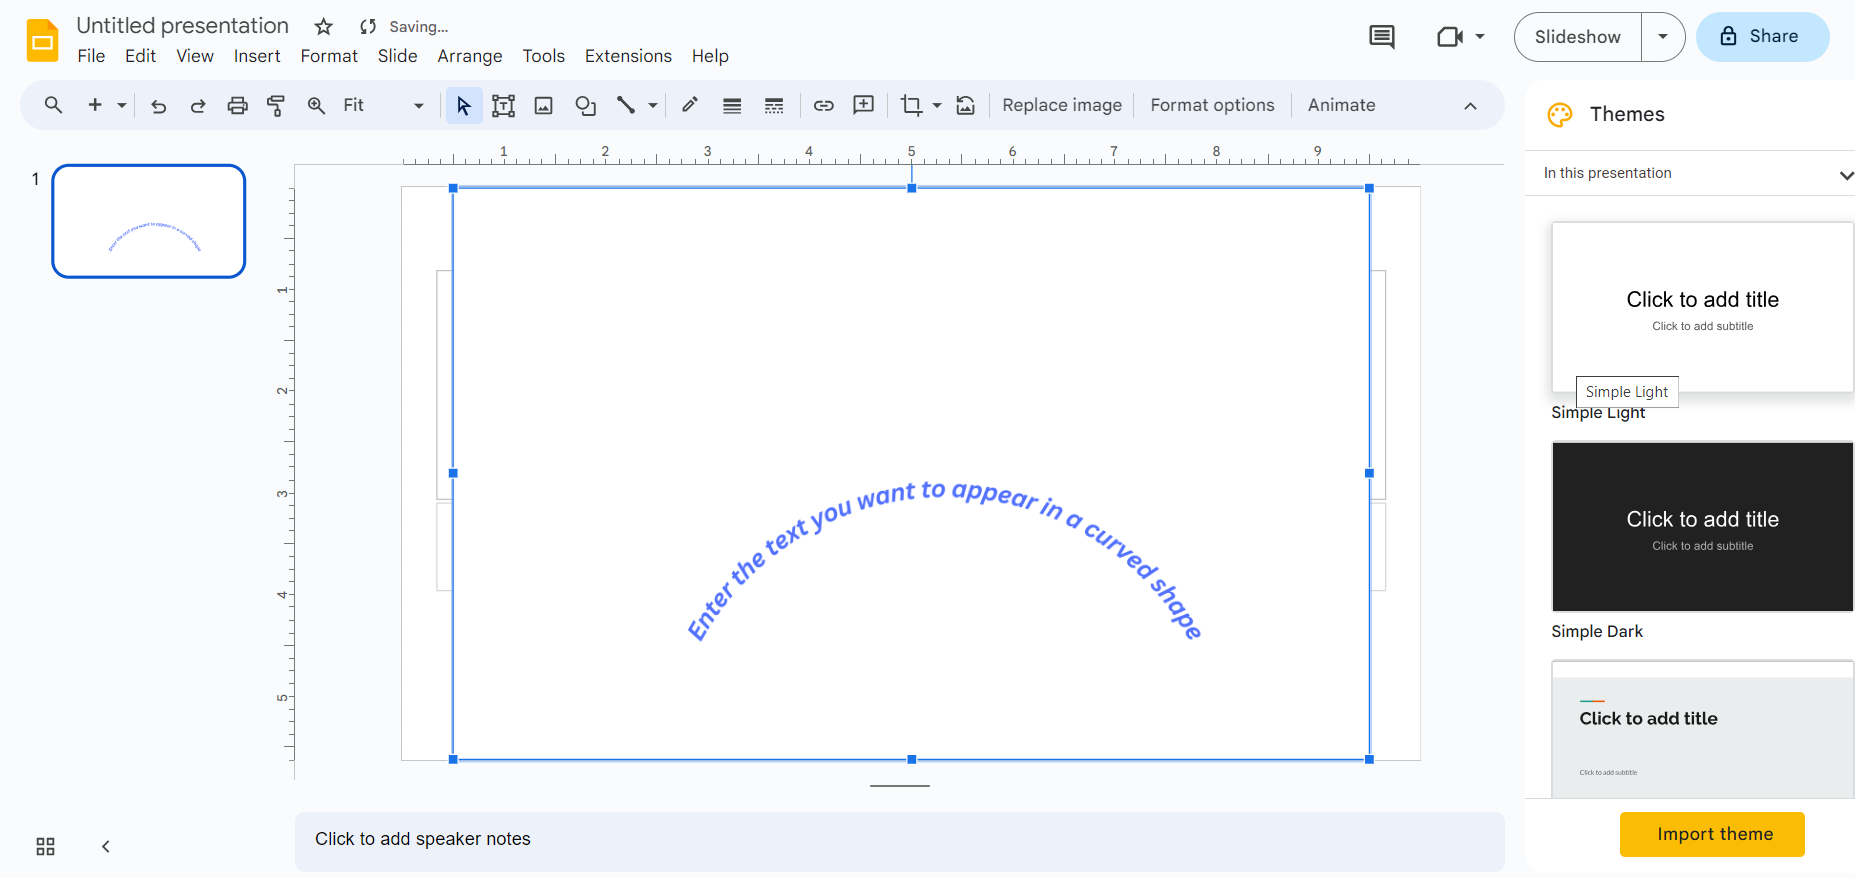
- Upload the file you downloaded from Canva. Adjust the image the way you want.
Best Practices for Using Curved Text in Google Slides
Adding curved text can sometimes elevate the whole look and feel of your presentations. But it can prove to be a double-edged sword at times as well. It all boils down to who you are presenting to or the target demographic to be precise.
If you are doing a presentation to a slightly more formal group of individuals or people above a certain age group then it may not be the best idea to introduce a unique design concept like curved text in your presentations.
If you are targeting a rather youthful and creative set of individuals then it can leave a lasting impression about you and your presentation.
Here are a few things you need to take care of:
Do’s:
- Learn about the people you are presenting to.
- Make the font size and styling readable enough even in a curved shape.
- Use commonly recognized fonts.
- Use a good mixture of symmetric layouts of text along with headings or points with rotated text.
Don’ts:
- Avoid using lighter colors on lighter backgrounds.
- Refrain from using curved text on the front page of the presentation.
- Don’t overkill the concept. Don’t overuse the curved text.
- Don’t use unrecognized fonts.
There are many other visual changes you can apply to your Google Slides that can set you apart from the herd and give a professional impression. Some of these are:
Frequently Asked Questions
Add a WordArt on your slide. Change the fill color and text color. Change the border color as well. You can then adjust the width of the border to make it look like a thicker outline.
You can add transitions and create visual effects to texts, images, slides and all the other objects in Google Slides. There are many animation features you can try on Google Slides.
Wrap Up!
So there you have it. While there’s no built-in option to curve text in Google Slides, the above two methods are relatively easy and functional. Among the two, my personal favorite is using creative tools like Canva for more creativity and command over designs.
Leave a Reply