PowerPoint is a highly customizable tool that allows you to do almost anything. I previously showed you how to change the color of bullet points and today you’ll learn about mirroring images. Although not as directly as rotating an image, the steps are still pretty straightforward.
There are two ways to flip a picture in PowerPoint. Let me show you each in detail with steps & screenshots.
Method 1: Via the Home Tab
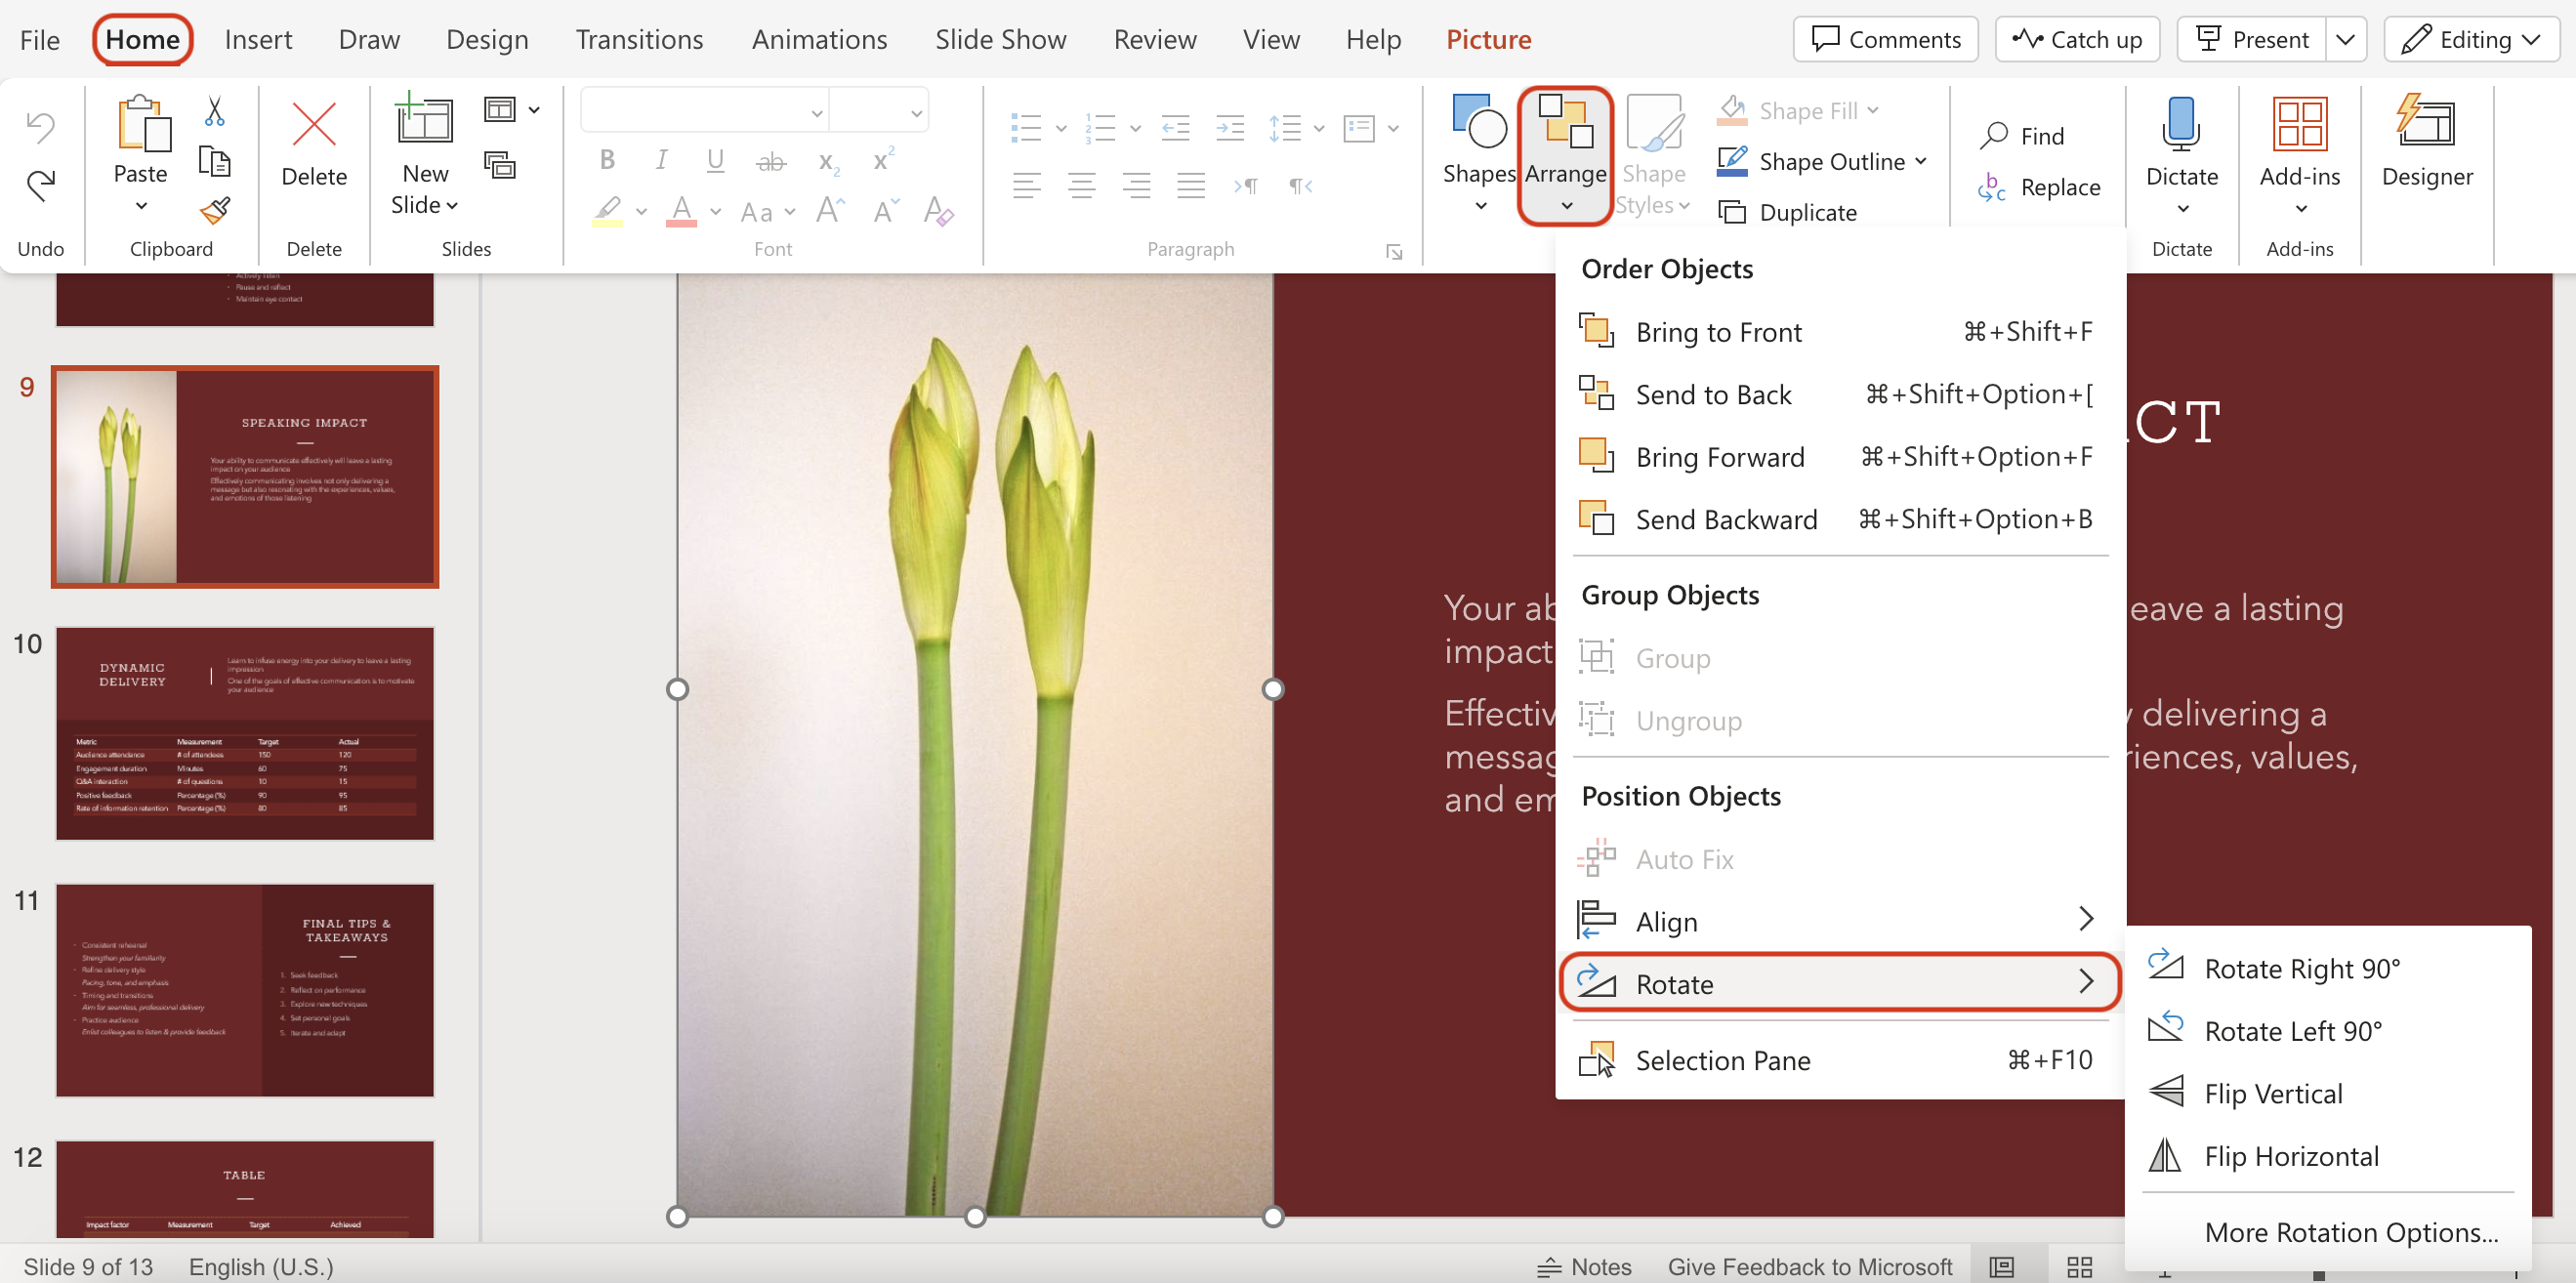
The Home tab contains all the frequent and the most commonly practiced actions in it. It involves everything from formatting the text to adding effects to an image. The option to rotate an object is also there on the right side of the tab.
Here are some simple steps to follow:
- Click on the image you want to flip in your slide.
- Go to the “Home” tab below the main menu.
- Locate and click on the “Arrange” feature towards the right.
- Select “Rotate” from the dropdown.
- Now select “Flip Vertical/Horizontal” from the sub-dropdown based on how you want it to appear.
Method 2: Via the Picture Tab
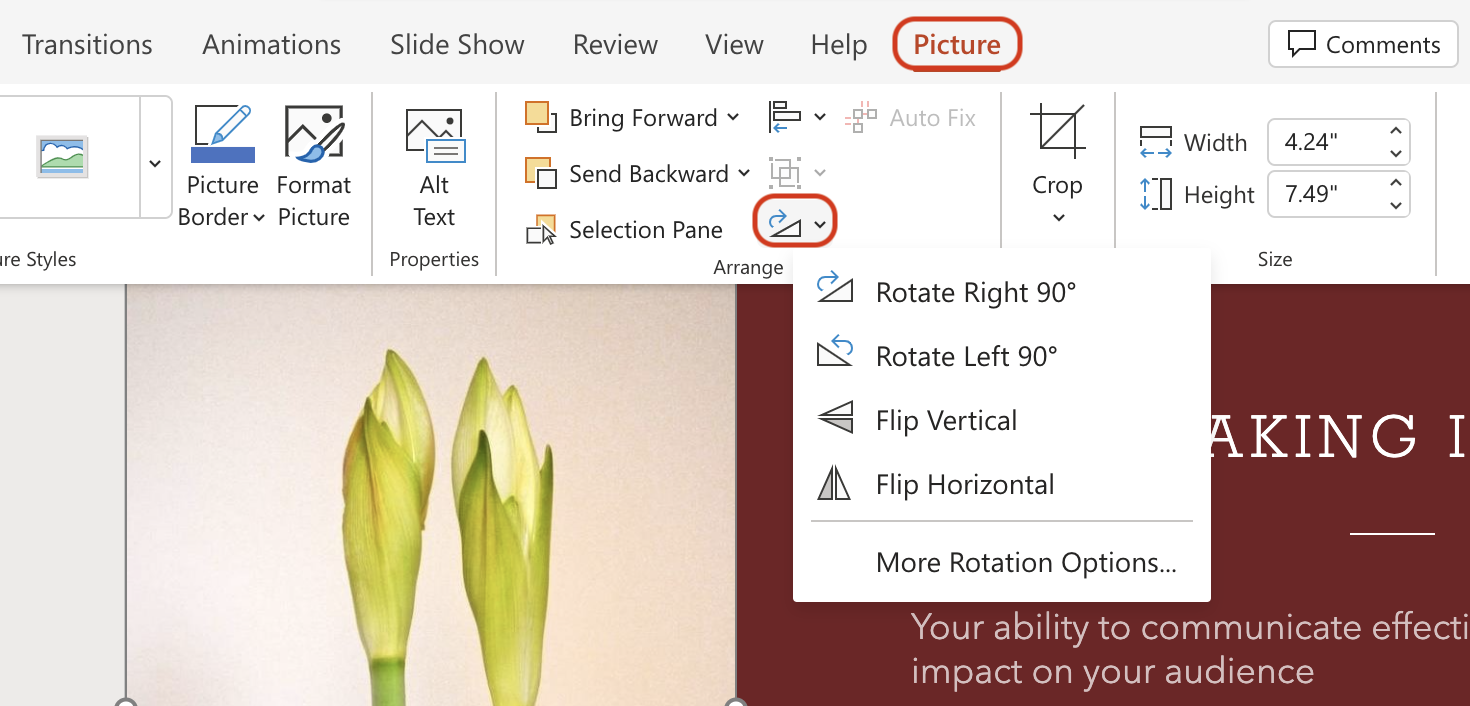
The picture tab has all the formatting options related to the image. This means it will offer you all the formatting features such as border, crop, change image, etc. The option to flip the image is towards the right end in the “arrange” column.
- Click on the image.
- Go to the “Picture” tab.
- Locate and click on the “Rotate” feature in the “Arrange” section.
- Select “Flip Vertical/Horizontal” from the dropdown.
Bonus: Tips & Tricks
Here are some useful tips and tricks to consider for the best experience:
- Reuse: When you have a directional image, symbol, or shape that you flip to align your design, you can save it as a separate image. Right-click on the flipped picture and select “Save as Picture”. You can now use the flipped picture in other slides instead of having to add and flip the original image every time.
- Animate: Another innovative way is to animate the image and make it appear like it is flipping. Many animations move your images in a certain direction. You can use these animations to point your image in the direction you want instead of simply flipping it.
- Group: You can also group an image with other images or text boxes to combine more information in fewer spaces. Make sure that you group the text after flipping.
- Resolution: Many users realize that the image quality of a flipped image deteriorates compared to the original image. Use an image with a higher resolution to avoid getting a distorted or blurry image.
Frequently Asked Questions
No, you cannot break down an image and flip only specific parts. You need a dedicated graphics tool to break down an image into specific parts or group images together if you want to bring it to Powerpoint and flip it partially.
Click on the shape, go to either Arrange> Rotate > Flip Vertical/Horizontal from the “Home” tab or directly go to the “Format” tab and access Rotate > Flip Vertical/Horizontal.
Wrap Up!
If you have a mascot or a character that points in a certain direction and the text does not align with it. Simply flip the image in the direction you want it to point. Flipping it horizontally or vertically essentially acts as a new image.
What makes it unique is that you can save it as a separate image directly from your slide and use it in other PowerPoint projects. But a slightly better way to use directional images is to animate them.


Leave a Reply