Blank rows can clutter up and make your spreadsheets hard to analyze, understand, and present the data. Fortunately, you can delete them and keep your Google Sheets organized and clean.
There are three methods to do it, and in this article, I will guide you through each of them with steps and images.
Ways to Delete Rows in Google Sheets
Whether you want to remove a specific row or delete multiple empty rows at once, I have got you covered. Below are some simple yet efficient ways to streamline your data management.
1. Manual Deletion
The manual deletion method can be used when you are dealing with small data sets, as it is time-consuming. Let’s delve into how to delete blank rows in Google Sheets manually.
- Open the Google Sheet with the data set you want to work on.
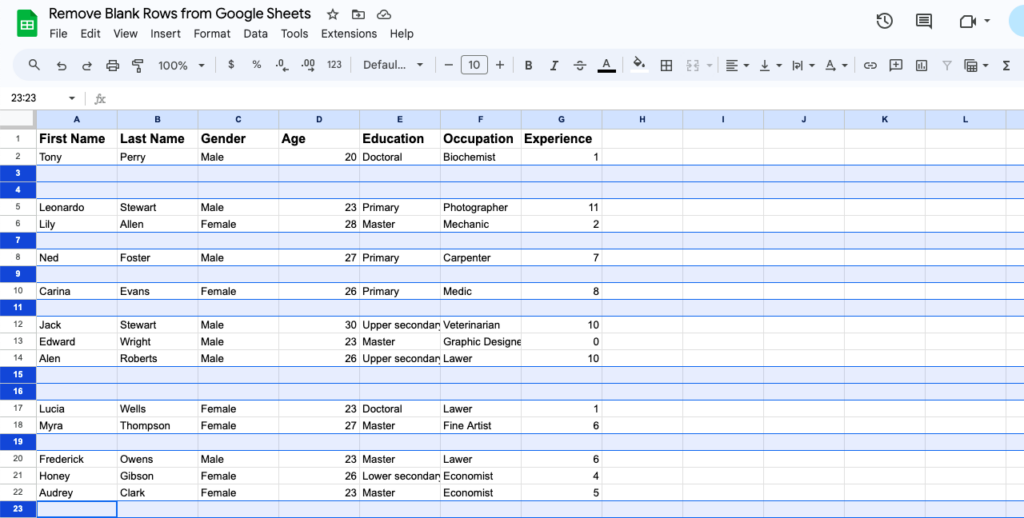
- Hold the “CTRL” or “Command” key and left-click on the empty rows.
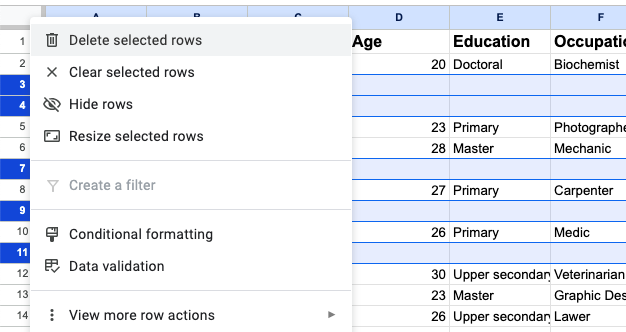
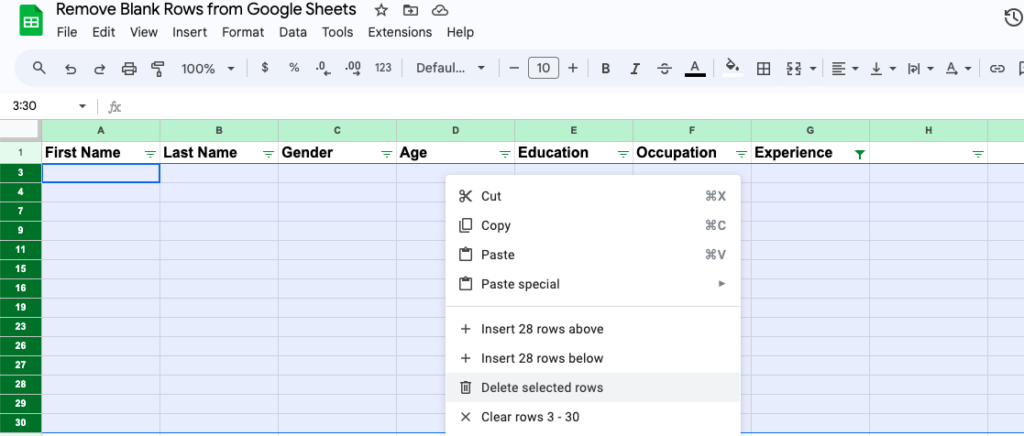
- After selecting the rows you want to delete, right-click on the row number of the last selected row.
- From the menu, select “Delete selected rows.”
2. Using Filter Feature
Google Sheets offers some excellent built-in features that enable you to delete unwanted rows. This is an effective method that you can use when dealing with complex and larger data sets.
- Hold the “Shift” key and select the data set with the blank rows.
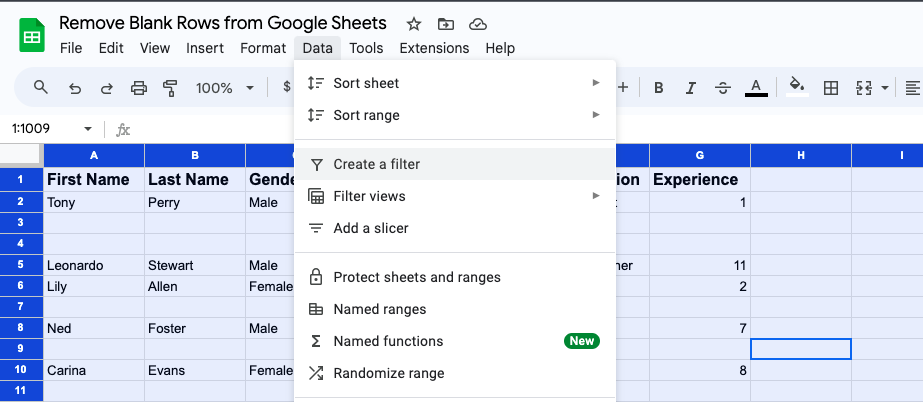
- Go to “Data” on the menu bar to open a drop-down menu.
- Click “Create a filter” and the row with the header will show a “Filter” symbol.
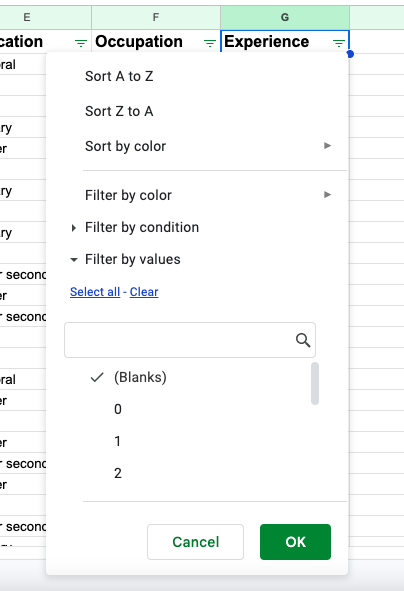
- Click the filter symbol and navigate to “Filter by values”.
- Now, click “Clear”, re-select “Blanks”, and tap on the OK button.
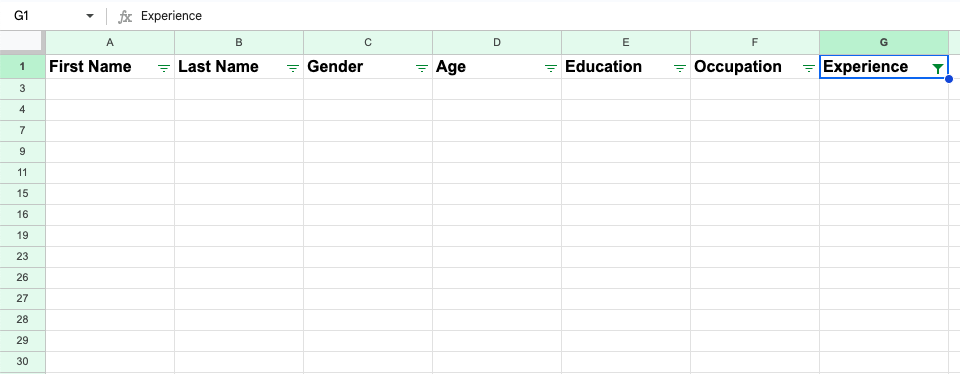
- This will hide all the data in the selected rows to only display blank rows as shown in the screenshot below.
- Now, use a shortcut CTRL + A (or Command + A) and then manually delete rows the same way as the previous method.
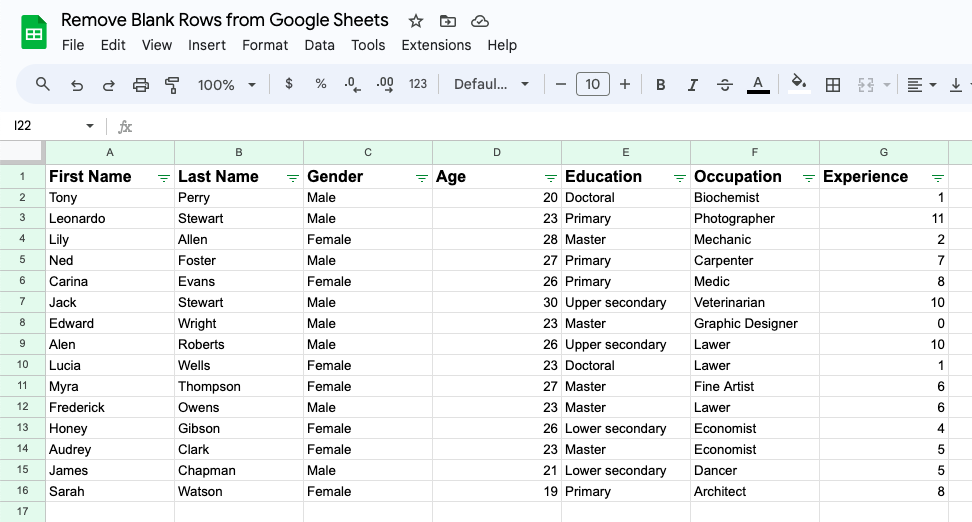
- Click the same filter icon in the row header. Go to “Select all” and click OK. Voila! You’ve successfully removed all the extra rows. The final output will look like this:
3. Using an Add-on
While the above methods are more practical and handy, there is another way to delete a row in Google Sheets.
- Press “Shift” and drag downwards to select the data set you want to work with.
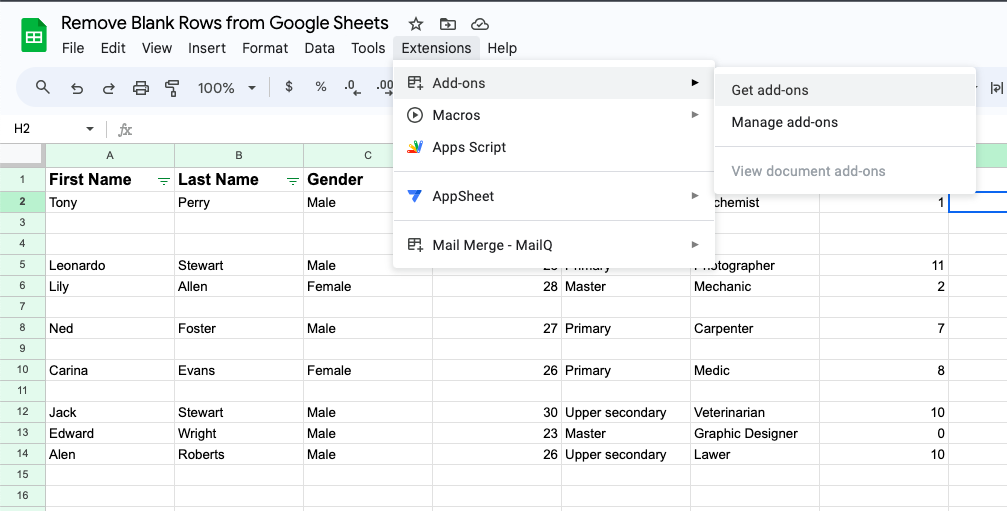
- Go to “Extensions” next to the Tools option on the menu bar.
- From the sub-menu, tap on the first, “Add-ons” option.
- Click “Get Add-ons” to open a search bar.
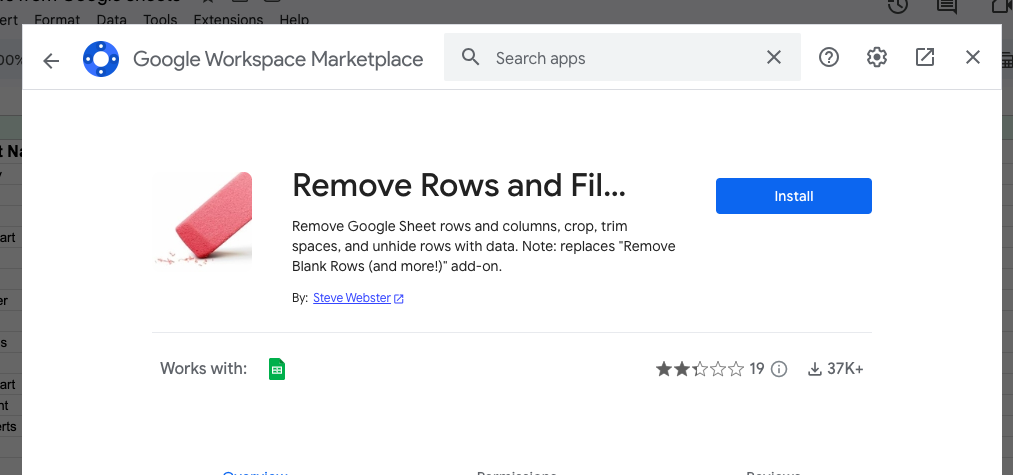
- Now enter “Remove Blank Rows” in the search bar, and select the appropriate option for Google Sheets.
- Install the extension using your email ID to access this feature.
- Click “Allow” to install the add-on, and you will see it on your Google Sheets.
Note: If you want to further organize or declutter your Google Sheets, you can remove gridlines and even print without them.
Frequently Asked Questions
You can automatically remove blank rows using Google Apps Script. It is based on JavaScript, enabling you to create custom functions to automate tasks like deleting blank rows.
Step 1: Press Shift and select all the rows you want to delete.
Step 2: Right-click on the last selected row.
Step 3: Select “delete selected rows.”
Step 1: Click on any row on your Google Sheet to display two small points.
Step 2: Now hold the upper or lower point to drag it across the screen toward the cells you want to delete.
Step 3: Click on the selected area to open a menu with “three dots.”
Step 4: Tap the three dots and select “Clear.”
Although Google Sheets doesn’t have a specific feature to prevent blank rows from appearing, you can utilize data validation rules to restrict input in certain cells. This will ensure you enter valid data.
Wrap Up!
Google Sheets isn’t just about grids for numbers and words. It’s a dynamic tool that will help you consolidate and organize your data, whether you are dealing with small or large data sets.
Therefore, it’s important to know essential functions like removing rows to declutter and manage your data better. I personally prefer manual deletion as I deal with small data sets. You can use filters and add-ons if you are dealing with a larger data set.

Leave a Reply