Creating a word cloud and curving the text are two key ingredients to make your boring texts appear attractive and engaging. They act as banner headings and are useful in creating logos when you wrap them across an image.
Apart from aesthetics, it also helps you fit in more data around the corners, which is always great. You can do so on a plain slide or around an image or a shape. In this article, I will explain both, step-by-step.
So, without further delay, let’s get in!
Steps To Curve the Text in PowerPoint
The first thing to note is to add text through either WordArt or a regular text box. Here are some simple steps to follow:
- Go to the “Home” tab on your PowerPoint slide.
- Add text to your slide using either WordArt or Text Box.
- Write down or paste the text you want to curve.
- Click on the Text Box or WordArt when you are done writing the content.
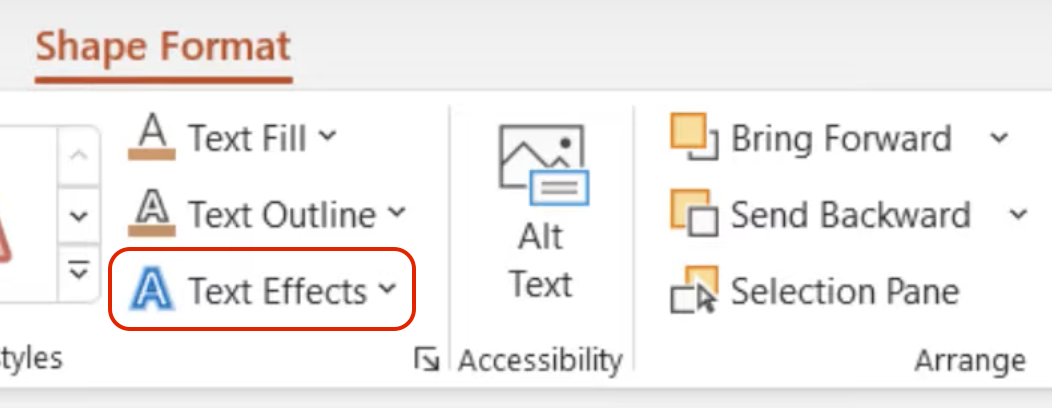
- Now go to the “Shape Format” tab on the top.
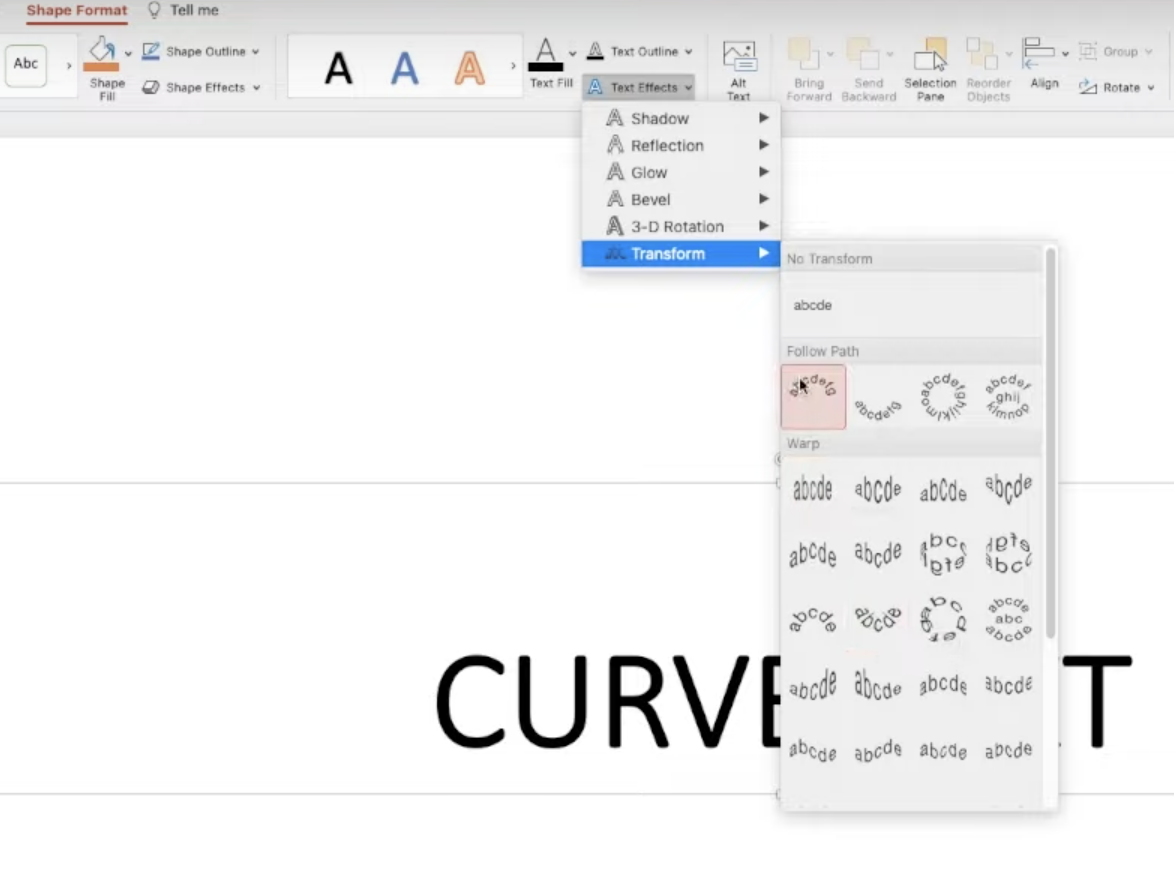
- Locate and click on the “Text Effects” option towards the right side.
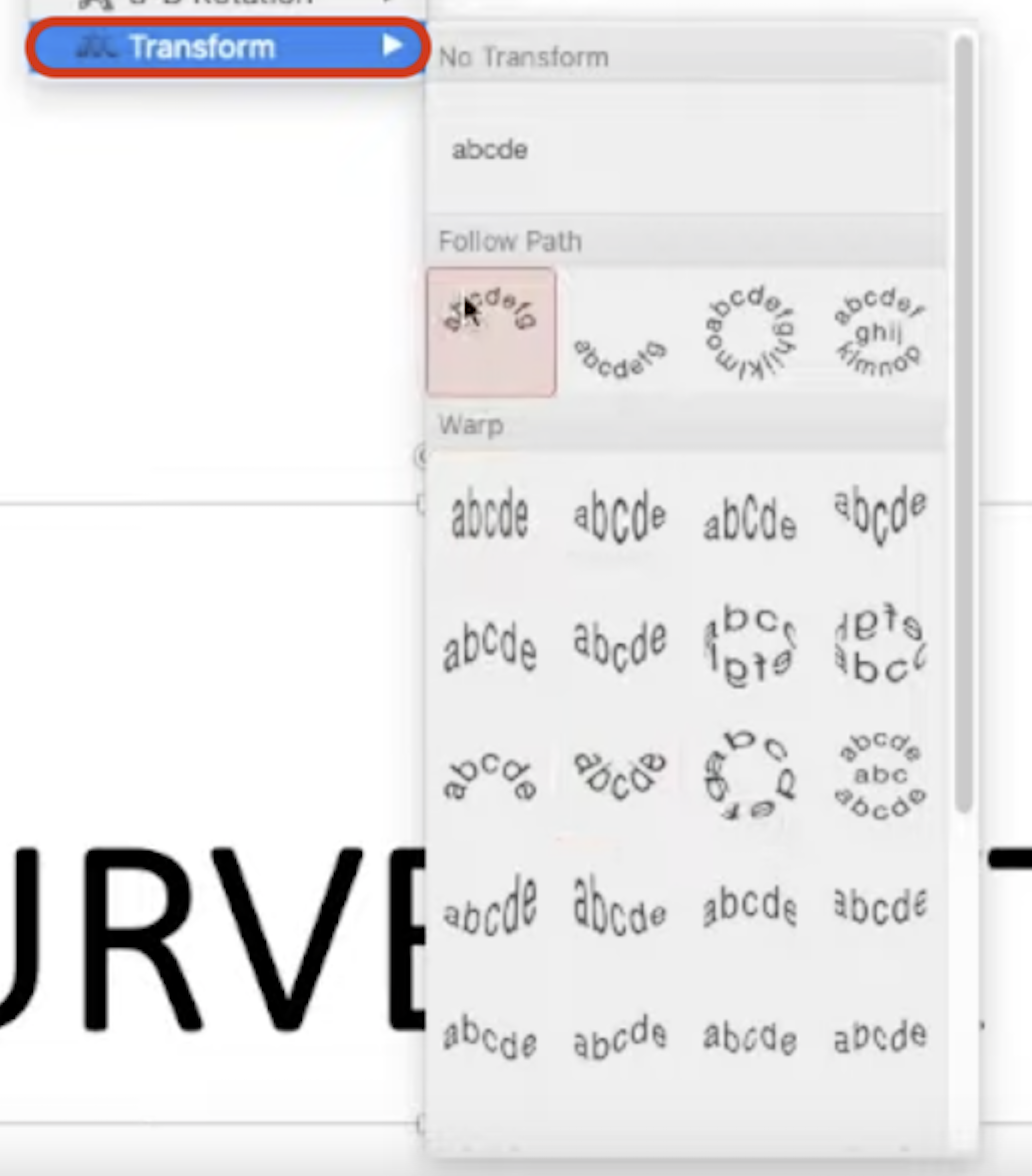
- Select “Transform” at the bottom of the dropdown.
- Select between an upward curve, downward curve, circular curve, or button-shaped curve for your text under the “Follow Path” tab in the sub-dropdown.
- Adjust the size, shape, and stretch of rotation of your curved text (using the pink dot).
Now you can play with colors, fonts, size, and shape of the text. You can add an animation to the curved text as well. Combine effects like shadows to make the most of the curved text in your PowerPoint presentation.
Steps To Warp the Text Around a Shape
The warp option helps you adjust the curviness of the text based on the shape of the object or image you have beforehand. Combining images and other design objects with curved text optimizes its visual appeal.
Here is how you can wrap text around a shape:
- Go to the “Home” tab on your PowerPoint slide.
- Add text to your slide using either WordArt or Text Box.
- Write down or paste the text you want to curve.
- Click on the Text Box or WordArt when you are done writing the content.
- Now go to the “Shape Format” tab on the top.
- Locate and click on the “Text Effects” option towards the right side.
- Select “Transform” at the bottom of the dropdown.
- Select the shape of the curve that matches your design under the “Warp” tab in the sub-dropdown.
Now arrange and format the colors, fonts, size, and shape of the text. Moreover, you can adjust the degree and stretch of the curve for your text using the same pink dot.
Frequently Asked Questions
There is no keyboard shortcut to it, but you can add a WordArt quickly by pressing Alt + Shift + W. Or simply press Alt, N, X, and Enter keys in that order to enter a text box.
Adjust the rotation, degree, and stretch of the curve and play with the fonts, size, and shape of the text to create a warped text that looks like a custom shape.
Wrap Up!
There is a lot that you can customize with curved text. I recommend starting with a regular text box instead of a WordArt. A lot of people scratch their heads when they are unable to curve their regular text boxes and end up looking for solutions online. That is exactly why I came up with this post.
I hope you enjoyed reading through it and learned something today! See you in the next one!


Leave a Reply