Last week, one of my regular readers reached out to me asking if she could burn a Spotify playlist to a CD. My answer was YES and NO. Technically, there’s no official feature to do so, but there are workarounds to achieve this.
For instance, you can create a shareable playlist and import it into third-party software like iTunes, Windows Media Player, VLC, or ImgBurn to burn it. In this article, I will discuss each of them in detail with steps & pictures.
So, without wasting more time, let’s get in.
Prerequisites
Here are a few things you need to burn a CD from Spotify:
- Computer with a disc drive.
- A Blank CD: It can be a CD-RW or CD+RW disc, which you can write multiple times.
- Disc-burning software (iTunes, Windows media player, or VLC).
- Spotify to CD converter: The music on Spotify is encoded, and directly burning it on a CD isn’t possible. So, you’ll need to use a converter to help record the music as unrestricted files.
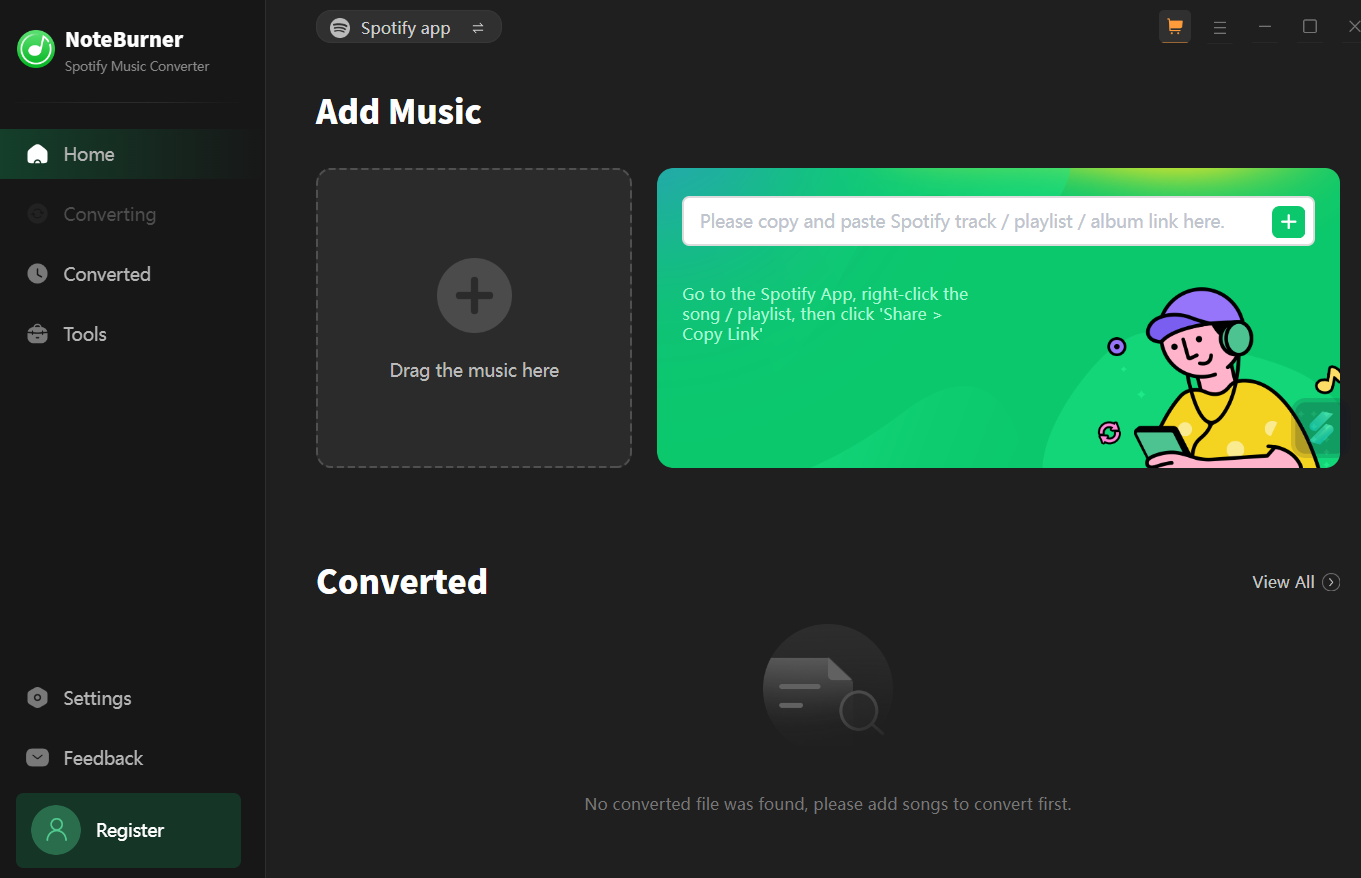
One such app is NoteBurner. With it, you can legally convert Spotify songs and playlists into any format (MP3, WAV, FLAC, AIFF, or ALAC) with 100% original quality. Here’s how to use it:
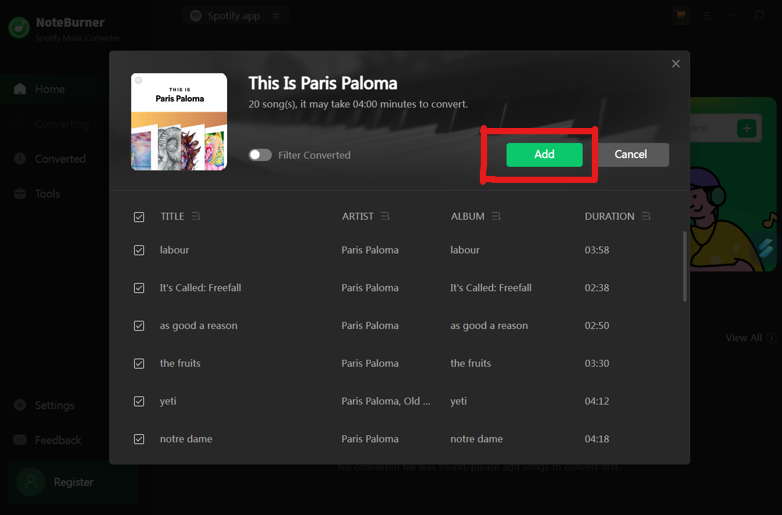
- Open the NoteBurner app and drag the playlist/song(s) to it, or you can just paste the link on the search bar.
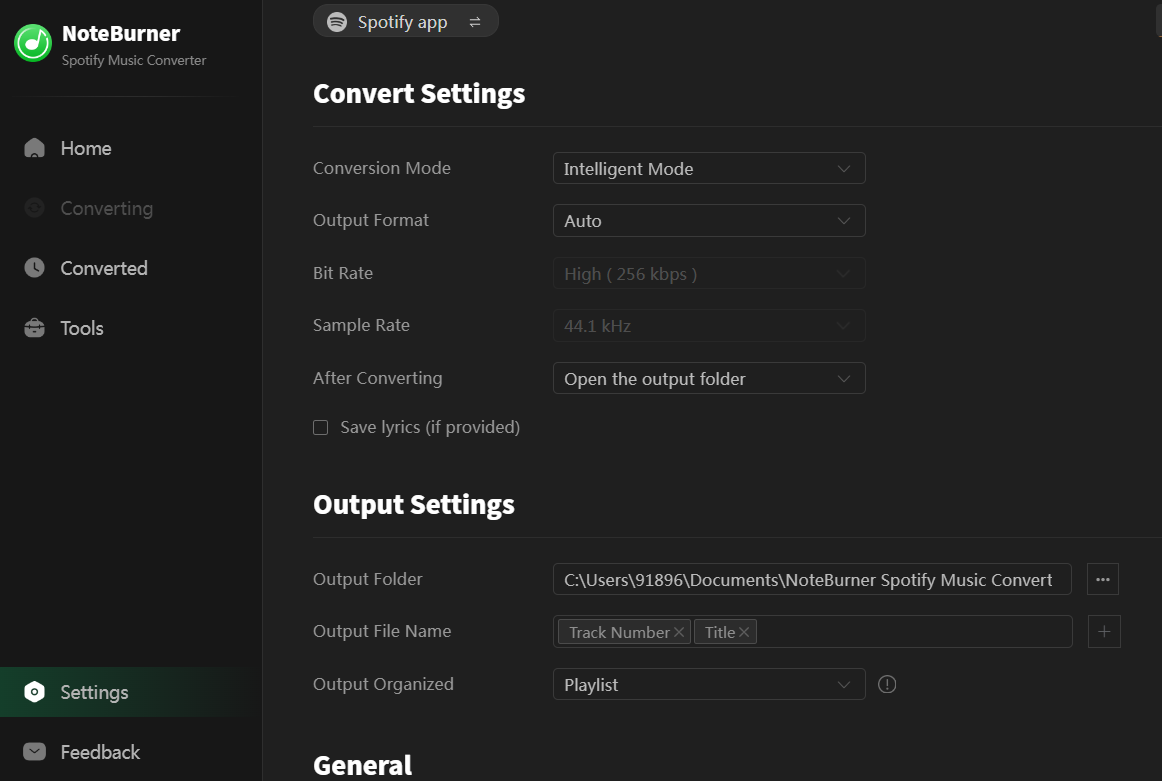
- As the song(s)/playlist appear, add them to it, and customize the settings, like speed, format, bit rate, and others, from the Settings tab.
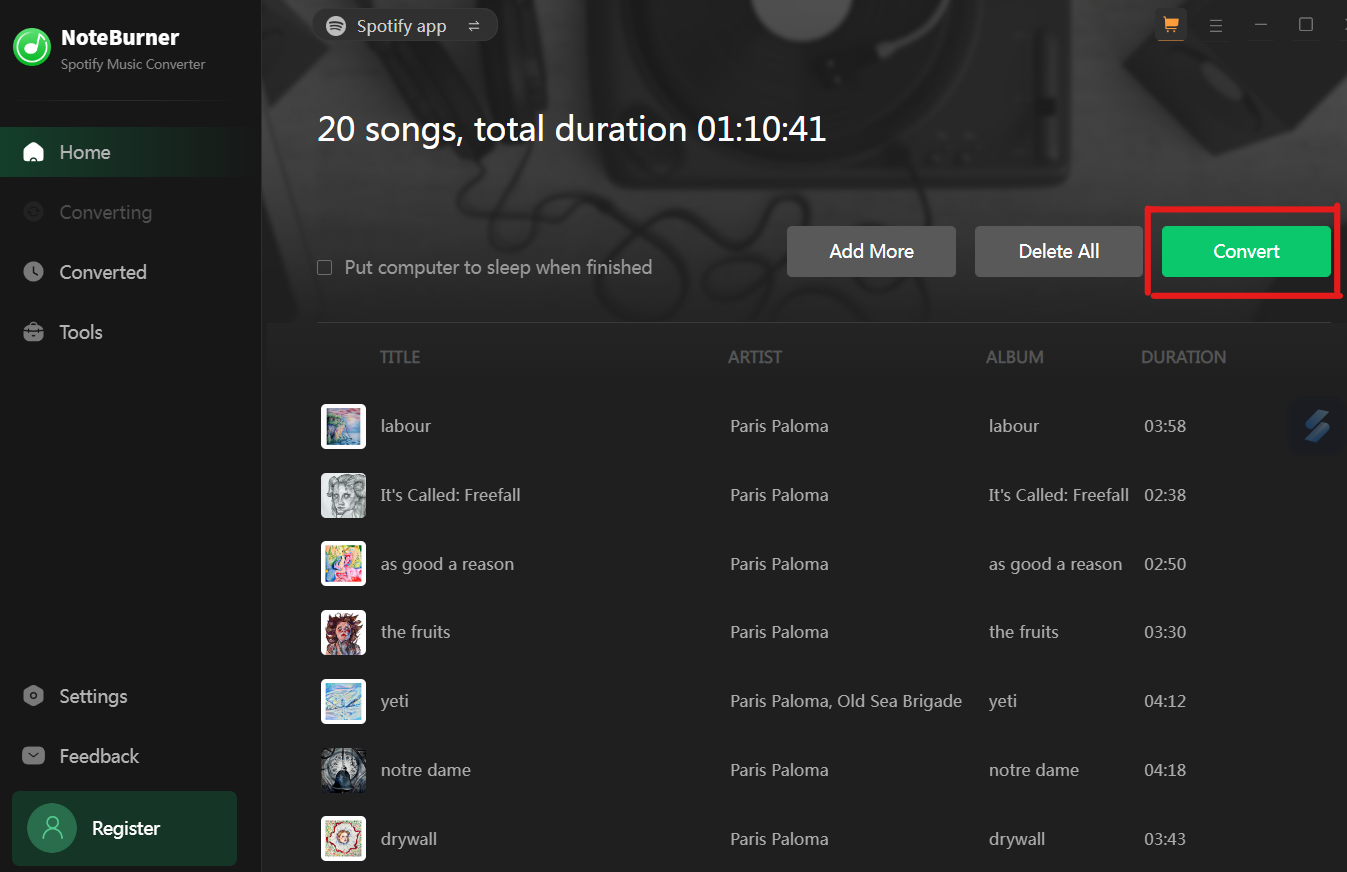
- Now, as you’re set, return to the dashboard and tap on convert.
- You can view the converted songs by clicking the Converted tab, and as the process is complete, they get saved to your set location.
Ways To Burn Spotify Songs To CD
Now that you have converted your Spotify playlist/songs to an unrestricted format, it’s time for you to put them into CD.
Method 1: Using iTunes
iTunes is a renowned music player on the Mac. However, if you’ve a Windows PC, worry not as it’s also available on the Microsoft Store.
Here’s what to do:
- Open iTunes on your computer.
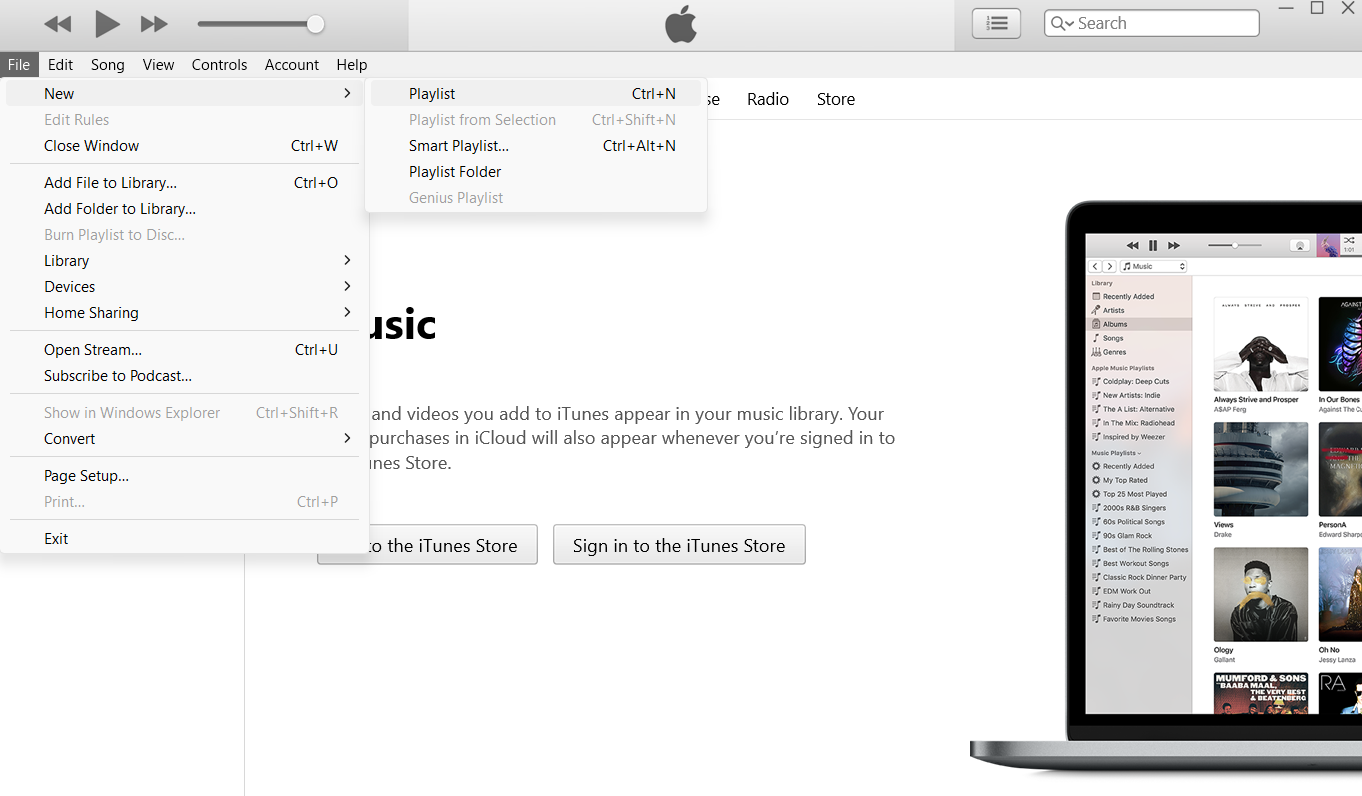
- Find and click File > New > Playlist to create a new playlist. I named the playlist “Demo” for demonstration purposes.
- Insert a writable blank CD into your computer.
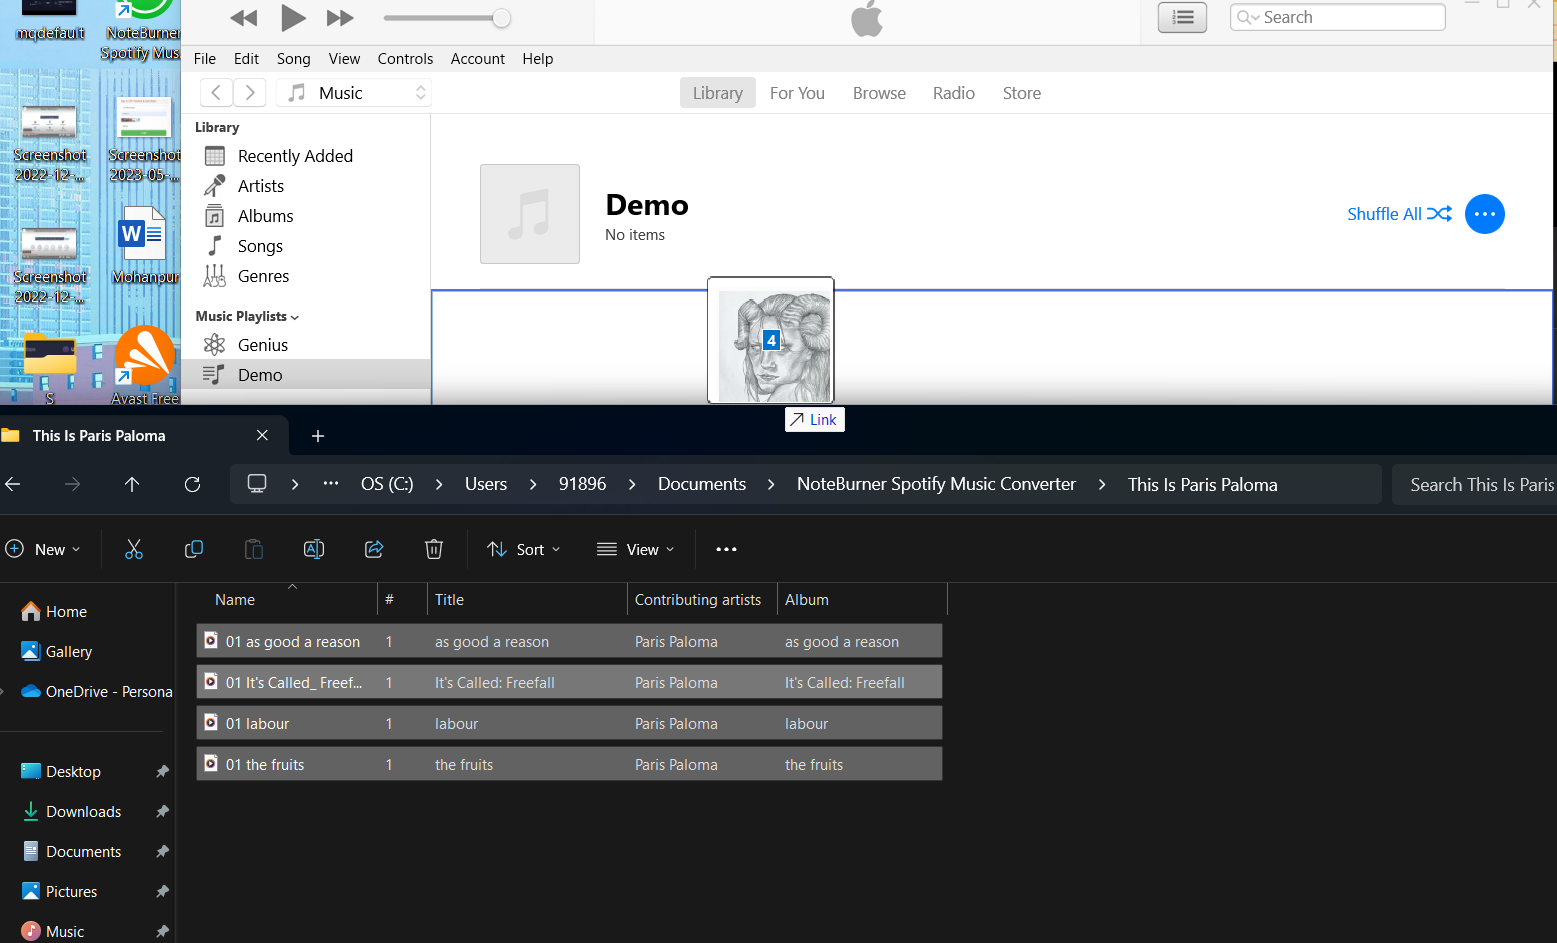
- Drag the songs downloaded from the file converter into the playlist.
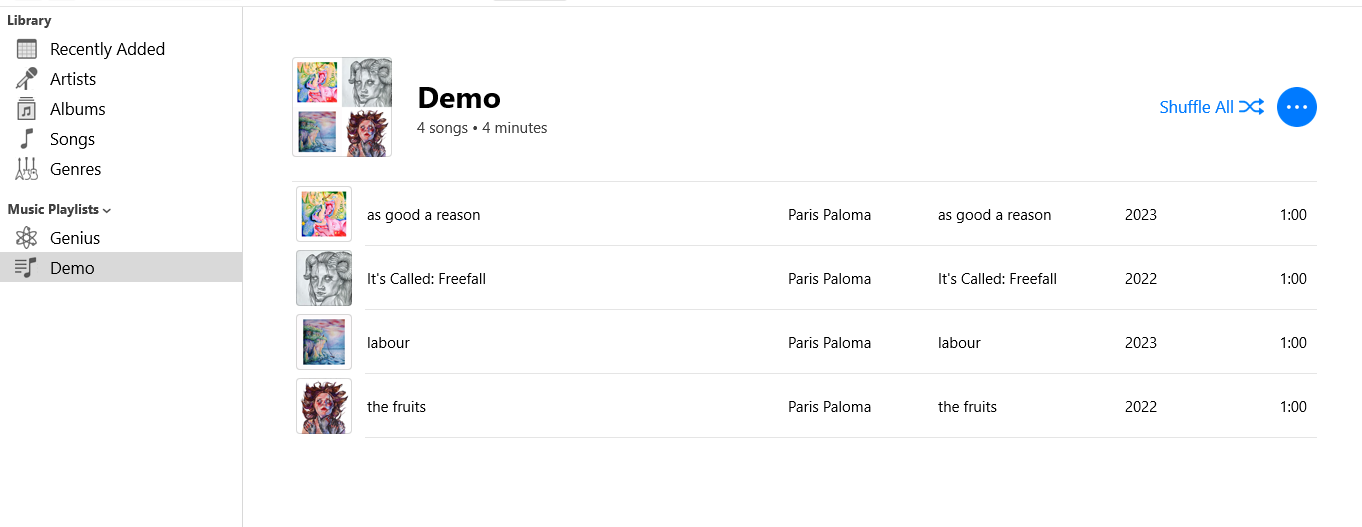
- The songs are saved into your created playlist.
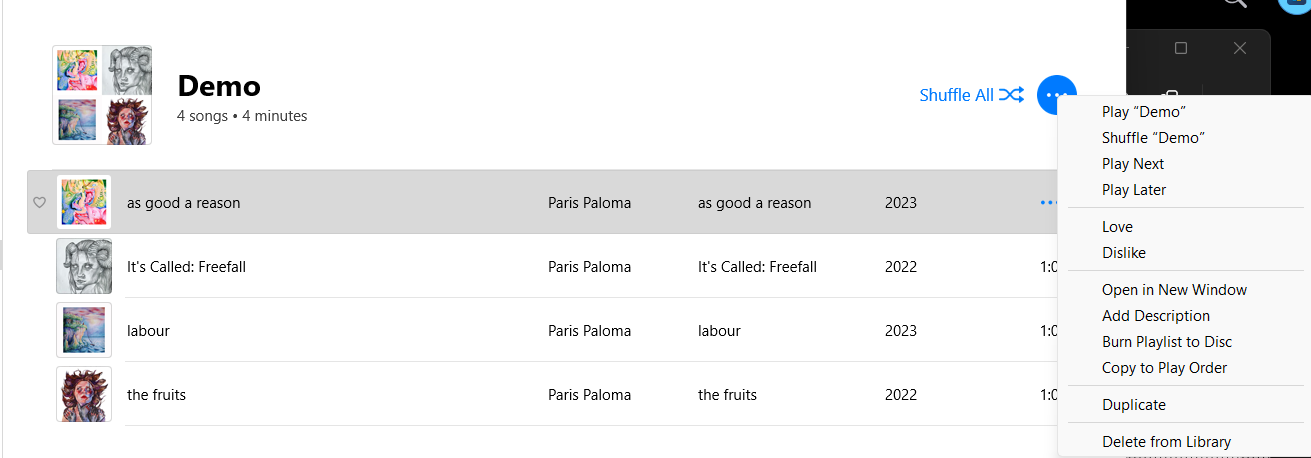
- Click on the three dots in the top right corner, followed by the “Burn Playlist to Disc” option.
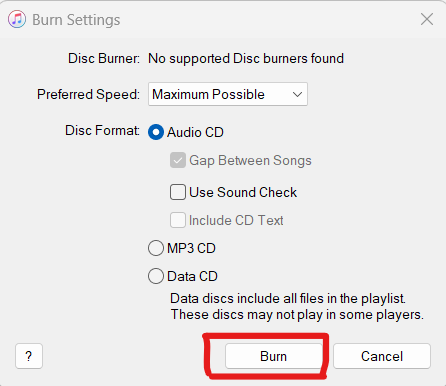
- Adjust the settings, including “disc format” and “preferred speed” on the pop-up menu, and click on Burn.
Method 2: Using Windows Media Player
Windows Media Player is one of the first music players introduced with the Windows OS, and if you don’t use a Macbook/Apple computer, you should have it pre-installed on your computer.
Here’s how to use it to burn discs:
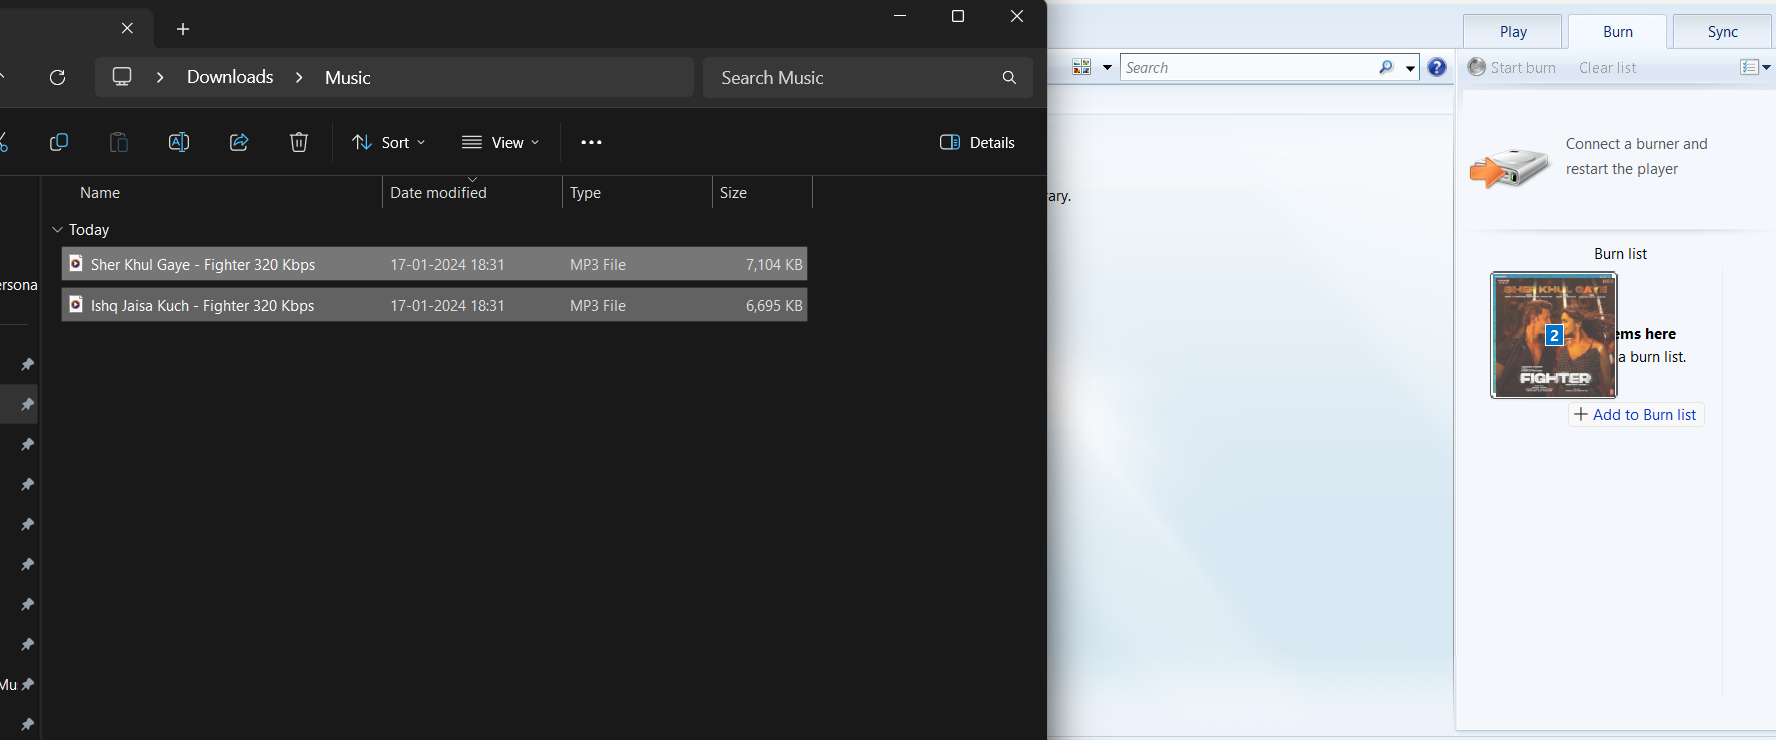
- Launch the Windows Media Player on your computer, and click the “Burn” tab in the top right corner.
- Insert a writable CD into your computer.
- Drag the song(s)/playlist you want to burn in the blank section below it.
- As you paste the songs, the app will burn them automatically. It takes a few minutes to complete.
Method 3: Using VLC Media Player
VLC is a free and open-source cross-platform media player that plays most multimedia files and various streaming protocols. You can also use it for making a CD from Spotify.
Here’s how:
- Launch the VLC media player on your PC.
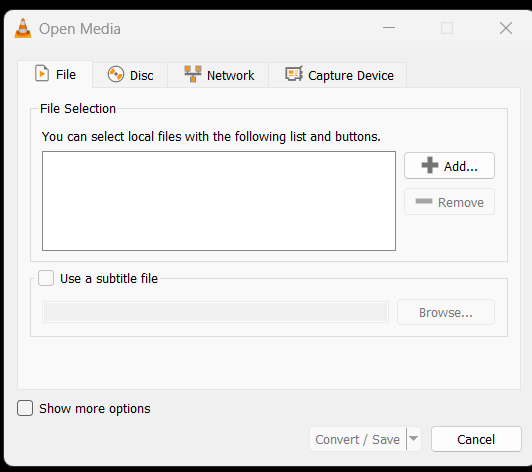
- Find and click the Media tab, followed by the “Convert/Save” option.
- Drag and drop/select the required audio files by clicking on the “add” option.
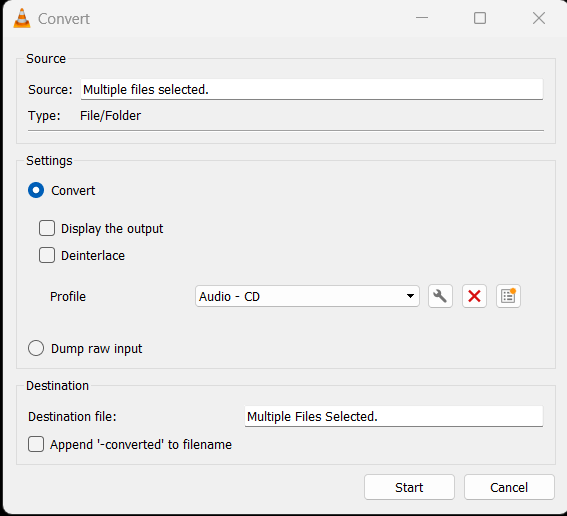
- In the “Profile” dropdown menu, select “Audio CD”, and “Start” to initiate the burning process.
Method 4: Using ImgBurn
Aside from my previously-mentioned platforms, you can use a free, lightweight disc-burning software for Windows, ImgBurn. You can use it to copy data and files directly to your CD in a few simple steps as follows:
- Install and launch the ImgBurn software on your computer.
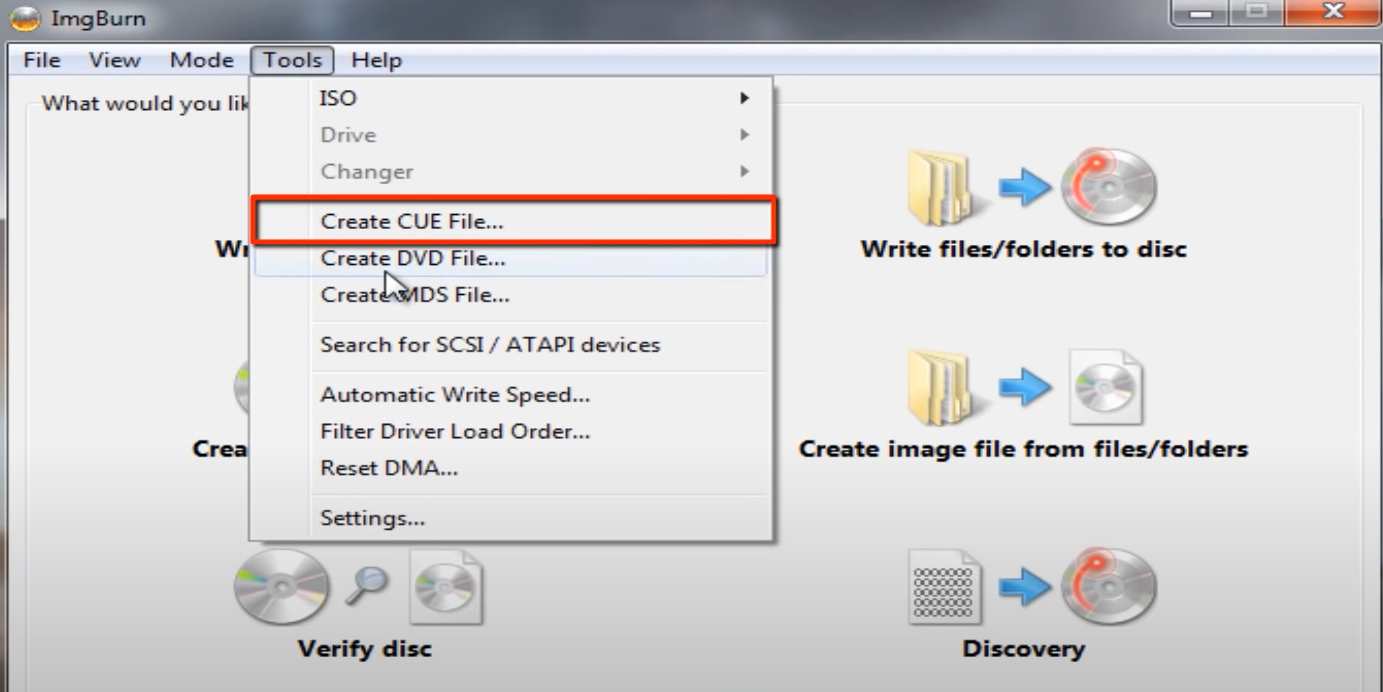
- Find and click the “Tools” tab, followed by “Create CUE file” on the dropdown menu. Or you tap on the “Mode” tab and click on the “CD” icon to do the same.
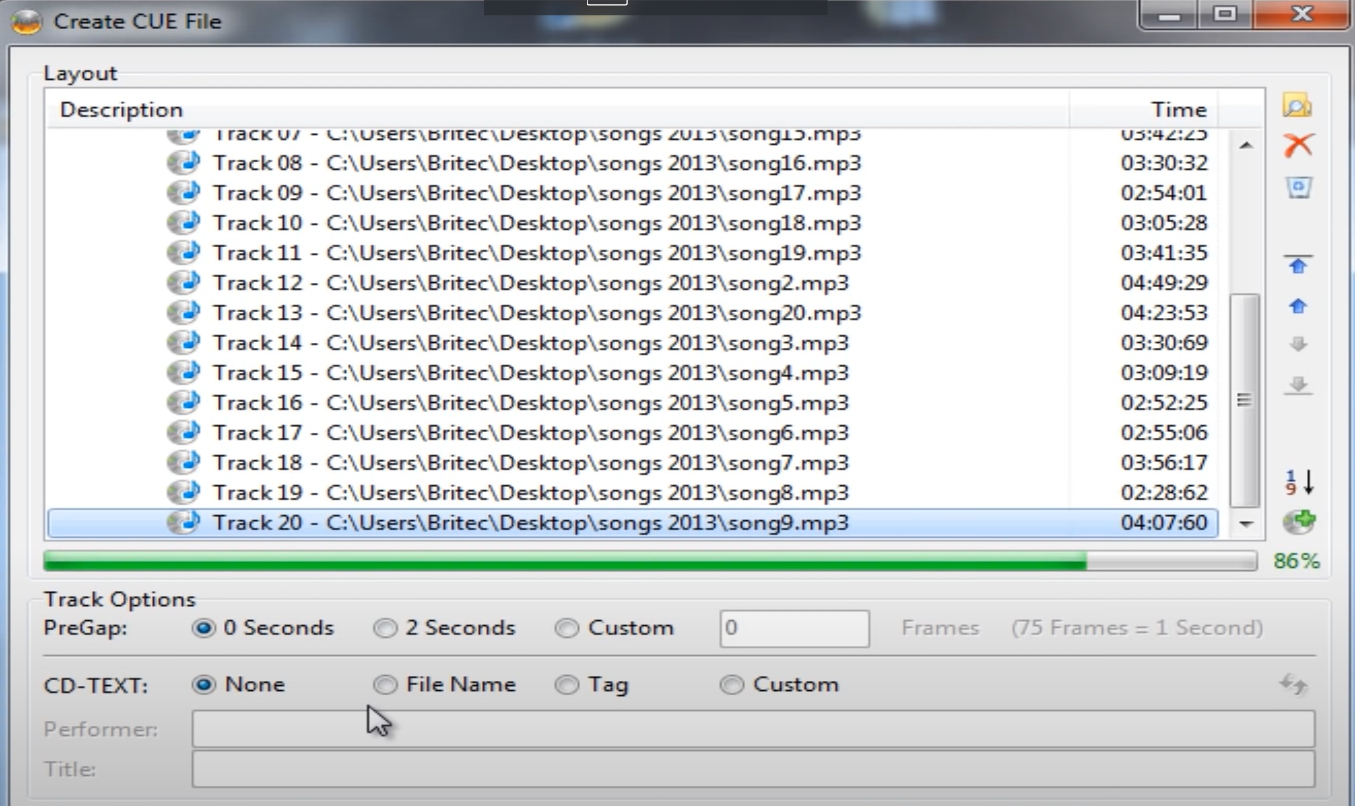
- In the opened window, click the file icon on the top left corner to browse and select the desired audio files you want to burn, and tap on “Open”.
- As the files are added to the ImgBurn app, change the “Track Options” for PreGap & CD-TEXT as needed, and tap on “OK”.
- Save it on your computer.
- Insert a writable CD into your computer, press the burn icon, and click on the “Yes” button to start the process.
That’s it. You can enjoy them whilst offline, particularly in older vehicles that lack Bluetooth or direct streaming services like Android Auto or CarPlay. And with your favorite songs now on CD, you can play them anytime, even if they’re unplayable or greyed out on the streaming platform.
Frequently Asked Questions
In general, burning a CD for personal use is permissible, but distributing copies, whether free or charged, without the copyright holder’s permission or licenses is illegal.
The number of songs a CD can accommodate depends on the song formats and capacity of the disc. Typically, the maximum limit for the number of songs is 99, with a maximum total playing time of 80 minutes.
The time it takes depends on two factors: how much information you’re burning and how fast you’re burning. For instance, if you’re burning a file of around 650-700 MB in size at 1X, it takes around 74 minutes to burn.
If you’re using media player software like VLC, iTunes, and others, these programs often retrieve and display track information when a CD is inserted. If not, you can use third-party software or manually enter the corresponding titles.
Wrap Up!
Since you can’t burn CDs directly from Spotify, you must use a third-party application for that. But things aren’t as difficult as you might have anticipated. Have a try, you’ll find out. If you have any queries or suggestions, please comment below.
With that, I’d like to bid adieu. Will see you in another such information-based guide. Till then, goodbye and take care!


Leave a Reply