Adding voice to the presentation takes it to a whole new level and differentiates you from the herd. There can be a variety of reasons why you might want to add voice to Google Slides. For instance, you can make a presentation even without physically being there.
The only way to add a voiceover to Google Slides is by adding an audio file to it. However, you can add the audio file in three different ways which I will discuss in the article below. So let us get into it!
1. By Adding an Audio File to Google Slides
You can record the voice and download it as an audio file which you can later use as a voiceover in the presentation.
Here are some simple steps to follow:
- Go to your slides and the final presentation from the slideshow mode.
- Note down points you want to include in the voiceover and then prepare a script.
- Once you have the final script, go to any voice recording app or website to record audio.
Note: You can use the stock apps on Windows or Mac or use any third-party app or web resource to record the audio. - Download the recorded video on your computer. Note that you can crop, edit, or enhance the audio clip based on the features available on the tool you are using to record the voiceover.
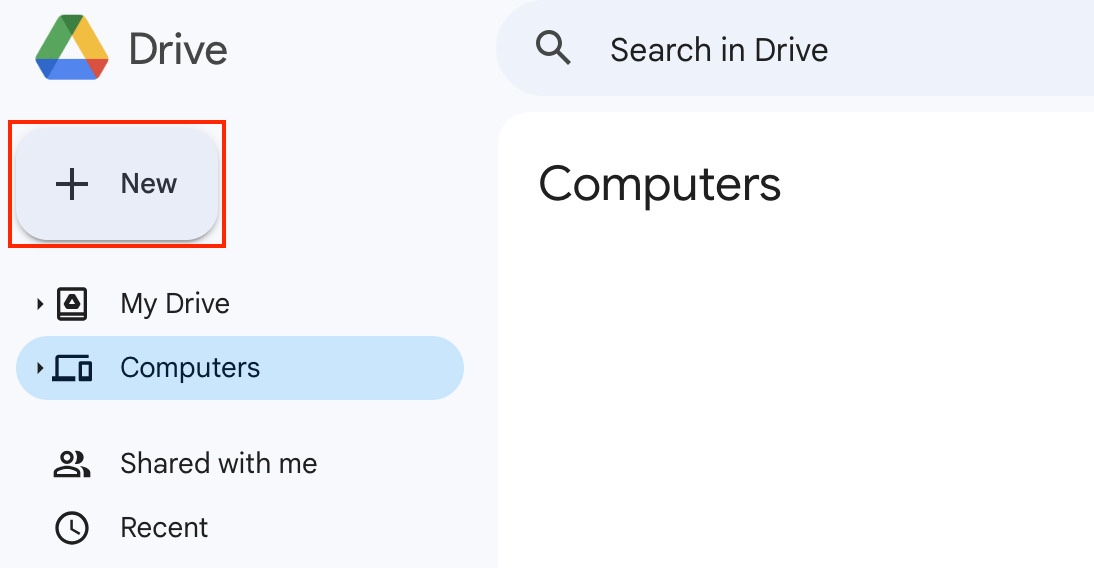
- Open Google Drive and click on “+ New”.
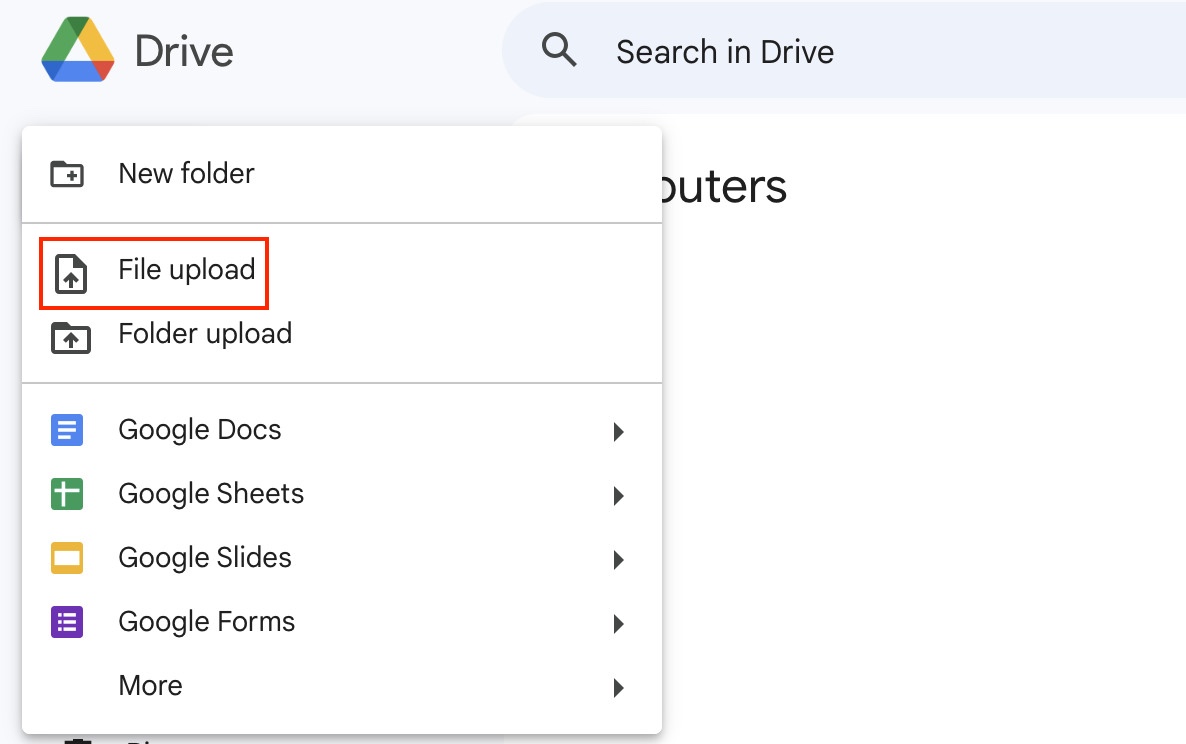
- Upload the audio file to your Google Drive folder and name it appropriately so that you can locate it easily.
- Go to your Google Slides file and select “Insert” from the main menu.
- Select “Audio” from the dropdown.
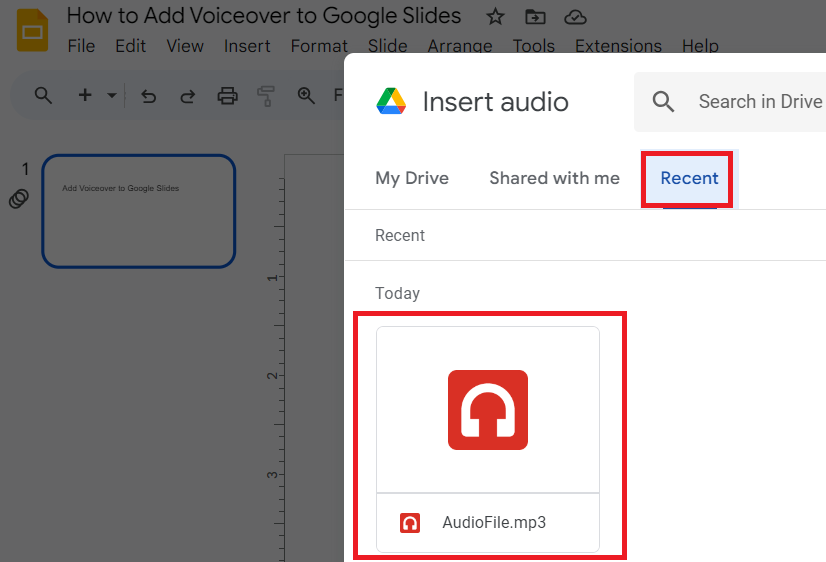
- Locate the folder on your Google Drive where you uploaded the audio file. Alternatively, you can use the “Recent” tab to access the most recently added files on your drive.
- Select the audio file upon locating it.
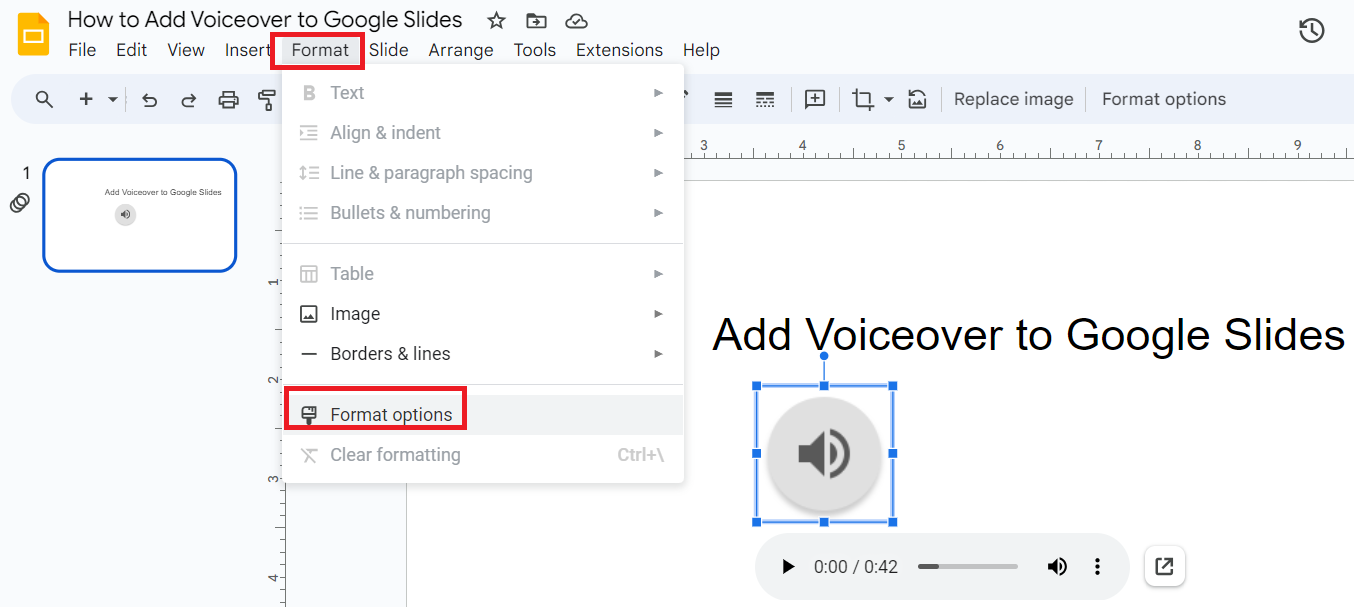
- Format or reposition the audio icon which appears upon adding an audio file to the slides.
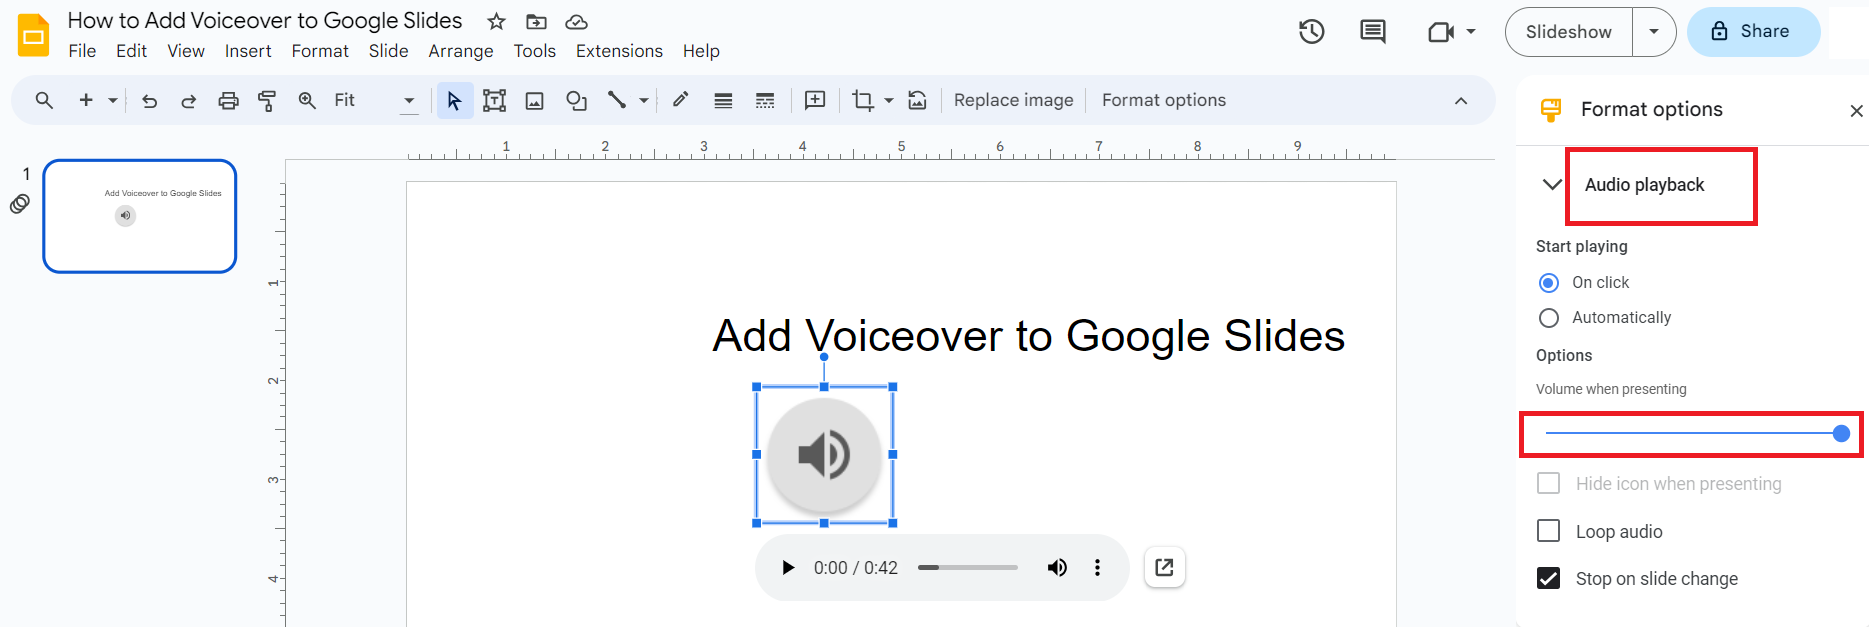
- Select “Format” from the main menu and select “Format Options” to format the audio file within the editor panel which will appear on the right side of your screen.
- Select the playback mode, volume levels, and speed of your audio file.
- Preview your presentation from the slideshow mode.
2. By Screen Recording
This is entirely different from what we just did in the first method. This method converts your presentation into a video. You can definitely use the video as a presentation but you have to be mindful of the playback controls and the animations and transitions.
One of the best ways to record a screen with you in it is through tools like Google Meet or Zoom. Here is how you can add a voiceover to via them:
- Go to your slides and the final presentation from the slideshow mode.
- Note down points you want to include in the voiceover and then prepare a script.
- Start a call using Google Meet or Zoom.
- Open your Google Slides file and start the presentation.
- Start the screen recording by pressing the record button. The location of the button varies based on the tool you are using.
- Read the script as the voiceover while the presentation appears on the screen.
- Export the recorded video and save it locally on your computer.
3. By Using Third Party Text-to-Speech
This method is very much similar to the first one. The only difference is instead of using your own voice you can use a different voice with the help of smart text-to-speech tools.
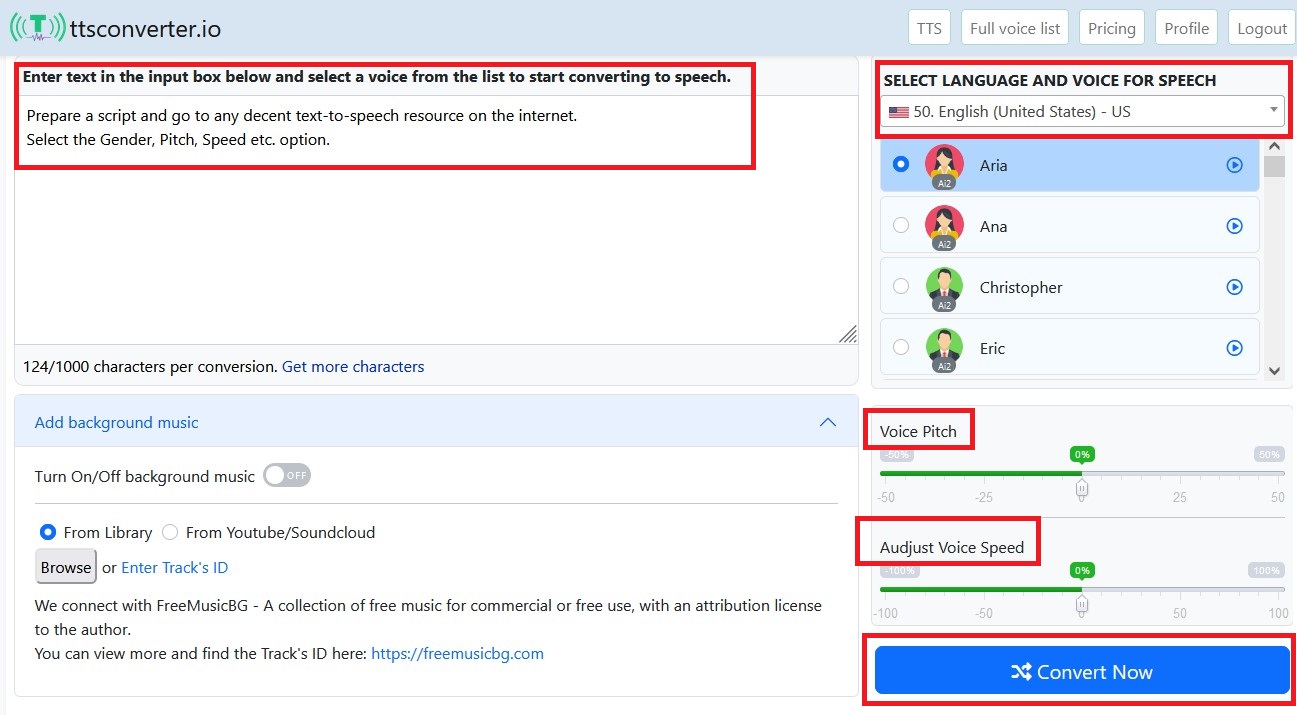
There are many third-party text-to-speech tools available on the internet where you can choose the gender of the speaker, accent, style, and tone of the voice as well. Here is how you can use the text-to-speech feature to add a voiceover:
- Go to your slides and the final presentation from the slideshow mode.
- Note down points you want to include in the voiceover and then prepare a script.
- Go to any decent text-to-speech resource on the internet. Note that the platform you choose to use for the text-to-speech must allow you to download the audio as well.
- Select the gender, accent, speed, tone, and style of voice based on how you want it and based on the tool or resource you are using.
- Copy and paste the script in the text section of the text-to-speech tool.
- Hit the play button to allow the platform to convert your text into a speech.
- Make adjustments like speed, volume, and other settings if available.
- Download the file and save it locally on your computer.
- Open Google Drive and click on “+ New” and upload the audio file to your Google Drive as shown previously.
- Open your Google Slides file and select the “Insert” tab in the main menu.
- Select “Audio” from the dropdown.
- Locate the folder on your Google Drive where you uploaded the audio file.
- Format or reposition the audio icon which appears upon adding an audio file to the slides.
- Select “Format” from the main menu and select “Format Options” to format the audio file.
- Select the playback mode, volume levels, and speed of your audio file.
- Preview your presentation from the slideshow mode.
Frequently Asked Questions
You can record a voiceover using any default app or from any resource on the internet. Download that audio file on your computer. In your PowerPoint file, go to “Insert” and select “Audio” from the dropdown. Select the downloaded file and adjust the speed and volume levels.
Unfortunately, Google Slides does not allow you to directly record audio on it. You have to record the audio separately, save the file, and then add the audio file to the Google Slides file.
Select “Slideshow” on your file. In the slideshow mode, move the cursor to the bottom right corner where you will find the three dots (…). Click on that and select “Autoplay” from the pop-up. Select “Play” and then select “Loop” from the following menus to play the slides on a loop. Read the complete guide.
Wrap Up!
So there you have it. Adding voiceover to slides in Google Slides is quite an easy task but the only thing is you have to use third-party tools or other built-in apps to record the audio. The screen recording feature is helpful but it takes away the essence of the slideshow of your Google Slides file.

Leave a Reply