A vertical line can be useful for separating sections of text or making a simple table structure. It can also enhance the visual appeal, and readability, and eventually help organize your documents better.
While Google Docs doesn’t have a tool specifically for adding a vertical line, it can easily be accomplished with its built-in drawing tool, table, and columns. In this guide, I will explain all three ways with steps and screenshots.
Let’s jump right in!
Method 1: Using Drawing Tool
For those who prefer a hands-on approach, drawing a line is an excellent way. Here’s how to proceed:
- Place the cursor in the desired position for inserting the line.
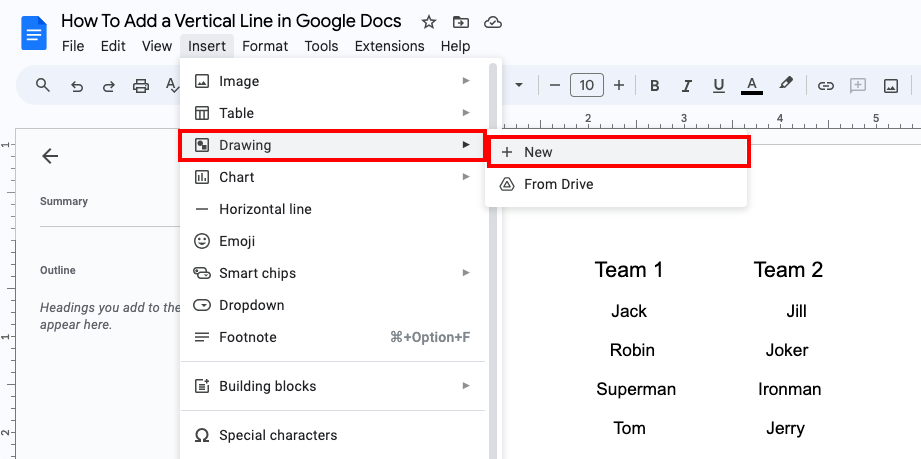
- Go to the “Insert” option from the toolbar.
- Select “Drawing” from the dropdown and go to “New”.
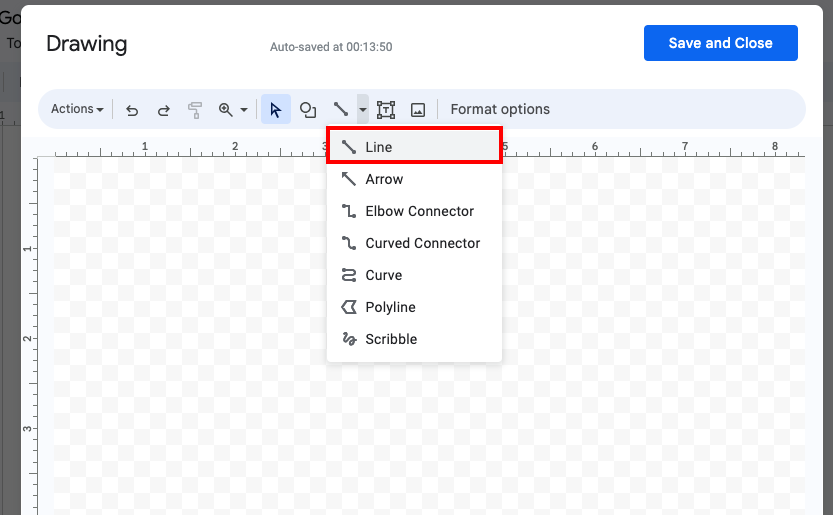
- After selecting New, a drawing box will appear. Select the “Line” from the toolbar.
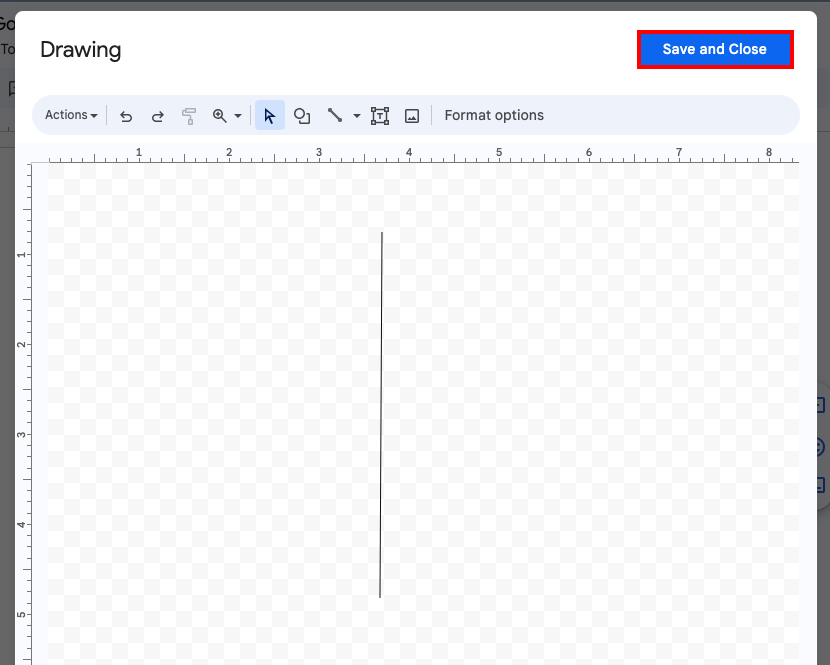
- Once satisfied with the drawn line, click Save and Close.
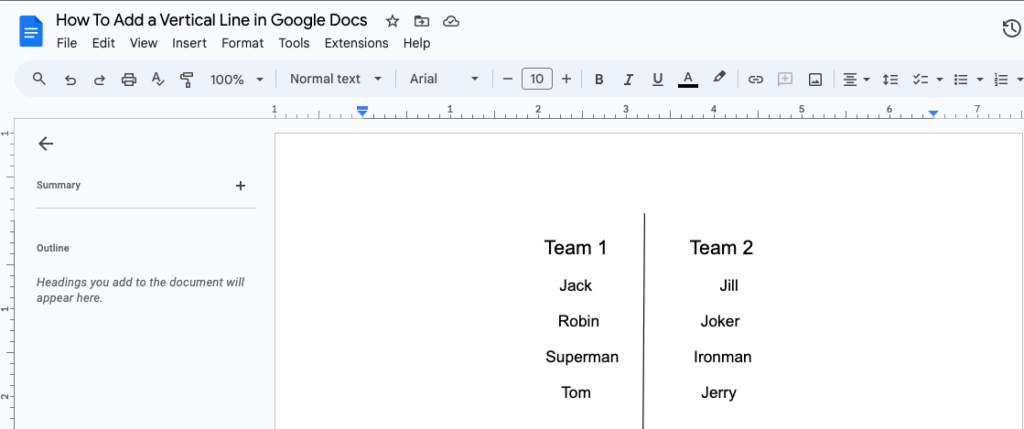
- Done. The line will appear in your document. Here’s how it would look:
Method 2: Using Table
Using tables to insert a vertical line is slightly tedious. However, it will let you organize your into neat sections. Follow the below steps:
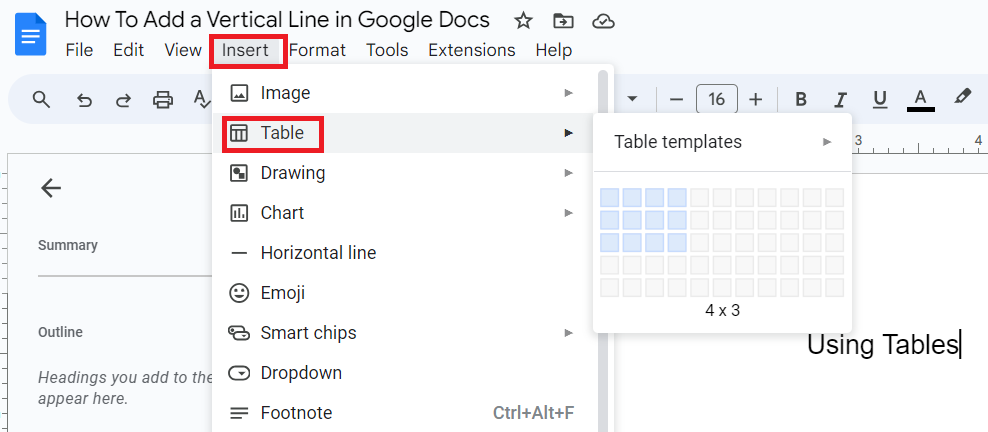
- Go to the “Insert” menu from the toolbar.
- Select the “Table” option and add the number of columns and rows.
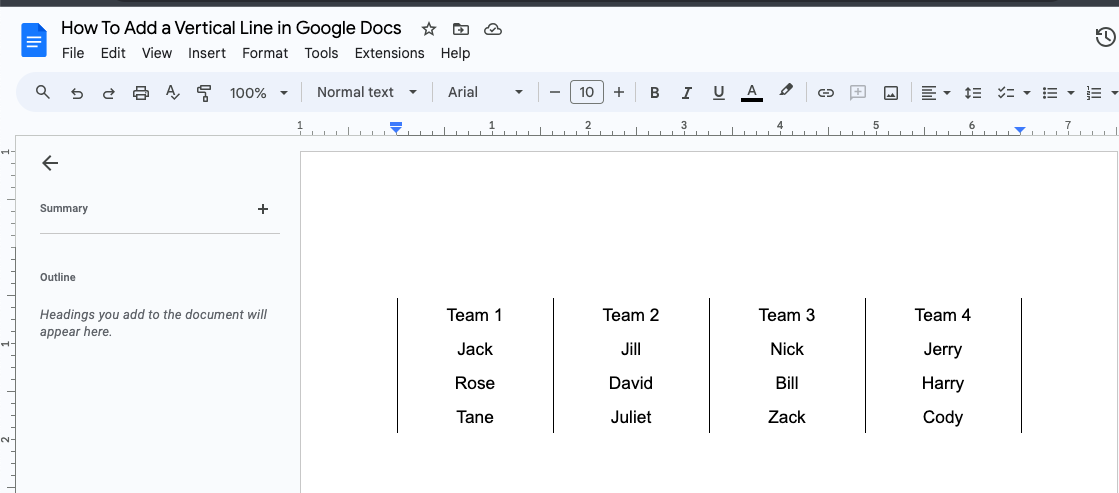
- Now press and hold the Shift key and select all the table borders except the one you want in your document.
- Go to the Border width option from the top menu and choose 0pt.
- Now, only the vertical line from the table remains, and you can customize its color or width.
Note: If you need to compare or analyze different types of data, it’s better to create tables in Google Sheets instead of Google Docs, as you can create different types of tables with it.
Method 3: Using Columns
This method helps create a more streamlined visual and maintains a professional appearance. Here’s how to use it to put vertical lines:
- Select the text you want to split into columns.
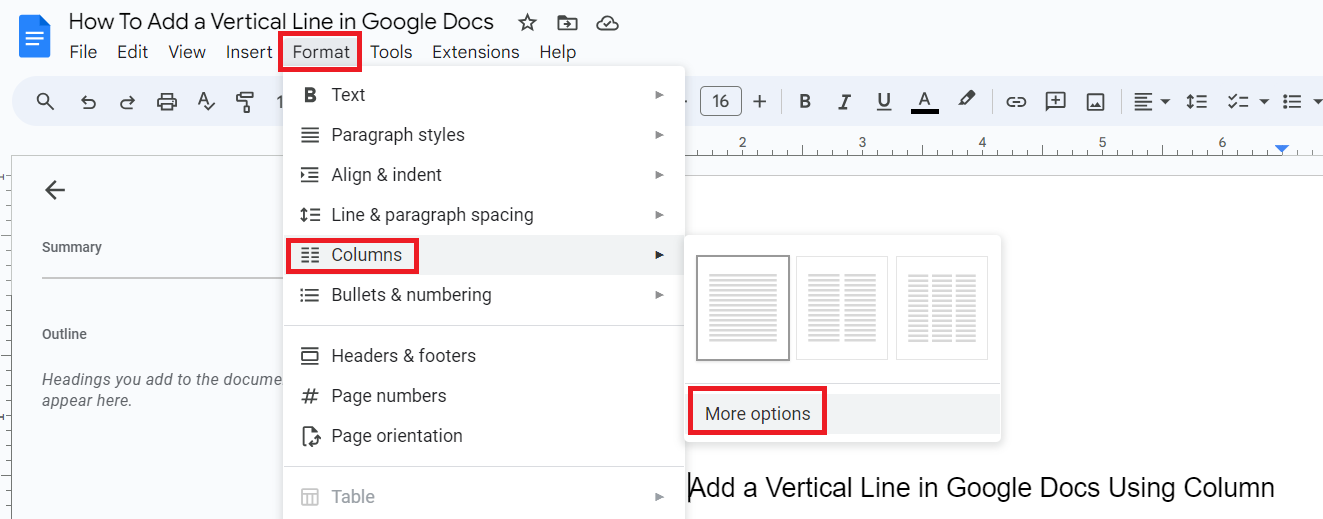
- Go to Format in the toolbar and select Columns.
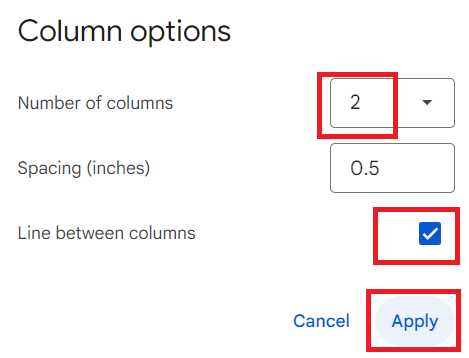
- Go to More Options and choose the number of columns you want.
- Ensure that you tick the line between the columns box.
- Done. Your text will appear in two columns.
Frequently Asked Questions
You can insert a straight line with these simple steps:
Step 1: Place the cursor where you want the straight line to appear.
Step 2: Go to the Insert option from the toolbar.
Step 3: Select Drawing from the dropdown and go to New.
Step 4: Head to the top toolbar and go to the Line option.
Step 5: Select the line type and draw it in the box.
Step 6: Click Save and Close.
Step 1: Go to the Insert menu.
Step 2: Select the Horizontal line from the dropdown.
This way, you can divide your data in Google Docs using a divider line.
Yes, you can. Here are two easy steps:
Step 1: Go to the Insert menu.
Step 2: Select the Horizontal line from the dropdown.
Wrap Up!
That is it. Whether you use the drawing tool, columns, or tables, vertical lines will separate your content and stand you apart. So, the next time you want to create a neat and structured document, don’t forget to add it.
Leave a Reply