Are you preparing a presentation for school, college, or work? Do you need to ensure you cover all slides within a specific timeframe? If yes, you can add a timer to your Google Slides.
While a built-in feature does not yet exist, few workarounds help accomplish this. In this article, I will show two methods for inserting a countdown clock into your slides, allowing you to manage time better.
So, let’s get going!
1. By Inserting a Video
There are tons of countdown videos available on the internet. You can either download them locally on your desktop or just look for countdown videos on YouTube, copy the URL, and then add them to your slides.
Here’s how do it step-by-step:
- Open your Google Slides file where you want to add a timer.
- Click on the first slide.
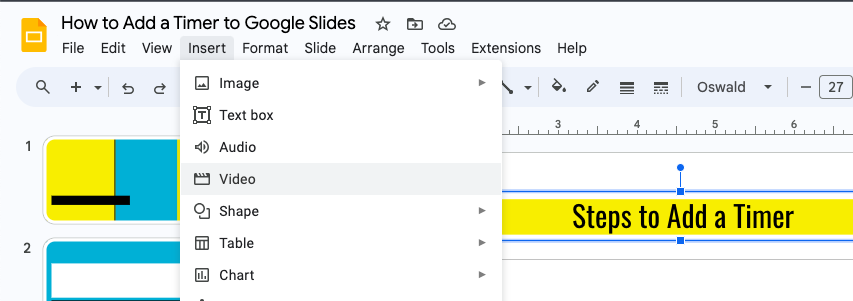
- Select “Insert” from the main menu and select “Video” from the dropdown.
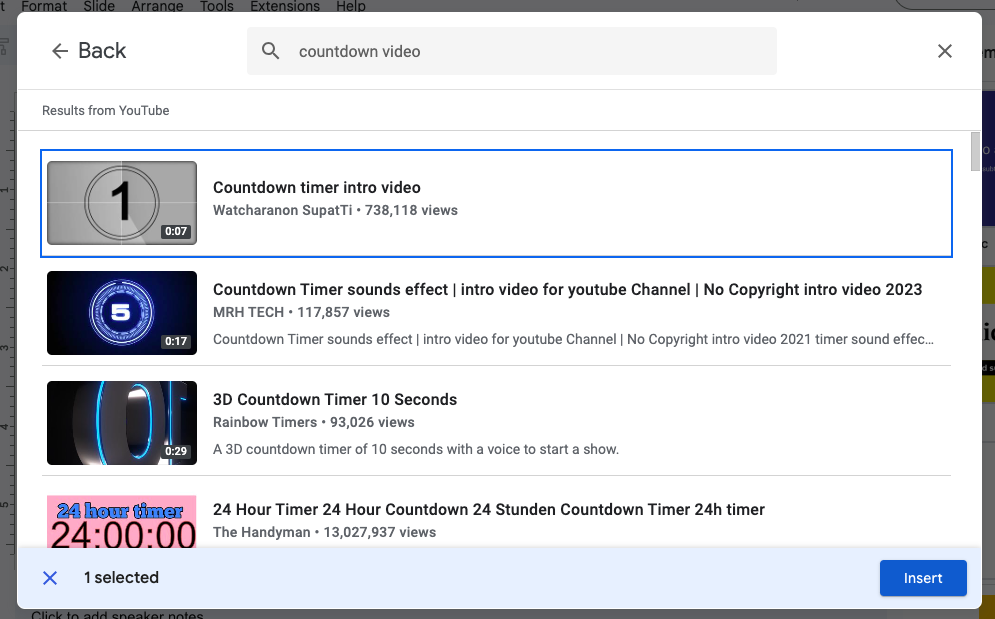
- Search and insert countdown videos from YouTube.
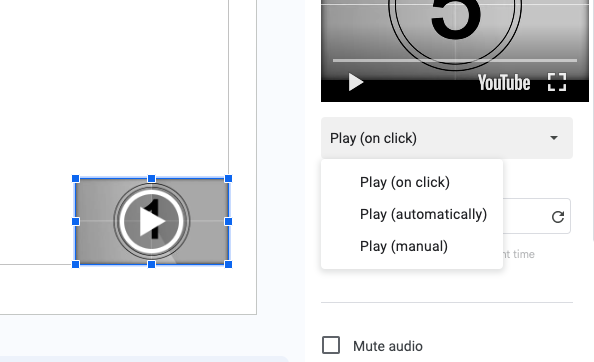
- Drag and drop the video thumbnail to where you want to place the timer. I suggest keeping it on the bottom right of the slide.
- Right-click on the video and select “Format options”.
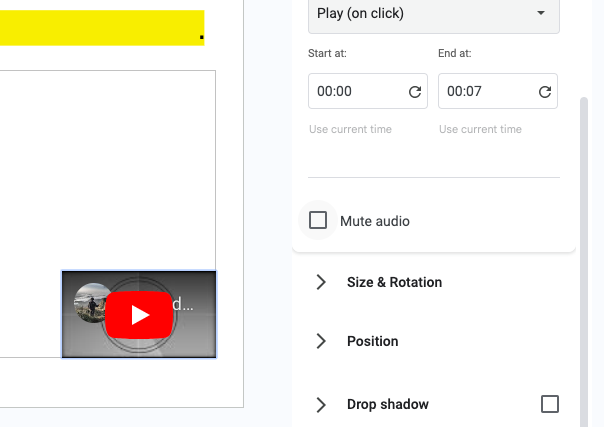
- Select the playback action and you can make it play automatically or on touch (manual).
- Mute the audio in case there is any audio on the playback or in case you have a voiceover to your slides.
- Repeat the above steps for all the slides. You can also copy and paste the video on each slide.
- Preview your slides with the slideshow option.
Voila! You have successfully added a countdown video right there on your slides which not only accurately counts the timer but also displays the countdown as a video playback.
Now, let us take a look at an alternate method of adding timers for Google Slides.
2. By Using Extensions
For everything that the stock apps do not offer, there are always third-party add-ons like extensions and plugins. There are many decent timer extensions on Chrome browser which you can use for your Google Slides. Here is how:
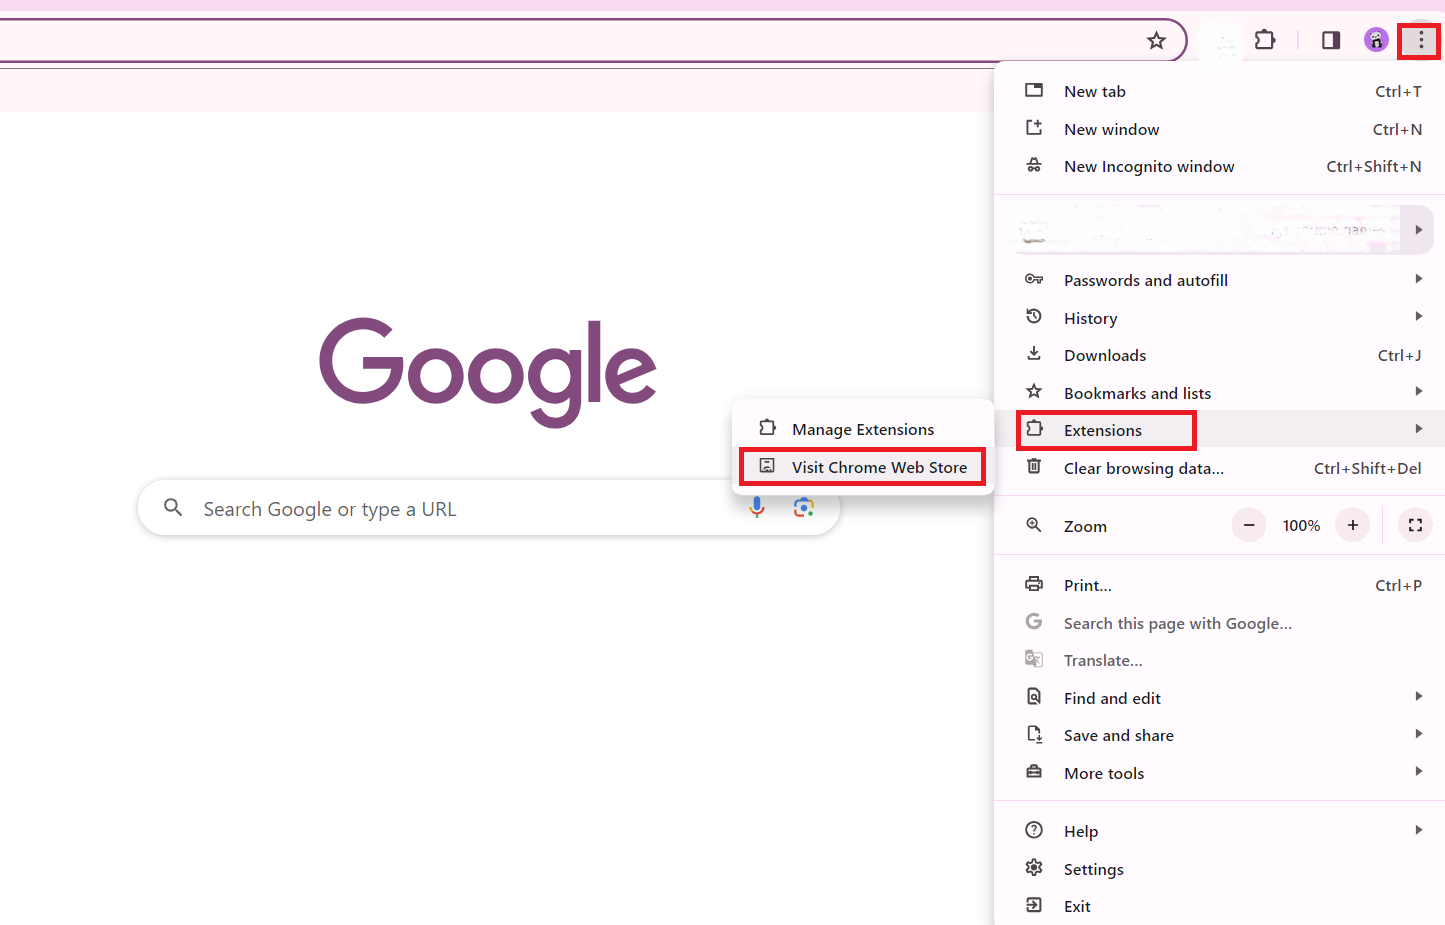
- Click on the ellipsis (three dots) on the top right of your Chrome browser and then select Extensions > Visit Chrome Web Store.
- Search for timer or countdown-related extensions.
- Add the desired extension to your browser.
- Open your Google Slides file where you want to add a timer.
- Click on the first slide.
- Go to “Extensions” from the main menu.
- Select the extension you just downloaded for the countdown.
- Adjust the settings from the extension regarding the countdown.
- Do the same for all the slides.
- Preview your presentation with the slideshow.
Note: Third-party extensions only work on browsers with installed extensions. Do not remove them.
Frequently Asked Questions
It allows you to maximize your time when you are doing a presentation and manage your time well. The display of the countdown also makes your slides fun to watch. You can always pause and resume the playback of the video in your slide which allows you to be flexible with the timing.
Select “Slideshow” on your Google Slides file. In the slideshow mode, move the cursor to the bottom right corner where you will find the three dots (…). Click on that and select “Autoplay” from the pop-up. Select “Play” and then select “Loop” from the following menus to play the slides on a loop.
Wrap Up!
We’ve all experienced it – rushing through a pivotal presentation because you lost track of time. Recently, this happened to me and I missed key points in those critical final slides. After this experience, I decided to look for an easier way to monitor timing in Google Slides.
Personally, I wouldn’t use browser extensions because they are local for your browser, and in the day and age of virtual meetings and presentations, the timer won’t work for the other person’s browser.
Adding a countdown video is not only visually better to watch but also more reliable than an extension. Apart from a timer, you can also add a transition to enhance Google Slides.

Leave a Reply