By default, Google Sheets contain 26 columns in a new spreadsheet. However, it’s possible to add more columns to manage the data better. You can insert a single or multiple columns. And just like adding rows, it is quick and easy!
In this post, I’ll walk you through a complete process including tips to customize them to streamline data management. So, follow along and dive in to unlock the potential of Google Sheets like a pro!
Adding One Column in Google Sheets
There are three different ways to do so. Let’s go through each, step-by-step.
1. Using Right Click
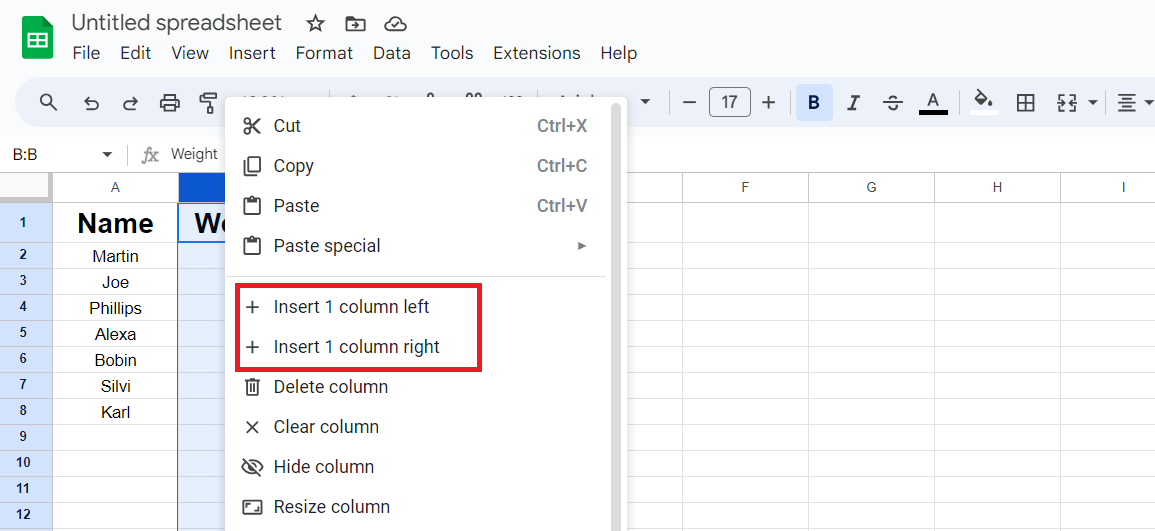
- Right-click on the column header where you want to add a new column
- Select Insert 1 column left/right wherever you want it
2. Using Insert Menu
- Select the column where you want to add a new one
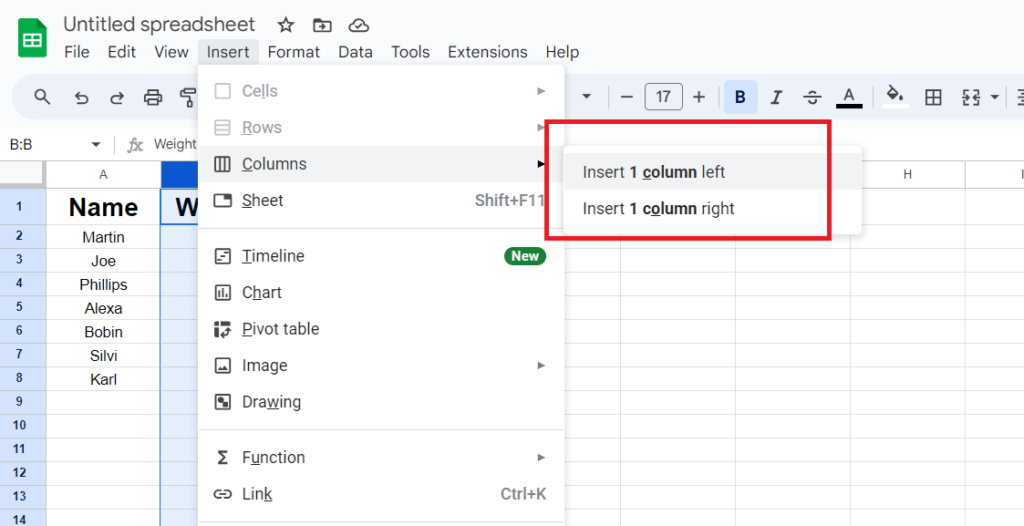
- Now click on the “Insert” option on the top menu and then on “Columns” to insert one either to the left or right
3. Using a Keyboard Shortcut
Keyboard shortcut methods are handy and the easiest way. But, they differ from browser to browser and device to device.
Shortcut for Mac:
Press ⌘ + Option + = (with columns selected), or you can also Press Command + Option + I, press C then C to insert the column on the left.
To insert the column on the right, Press Command + Option + I, press C then O.
Shortcut for Windows:
Press Ctrl + Alt + Shift + = (with columns selected), or you can also Press Alt + I, then C in Google Chrome and Alt + Shift + I, then C for other browsers to insert the column on the left.
To insert the column on the right, Press Alt + I, then O in Google Chrome and Alt + Shift + I, then O in other browsers.
Adding Multiple Columns in Google Sheets
I often add multiple columns at once to save time while dealing with a large data set. So, here are two hassle-free ways to do it:
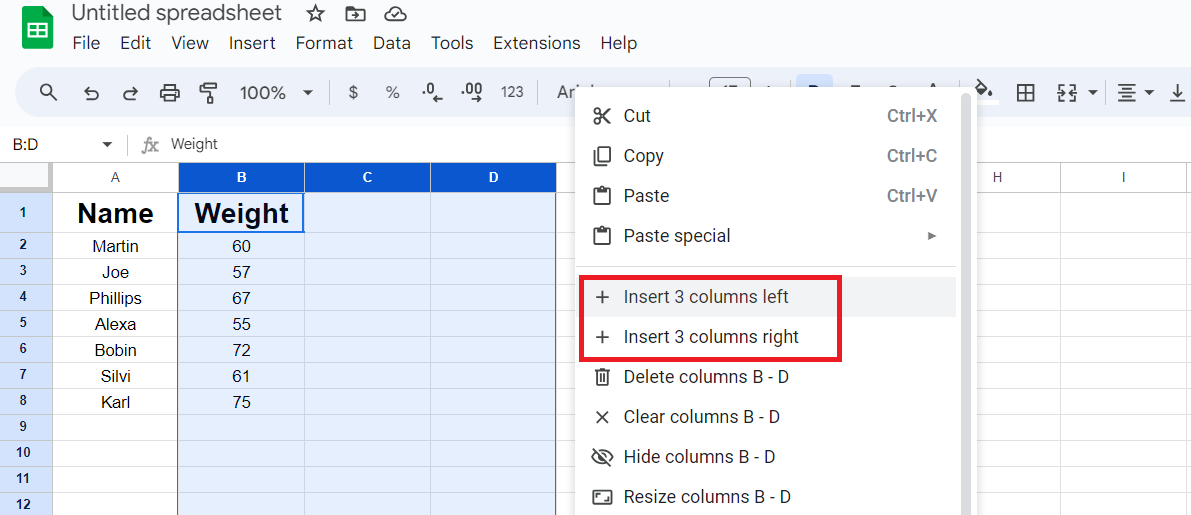
- Hold the Shift key, and select the number of columns you want to add
- Right-click and select Insert ‘n’ number of columns to left/right
Customizing Columns in Google Sheets
Customizing columns might seem insignificant. However, it improves your presentation when you want to highlight and differentiate essential data.
There are several characteristics that you can change, like size, color, and borders, to present data better.
1. Resize
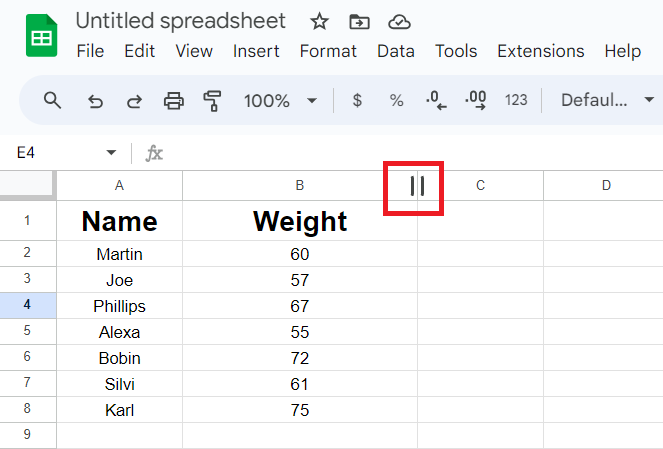
Although you can select the column you want to resize and right-click on it, the easiest way is to hover over the column name (letter) until a resizing arrow appears. Extend the column to your desired size.
2. Move
- Click on the column name for a hand to appear.
- Now drag the column to the left or right and place it in your desired location.
3. Merge
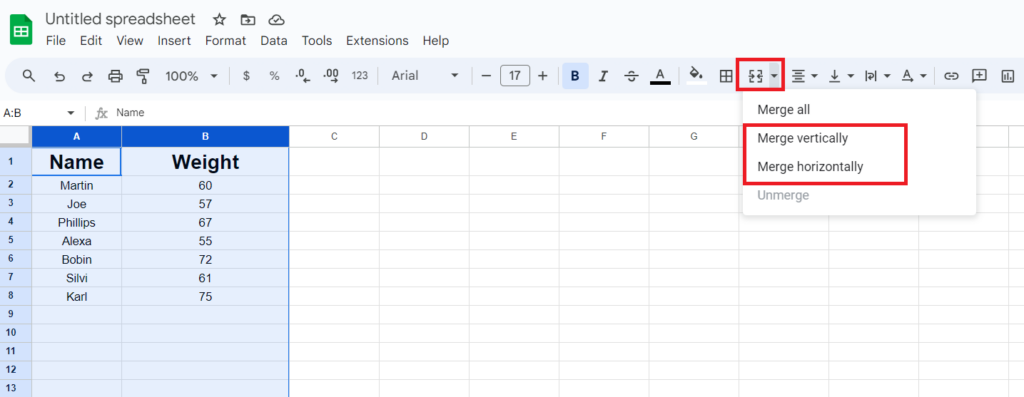
- Select the columns you want to merge.
- Go to Merge Cells from the toolbar. You can also choose Merge vertically/ horizontally from the drop-down menu next to the Merge Cells tab.
4. Border Color
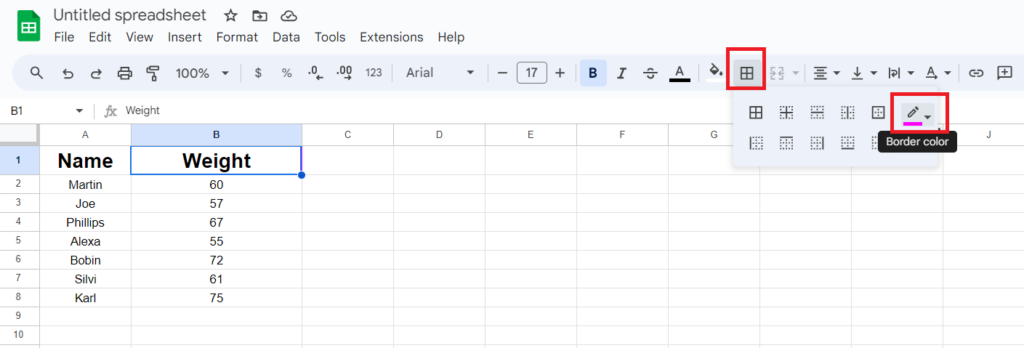
- Select a cell to change the border color.
- Go to the Borders tab and choose the border type and color.
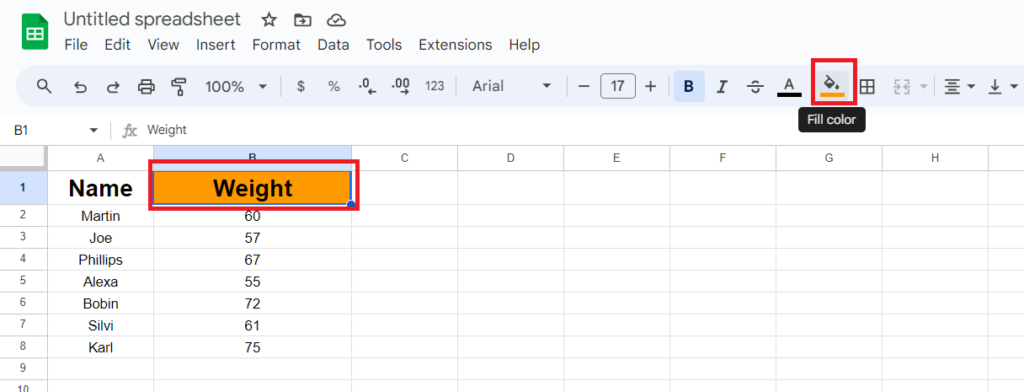
5. Fill Color
- Select the column cells you want to fill color in.
- Go to the Fill Color tab (paint box).
- Select the desired color for your cells.
6. Freeze
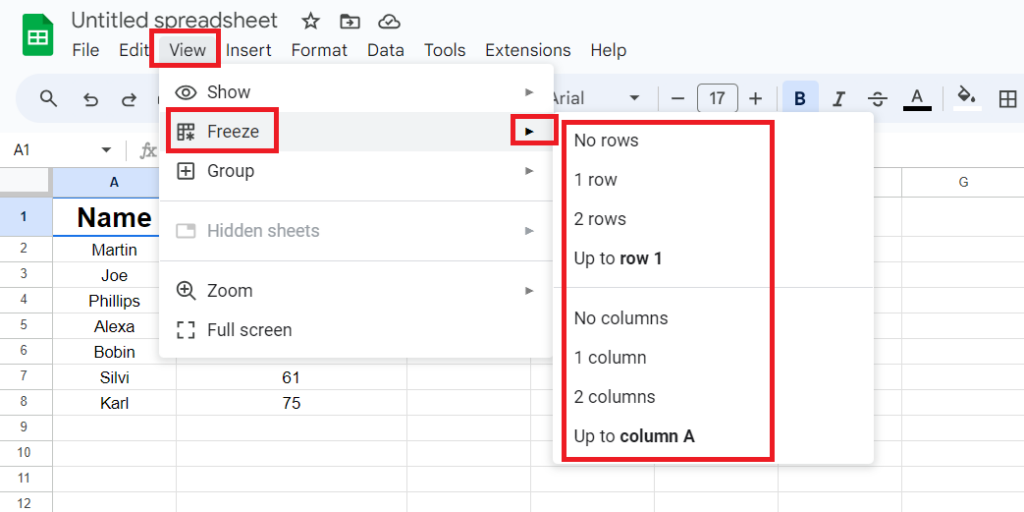
- Select the cell in the column where you want to freeze the sheet.
- Go to Freeze in the View menu and choose the desired freeze option.
Frequently Asked Questions
Right-click on the row number or column letter where you want to add new cells.
Follow these simple steps:
Step 1: Select the column letter you want to delete.
Step 2: Right-click and go to the Delete column.
If you are interested, I have also written a dedicated guide on deleting columns.
There’s no shortcut to add 100 columns at once. You’ll have to select 100 columns manually, right-click on any selected column, and select “Add 100 columns left/right.”
Wrap Up!
Google Sheets lets you explore new possibilities and is an efficient tool to organize scattered data. So, remember, with it, accommodating data doesn’t have to be a head-scratcher.
Leave a Reply