Adding and customizing cells in Google Sheets allows you to better organize and present your data. Whether you’re a student, business owner, or simply looking to upgrade your spreadsheet skills, mastering some simple cell manipulation techniques can save you time and effort.
In this guide, you’ll learn how to add a single or multiple cells and customize them. So, without further ado, let’s get into it.
1. Inserting a Single Cell
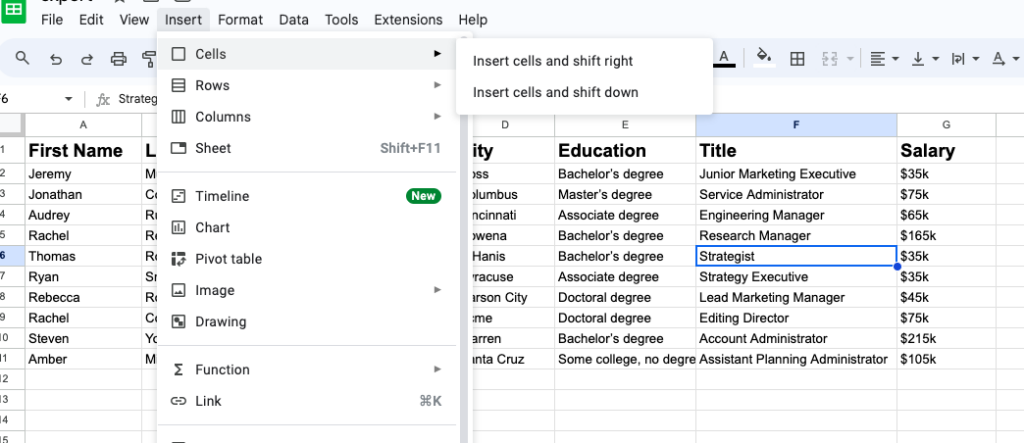
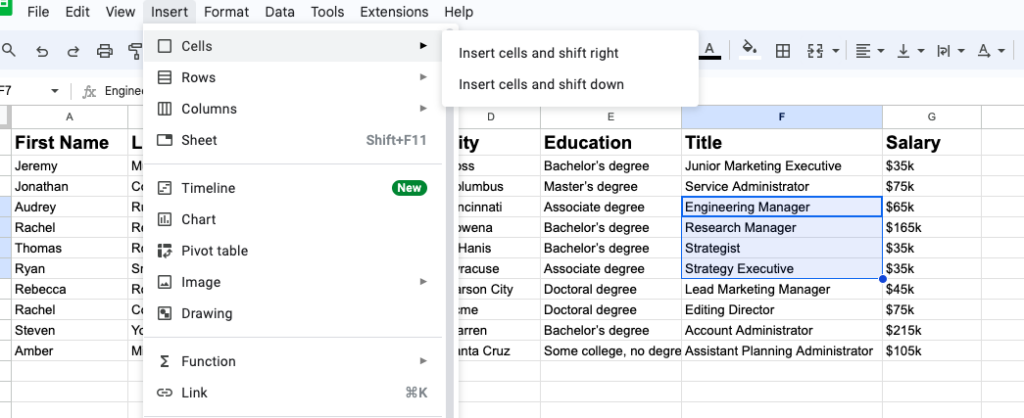
When you need to add a cell, the Insert tab provides a simple way to add a new cell. Here’s how:
- Open Google Sheets, and select the cell where you want to add a new cell.
- Go to the “Insert” tab.
- Click the “Cells” button
- Select “Insert cells and shift right” or “Insert cells and shift down” as per your requirement.
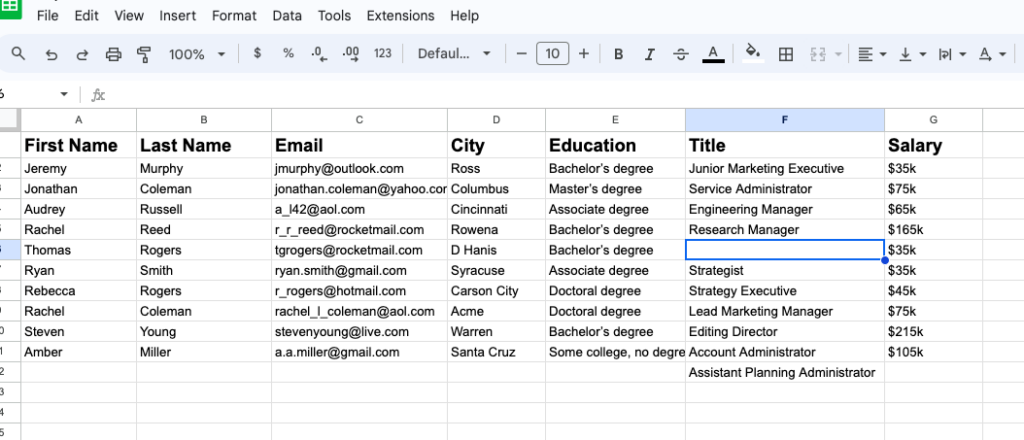
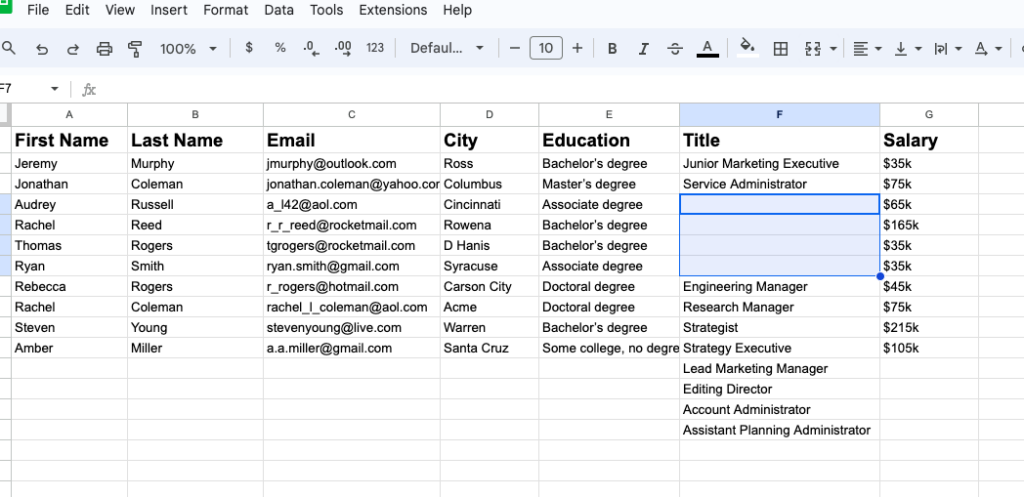
- And Done! You have added a new cell to the sheet. It would look like this:
Note: The right-click method provides a quick way to add up cells. Simply select the cell where you want to add a new cell, right-click on the highlighted cell, choose “Insert” from the pop-up menu, and then pick from the right or down option. Following this simple process allows you to swiftly add several empty cells simultaneously without navigating through tabs.
2. Inserting Multiple Cells
Adding multiple cells is as simple as adding a single cell. Let’s quickly dive into some simple steps to do it.
- To insert multiple cells, select the number of cells you want to insert.
- For example, if you want to add four new cells, select the four cells where you want to insert new cells.
- Click the “Insert” tab.
- Select “Insert cells and shift right” or “Insert cells and shift down” as per your need.
Output: Four new cells have been successfully added to the sheet.
Customizing Cells in Google Sheets
There are customization options available to change to change the size, border type, or color of your cells. Merging cells is another option to combine the selected cells, in case you want to enter data in a longer format.
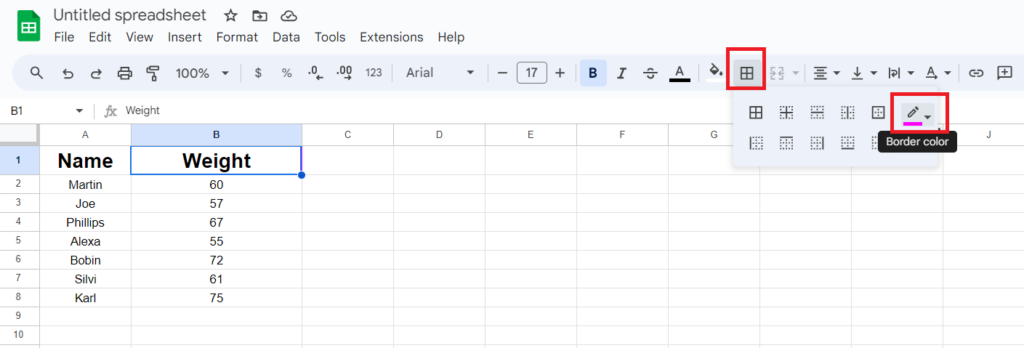
1. Border Color or Type
- Select the cell for which you want to change the border or color.
- Go to the Border tab from the toolbar.
- From the submenu, choose the color or border type.
2. Merge Cells
- Select the cells you wish to merge.
- Go to the “Merge cells” menu from the toolbar, next to Borders.
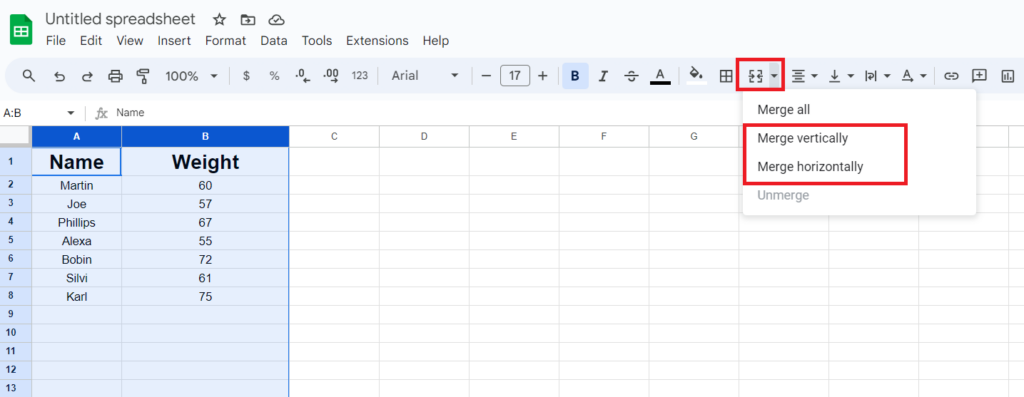
It is worth noting that, when you merge cells, only the data in the selected cell remains visible. So, double-check your data before taking any action.
3. Move Cells
- Select the cells you want to move.
- Navigate your cursor to the top of the selected cells.
- Drag the hand that appears to your desired location, to move the cells.
- If you want to separate text within a cell without moving it, you can add a line break.
Frequently Asked Questions
Step 1: Select the cells to calculate.
Step 2: Add the bottom-right of the sheet to see the sum of the selected cells.
Step 1: Select the cell where you want the sum to appear.
Step 2: Type “=” SUM (range of the cells you want to add).
The data in your cell will shift according to the option you select when adding a new cell in a row or column.
If you choose “add cells and shift right,” your selected cell will move to the right, and so on.
Yes, the simplest way to undo adding a cell is to press “Ctrl or Command +Z” on your keyboard.
Wrap Up!
While it’s easy to master the entirety of Google Sheets, these simple tips and tricks can come in handy to seamlessly manipulate and organize data and enhance efficiency. So, whether you’re managing a project or handling finances, the ways to manage data on Google Sheets are a game-changer.
Leave a Reply