Looping a slideshow works great when it is short, informative, and preferably flashing over a screen. The first thing that comes to my mind when I think of this is local clinics where they keep playing the same slides.
Brand stores, event venues, and restaurants also use these to help visitors read pivotal information again and again. But how do you do that in PowerPoint? Well, the Slide Show tab has all the answers you need.
Just so you know, you can loop select slides or an entire PPT. In this article, I will explain both. So, let’s get into it!
Steps To Make PowerPoint Loop a Slideshow
There are two parts to this process. The first involves setting the presentation to play automatically, and the second involves deciding when and how to transition from one slide to the other. Both these options are accessed from different tabs.
Let me walk you through each.
Part 1: Setting Up Auto Play
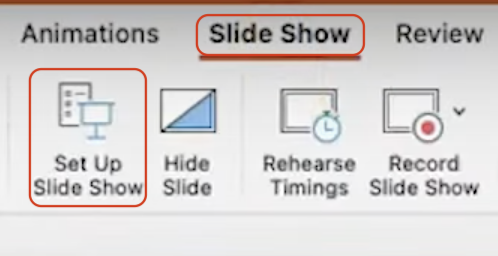
- Go to “Slide Show” from the ribbon menu.
- Click on “Set Up Slide Show” from the “Set Up” section.
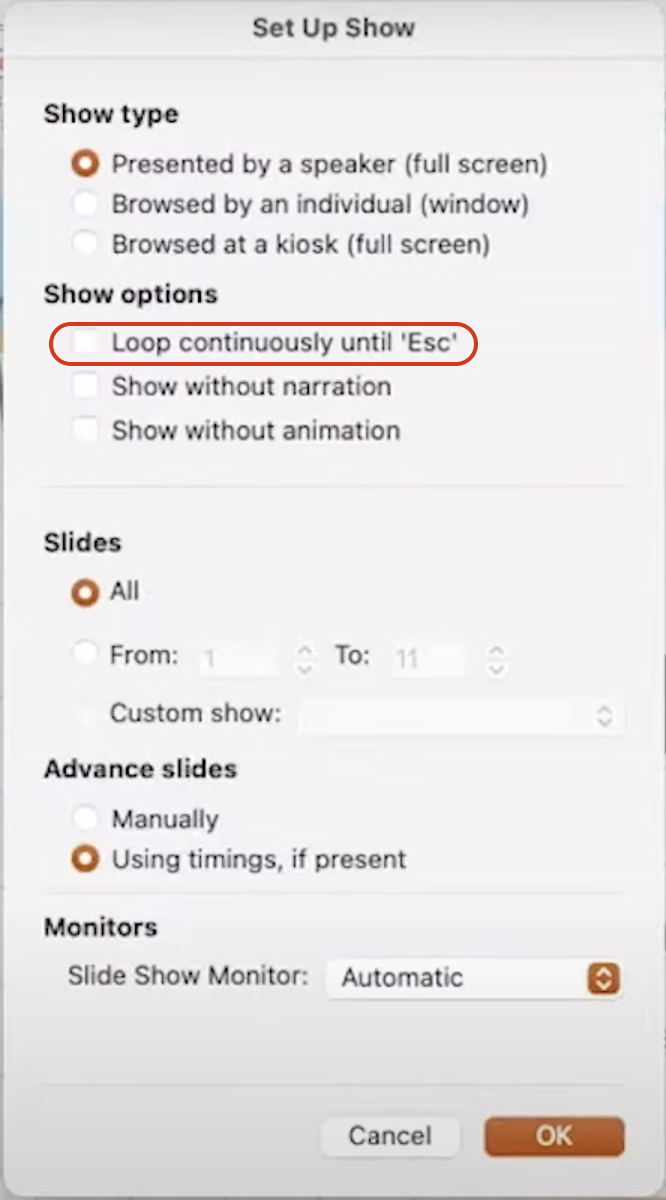
- Check the box that says “Loop continuously until Esc” under the “Show Options” from the pop-up window.
- Under the “Advanced slides” section on the right, Select “Using timings, if present”.
- Click on “OK” to apply changes.
Part 2: Setting Up Transition
- Click on any slide from the slides panel on the left.
- Now select all the slides by pressing Ctrl + A on the keyboard.
- Go to the “Transitions” tab from the ribbon menu.
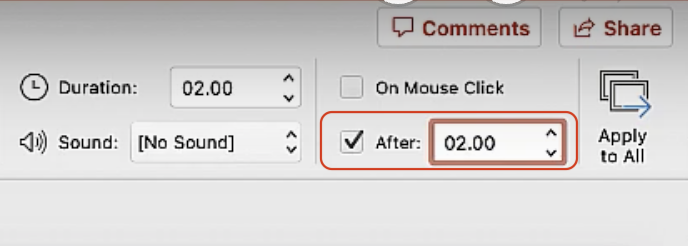
- Uncheck the “On Mouse Click” on the far right under the “Timing” section.
- Check the box below that says “After”, and enter the number of seconds you want each slide to appear.
Now if you play the slideshow, it will automatically shift slides as per the duration entered by you. At the end of the last slide, the presentation will begin the first slide with the same transition.
Note: Even if your PPT is set to auto-play, you will still have to click to change the slides. With this option, the slides transition automatically.
Steps To Play Select Slides on Loop
There are times when you want to play only the informative bit in an autoplay mode. You would want the specific details to flash on the screen repeatedly without revisiting the opening or closing slides. In that case, you have to manually provide the number of slides you want to present.
Here is how:
- Go to “Slide Show” from the ribbon menu.
- Click on “Set Up Slide Show” from the “Set Up” section.
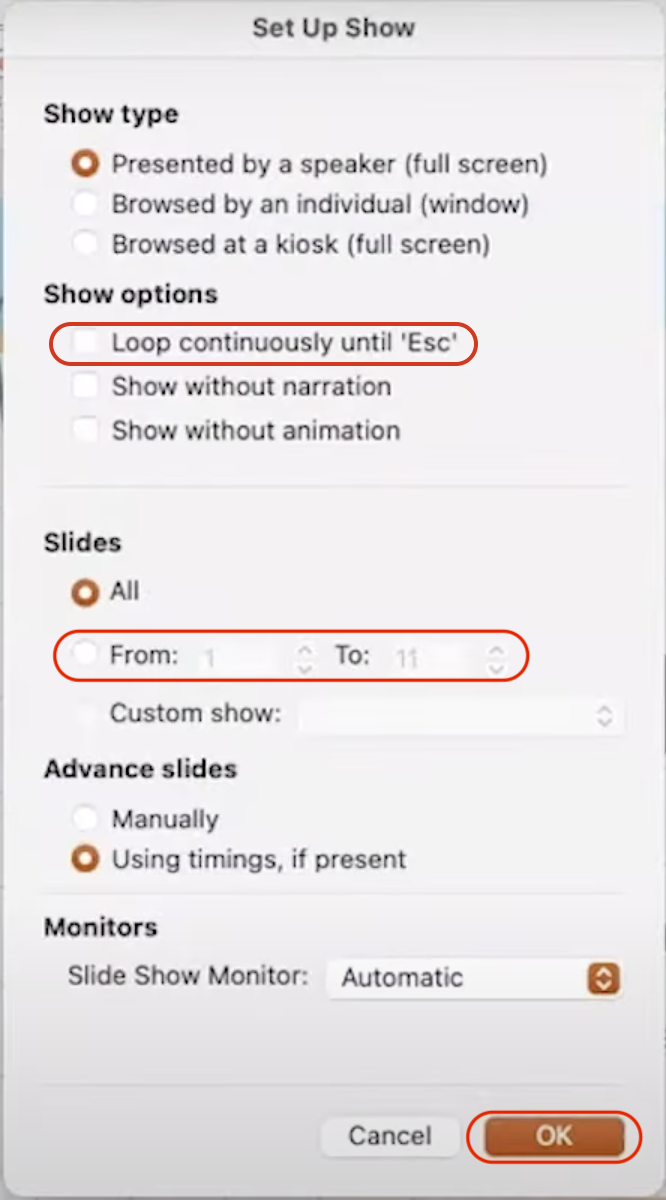
- Check the box that says “Loop continuously until Esc” under the “Show Options” from the pop-up window.
- Under the “Advanced slides” section on the right, Select “Using timings, if present”.
- Go to the “Show slides” section in the pop-up window.
- Click on the “From: __ To: __” option.
- Enter the range of slides (slide numbers) which you want to autoplay.
- Click on “OK” to apply changes.
Note: You can only autoplay selected ranges of slides if they are in a sequence. In other words, you can only autoplay consecutive slides in PowerPoint.
On a side note, not only looped presentation, but there are several ways to enhance your PowerPoint slideshow. These include changing bullet colors, curving text, and mirroring images.
Frequently Asked Question
Go to File > Save As and select the file type to Windows Media Video (WMV) to save the presentation as a looping video. In newer versions of PowerPoint, you can also use the “Export” option from “Files” and choose the type of file you want to export (video).
Go to the “Playback” tab from the ribbon menu. Check the box that says “Loop until Stopped” box from the “Video Options” section.
Wrap Up!
Playing a presentation on a loop can be quite effective even when you are done presenting. You can choose a range of slides to autoplay so that it keeps flashing the information you want your viewers to emphasize while you elaborate further.


Leave a Reply