We typically start working on the top left corner of a spreadsheet, which isn’t aesthetically pleasing, especially when printing it on an A4-sized paper. The data rather seems squished into a corner.
Centering your Excel worksheet horizontally ensures consistency across all pages and makes it visually appealing. Besides, a centered layout makes it easier to read and analyze, giving it a more professional appearance.
In this article, I will guide you through three ways to center-align the datasheet. Without further ado, let’s dig in!
Method 1: Using Print Preview
The print preview option lets you preview how the worksheet appears when printed, so you can adjust the settings for optimal printing. It’s particularly beneficial for professionals who wish to customize the layout based on their preferences or specific printing needs.
Here’s a step-by-step process:
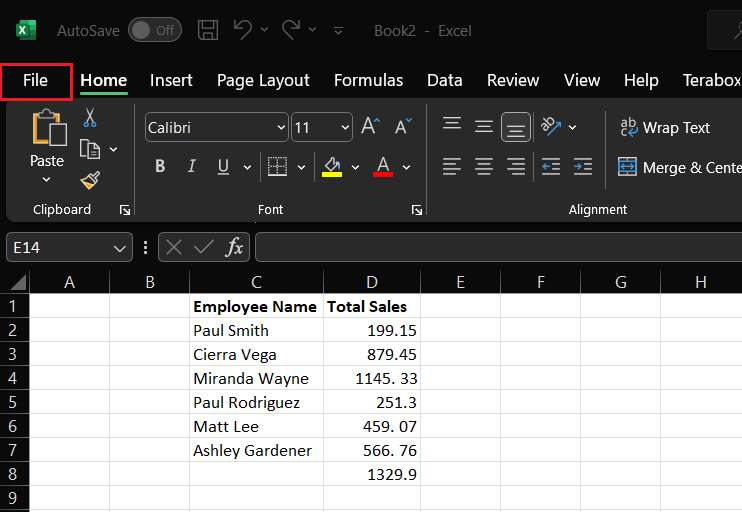
- Tap on the “File” tab in the top ribbon.
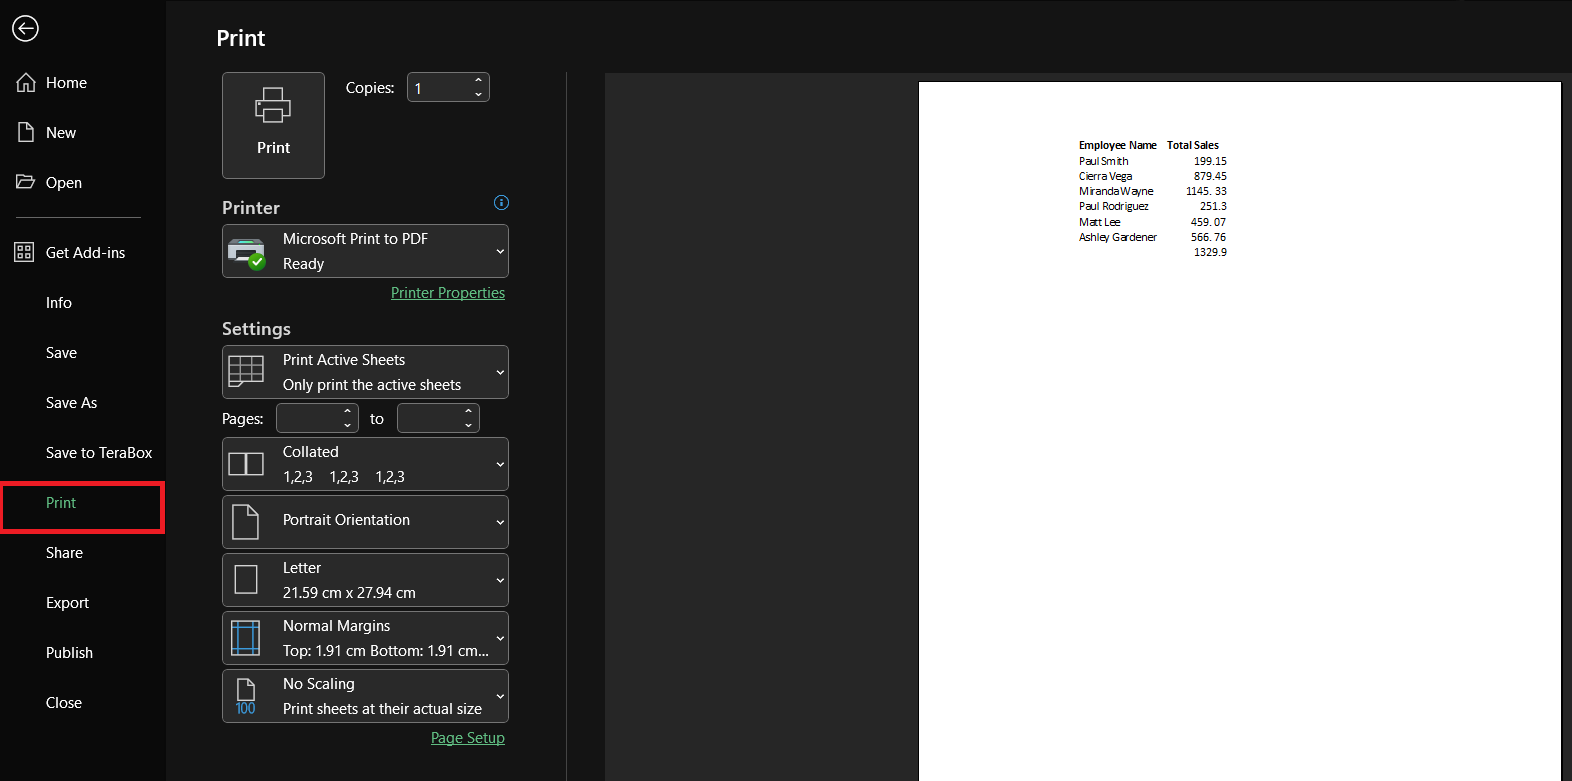
- Select the “Print” option from the drop-down menu, which shows the preview of your document.
- Alternatively, you can open the print settings directly using the Ctrl + P keyboard shortcut.
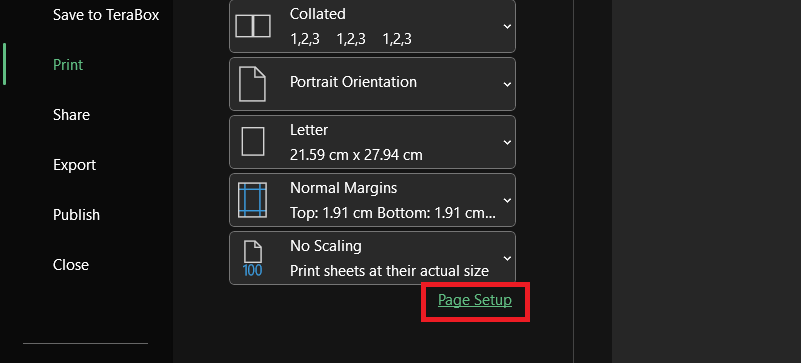
- Click the “Page Setup” option under the settings to open the dialog box.
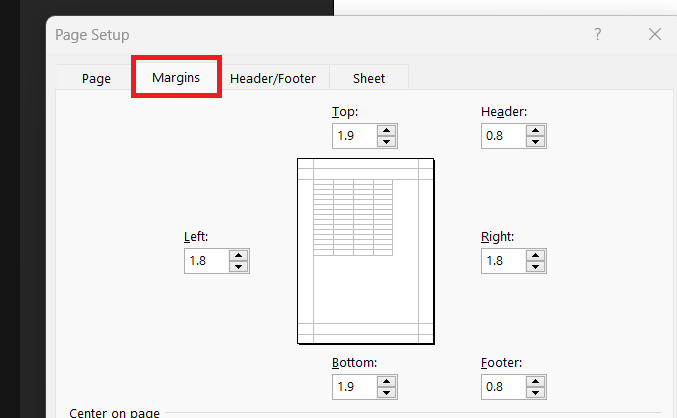
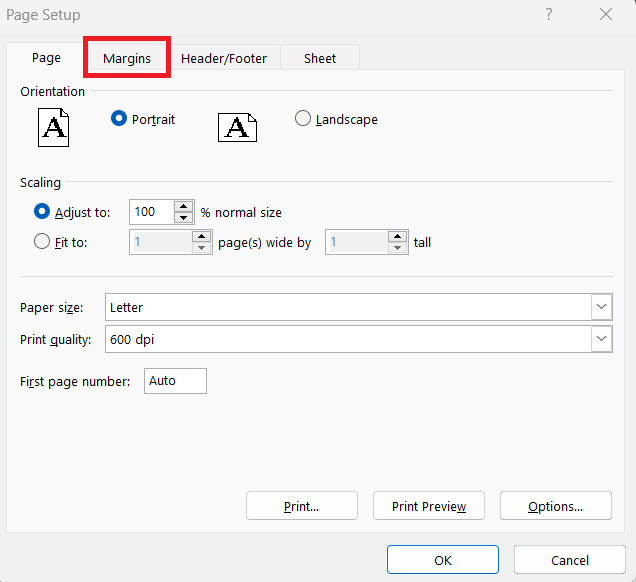
- Tap on the “Margins” tab in the dialog box.
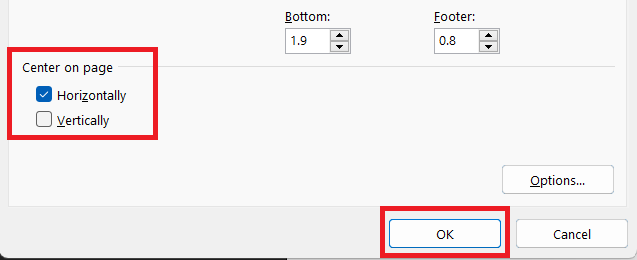
- Then check box the “Horizontally” option under “Center on page” and click on the Ok option below the dialog box.
- Now, you can print the worksheet data on a horizontally centered worksheet.
Method 2: Using Page Setup
Using the page setup rather than the print preview option, with various page layouts available, you have options to customize multiple printing settings. This is particularly beneficial for presentations and reports.
Here’s a step-by-step process:
- Find and tap on the “Page Layout” tab in the top Excel ribbon.
- Click the arrow on the left-bottom corner of the “Page Setup” group to open a dialog box.
- A dialog box should open up like this. Then click on the Margins tab.
- Then, as in my previous method, check the “Horizontally” box followed by clicking on the “OK” button.
- Your content should be centered horizontally. To check if it’s done right, you can preview the page using the “Print Preview” option. If you’re content about things being done right, you can directly print it from there.
Method 3: Manually Setting Page Margins
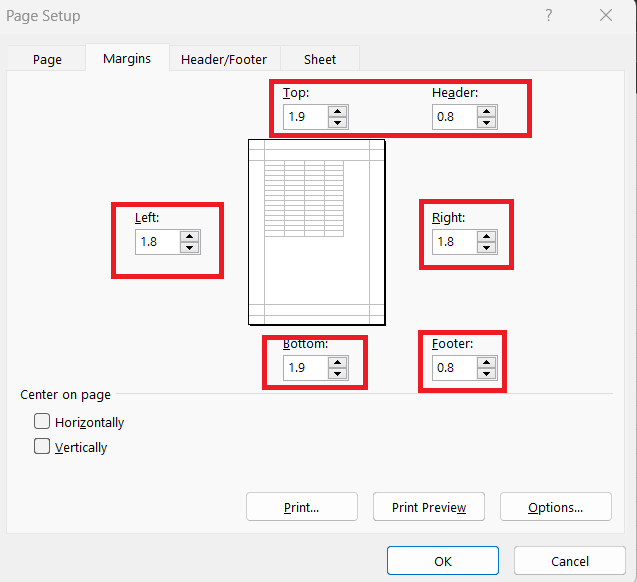
In the page setup dialog box, you’ll find a few other additional options to fine-tune your margins. This is helpful if you don’t want your content to be at the dead center of the page, and you can adjust the margins left and right as you wish.
There are options to set the margins on the left, right, top, bottom, header, and footer of the page.
Note: Once the horizontal or vertical centering is checked, altering the margins on any side doesn’t make any difference particularly. So, first, uncheck the boxes and feel free to adjust the margins as needed.
Frequently Asked Questions
Step 1: Click the first worksheet, then hold the Shift key click on the sheet tab of your last worksheet to select all sheets.
Step 2: Right-click on one of the sheets, followed by the “Group” option.
Step 3: Now, any changes on one sheet apply to all the grouped sheets.
Step 4: On the home tab of the Excel ribbon, click on the “alignment” group. You can now use options like “Align Center,” “Left,” and “Right,” or “Align Top,” “Bottom,” and “Middle” to align the sheets horizontally and vertically, respectively.
Step 5: After altering the alignment, right-click on the Sheet tab followed by Ungroup sheets.
You can use Page Setup or Print preview options and click the “vertically” option instead of “horizontally” to center the worksheet vertically in Excel.
Wrap Up!
Rather than toggling through the options, you can open the page setup dialog box by clicking the keyboard shortcut Alt + P, S, P. You can then change the page alignment to “Horizontal” or “Vertical”; it’s that easy.
Additionally, you can zoom in on your Excel sheets to analyze the data better. Saying that, I’d wrap this guide up. I’ll see you in another such informational guide. Till then, goodbye and take care!


Leave a Reply