Are you preparing for a very important presentation and realized you have created more slides than needed? Wondering if it’s possible to make last-minute changes and reorder them? If so, hiding the extra slides is the best solution.
It is a very straightforward process and one that everyone must know. So, I decided to write about it and share the valuable information. You will learn about hiding and its benefits in this article.
Ways To Hide Google Slides
At times it is best to hide than to delete and lose all the critical data and information you collected for it. You can always put notes in it and share it with your clients or colleagues in case they want to expand upon a few topics and check out the additional data with those hidden files.
Moreover, at times you may also want the printed versions of your presentations but don’t want to print the entire project. It becomes handy if you hide a few right before printing. Fortunately, you can print with notes too.
There are two methods to hide a Google slide. The option we will have to access is called “Skip slide” which skips the slide during both presentation as well as print. Here are both methods explained in detail.
Method 1: Using Right Click
- Open the file in which you want to hide certain slides.
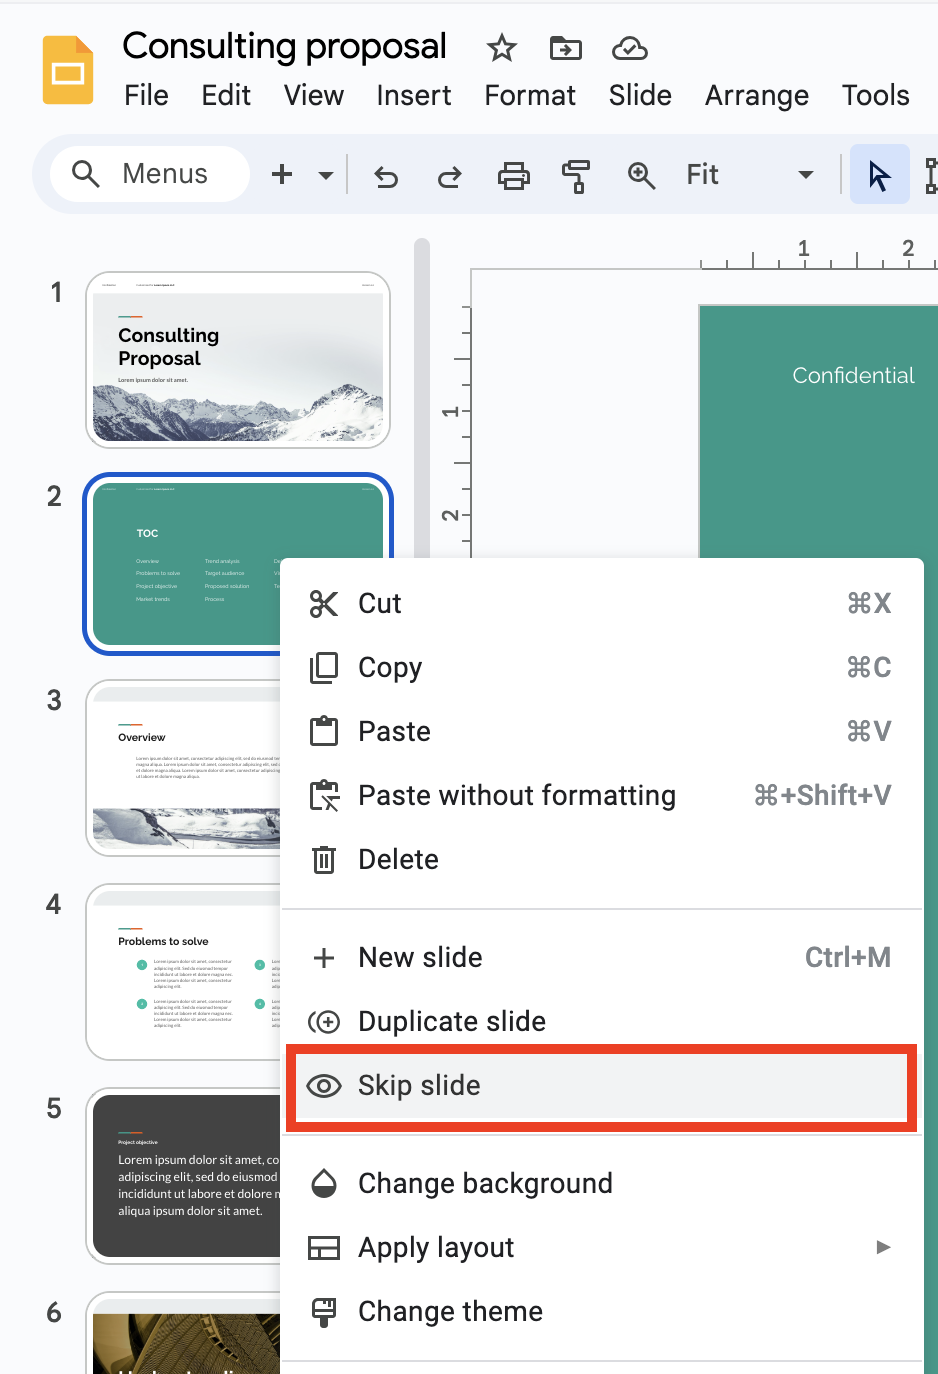
- On the left panel of your screen, there will be a list of slides. Right-click on the slide that you want to hide.
- Locate and select the “Skip slide” option from the right click menu which has an eye-shaped icon.
- Additionally, you can select multiple slides by pressing the Ctrl (command) key and clicking on the slides.
- Right click on any one of the multiple selected slides and select “Skip slides” to hide all the selected slides.
Method 2: Using Slide Option
Another way is to access the Slide option from the main menu. It contains all the actions and features that you can perform on the slides from either the editor or from the right click.
Here is how you can hide with this option:
- Open the file.
- Click on any slide from the left panel.
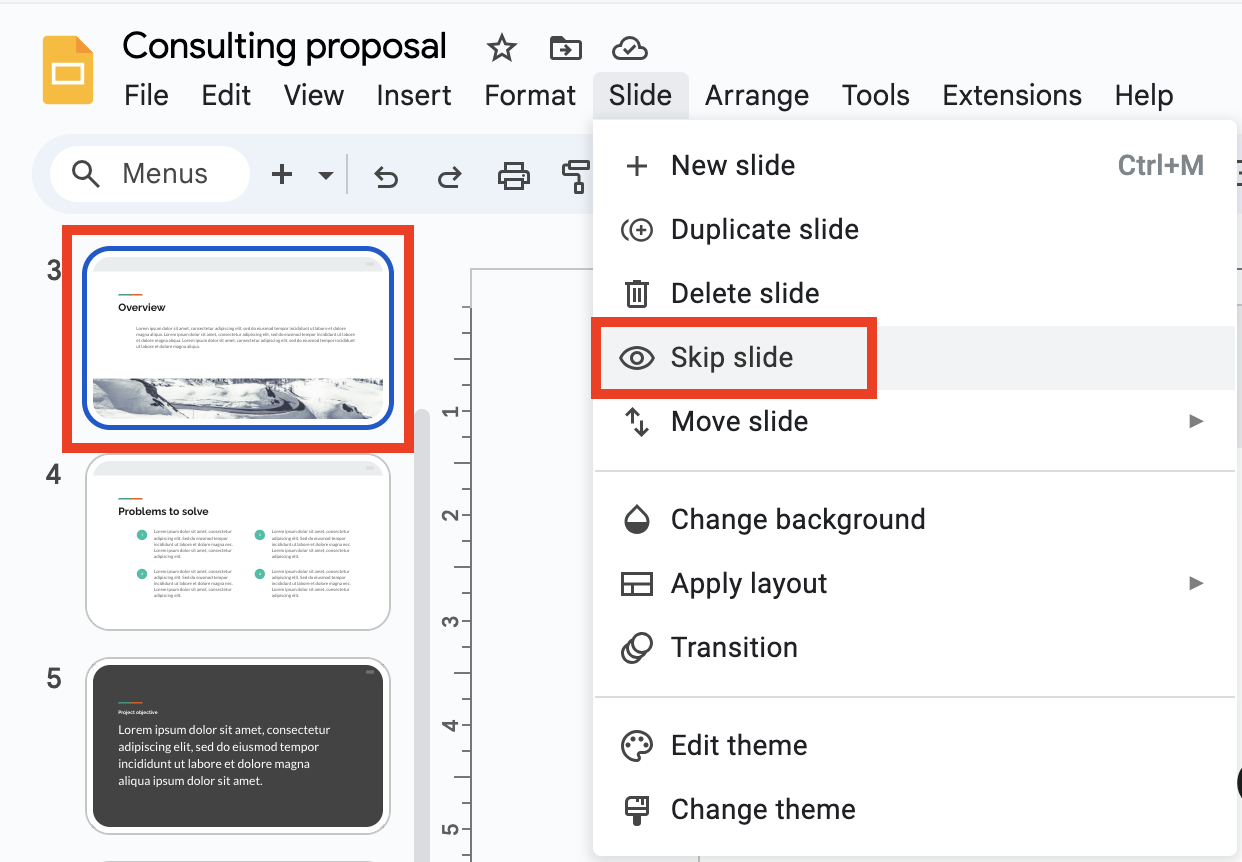
- Open the “Slide” option from the main menu.
- Select “Skip slide” from the menu.
- Additionally, select multiple slides by pressing the Ctrl (Command) key and clicking on the slides.
- Go to the “Slide” option from the main menu and select “Skip slides” to hide all the selected slides.
Note: You can also do the same thing by clicking anywhere on the slide on the main editor. You can use the “Skip slide” feature from the “Slide” option on the main menu even when you are inside a text editor in a slide.
Frequently Asked Questions
You can unhide a slide by right clicking on it and selecting “Unskip slide” or clicking on the slide, going to the “Slide” option from the main menu and selecting “Unskip slide”.
Yes, you can print without including hidden slides. All you have to do is to go to “File”, select “Print preview” and in the preview window, unselect the option “Include skipped slides”.
Wrap Up!
So there you go. Hiding a slide in Google Slides can help you make your presentations crispier, shorter, and time-saving.
Next time when you create more than what you want or if you want to add a few slides just for expanded context then don’t forget to use this very effective feature that allows you to hide (skip) slides.


Leave a Reply