We use Google Sheets for all sorts of personal and professional purposes. In a day and age where data theft is more prevalent than it ever was, it should be in our prime focus to protect our files and the data within.
As things stand, Google Sheets does not have a built-in feature to password-protect files for added security. In the meantime, you can always restrict the access to specific users.
But is there a workaround to protect your confidential spreadsheets? Is there a third-party solution for it? Let’s find out.
Steps To Add Password & Encrypt Google Sheets
You can add the encryption feature with the help of Apps Script, which lies in the Extensions option in the main menu. With Apps Script, you can deploy small programs that help you enhance your experience in Google’s workplace.
The way Apps Script works with Google Sheets is that you have to download templates of sheets that are pre-built with the feature you want.
Specifically, you have to make a copy and use the same sheet for password protection. Here’s how to go about it:
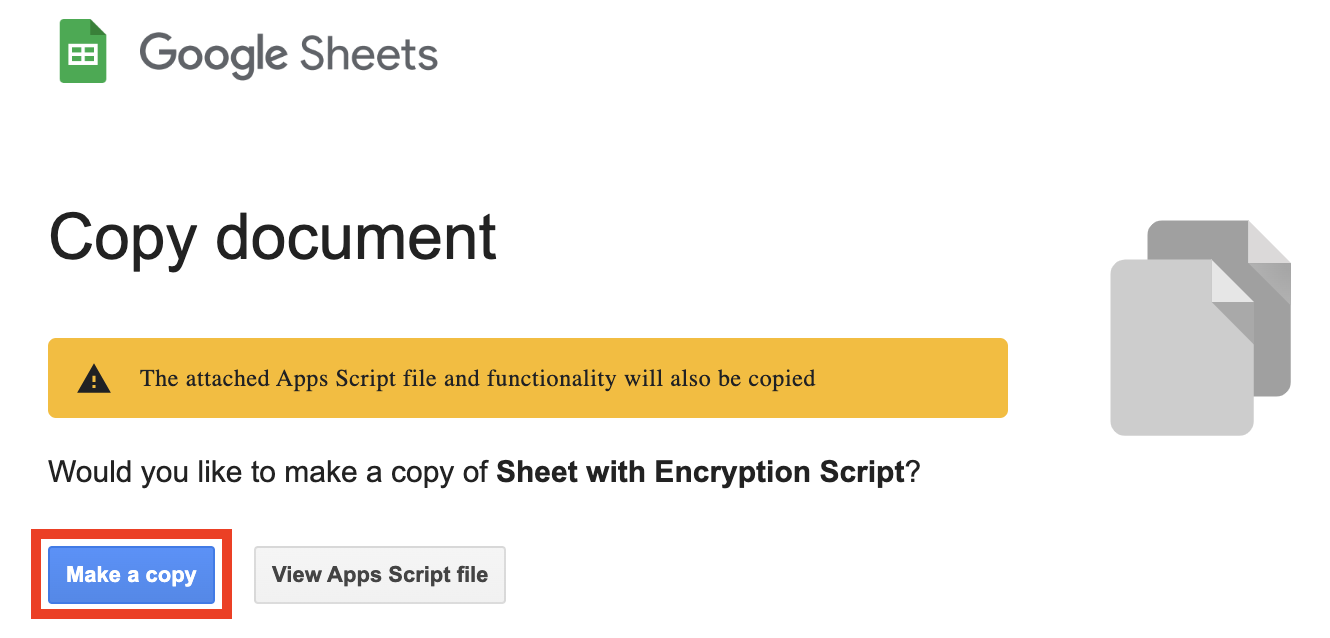
- Copy this sheet with the encryption script to your Google Drive.
- Once in, you can rename it according to your preference and input the data.
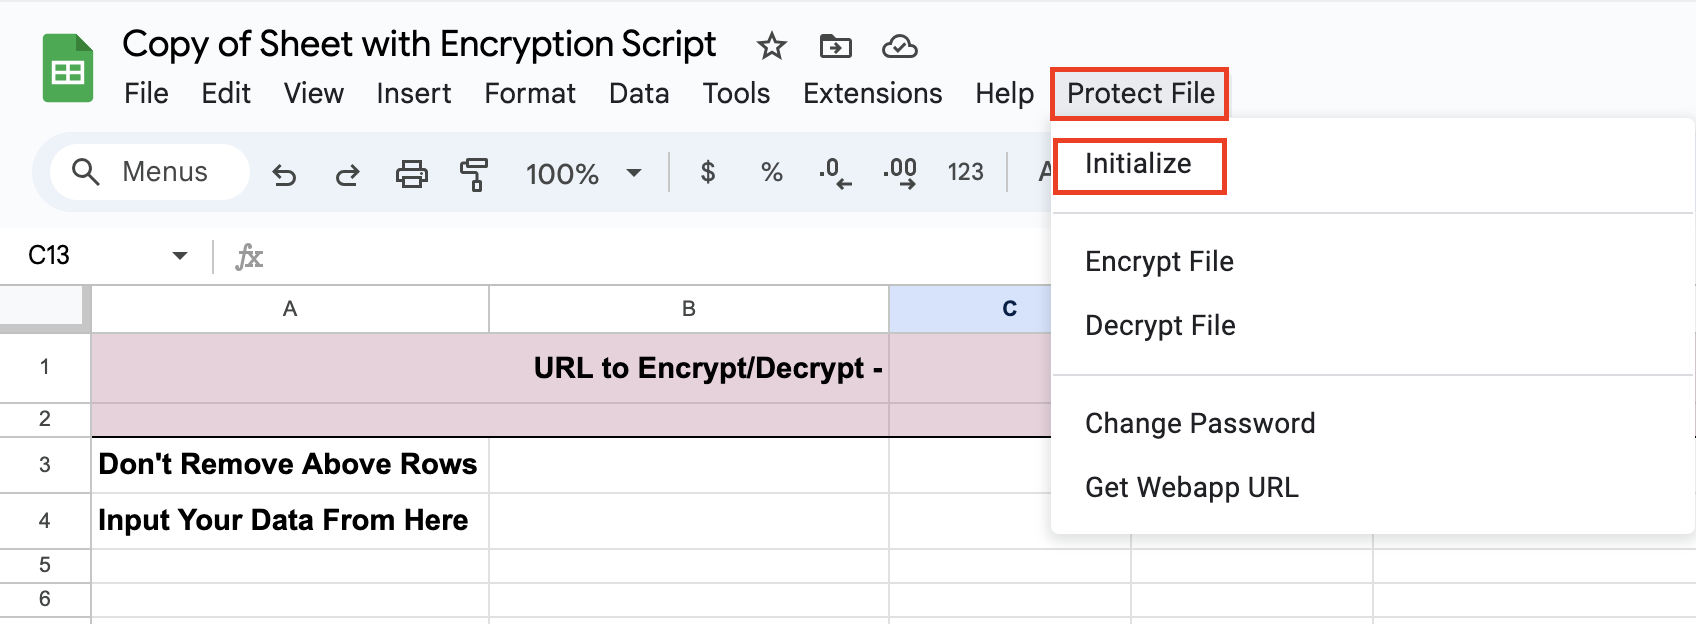
- Click on “Protect File” from the main menu. This is a new option added to your main menu with the help of the code from Apps Script.
- Select “Initialize” from the dropdown menu.
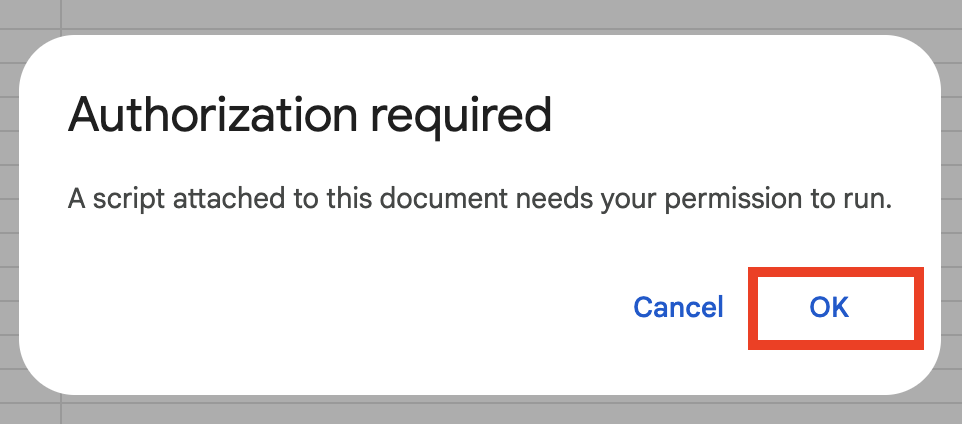
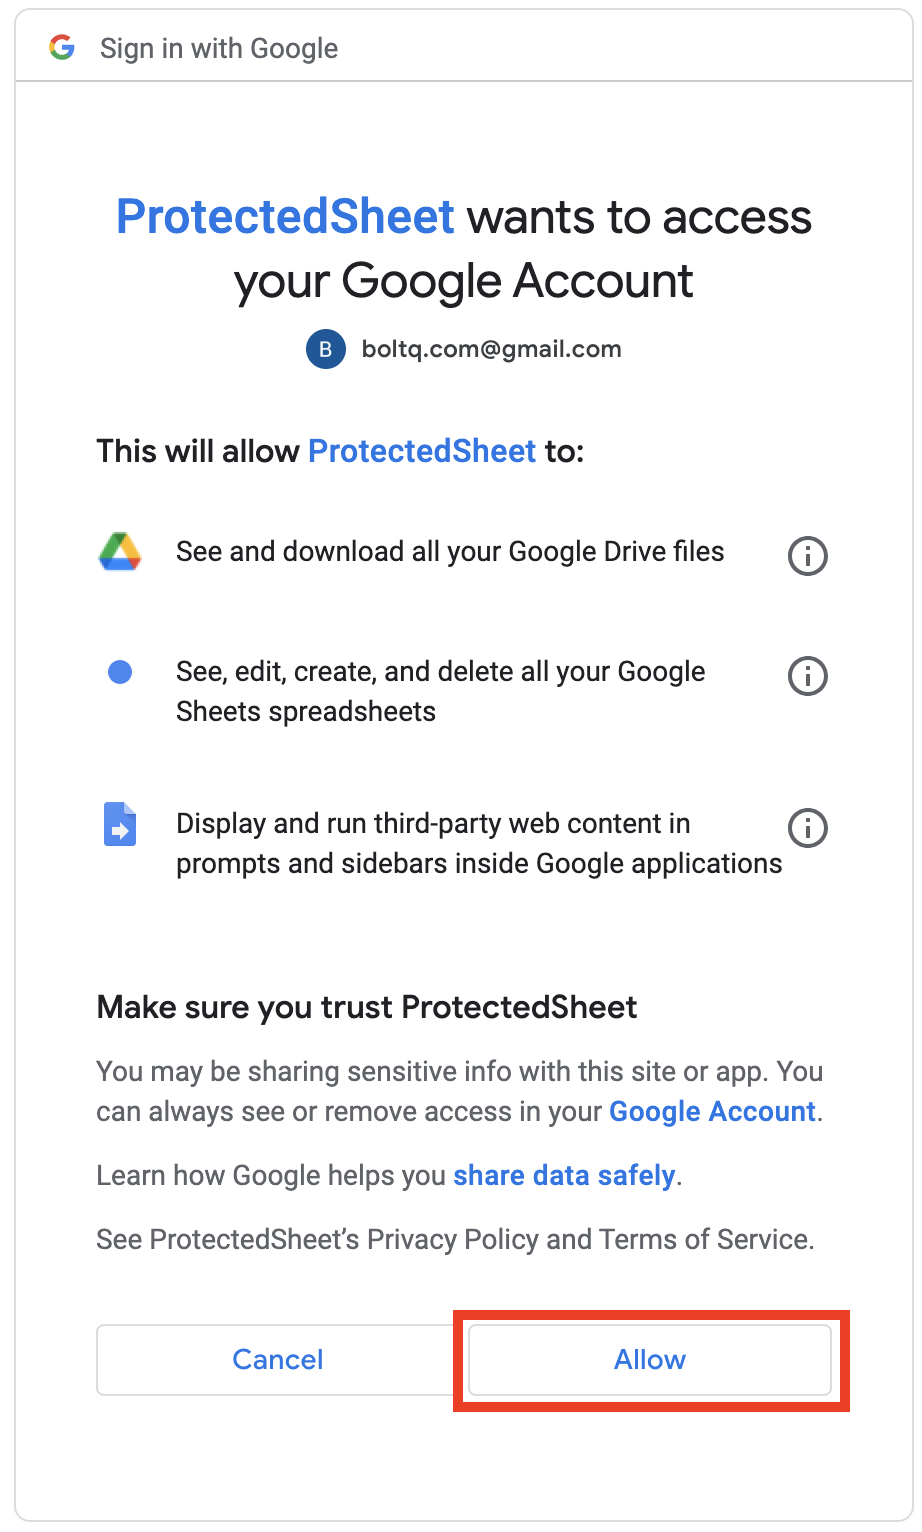
- Click on “OK” to authorize your sign-in.
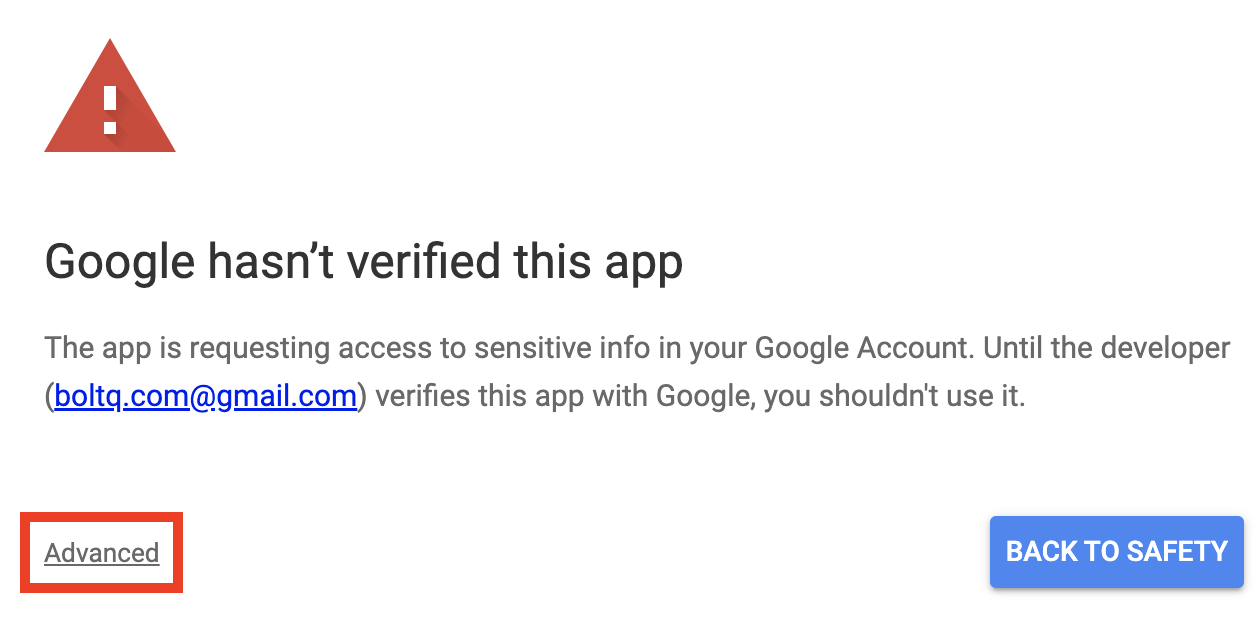
- On a new page, click on the “advanced” option as highlighted below.
- Next, you’ll be prompted to grant permissions.
- Once done, go to the “Protect File” on the main menu again.
- Select “Encrypt File” from the dropdown.
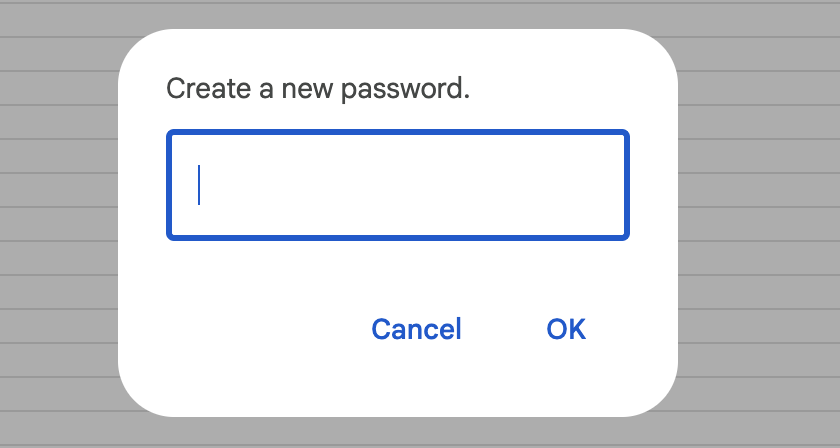
- Create the password in the pop-up and click “OK” to confirm.
- This will encrypt all your data, which will make it unreadable.
Now, to restore the data as it was earlier, you’ll need to decrypt it by entering the password you just created.
Steps To Unlock & Decrypt Data To View or Edit
Both encryption and decryption options are right there in the dropdown of the new “Protect File” option in the main menu.
Here are the steps to unlock an encrypted Google Sheet:
- Open the encrypted sheet.
- Go to “Protect File” from the main menu.
- Select “Decrypt File” from the dropdown.
- Sign in with your Google Account if prompted.
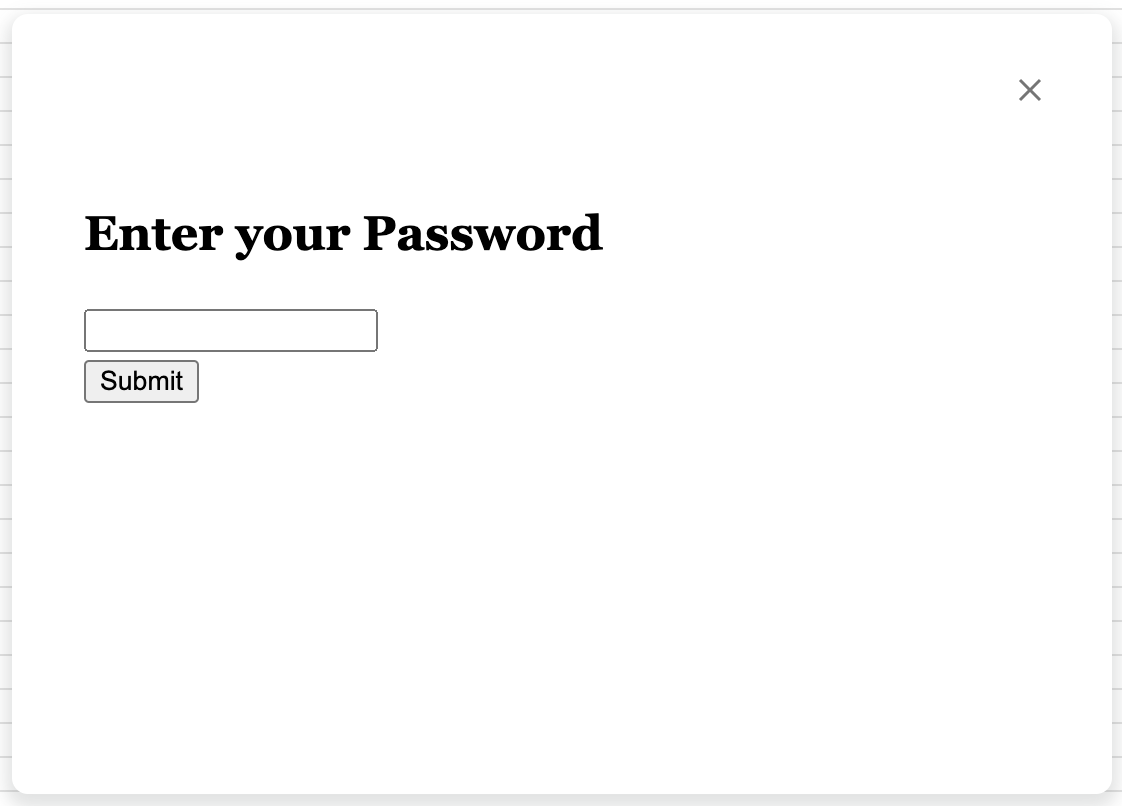
- Enter the password in the pop-up and click “Submit”.
That is it. You have now unlocked a password-protected file and achieved your rights as an editor.
Steps To Change Password
There is also an option to change the password you set in the “Project File”. This requires you to enter the previous password.
If you cannot remember the previous password, then you may have to remove that code from the Apps Script editor.
Here are some simple steps to change the password for your password-protected Google Sheet.
- Go to “Protect File” from the main menu.
- Select “Change Password” from the dropdown.
- Enter the old and new passwords.
- Click on “Submit”.
Benefits of Password Protecting Your Google Sheets
There is no harm in implementing safety practices while working on Google Sheets. Here are some key benefits of protecting your files with a password and data encryption:
- Confidentiality: Sometimes, you don’t want everyone in the organization to access a particular sheet or a whole file. The file could be stored in a folder that is accessible to a lot of people. Protecting the file or a sheet with a password makes sure that only those who are supposed to access it can access it.
- Data Safety: We live in an age where data is the most precious thing, especially over the internet. Organizations don’t want their sensitive data to be vulnerable, and it is a good practice to protect your key data from thieves or spam by protecting it with a password.
- Error Prevention: At times, people accidentally alter data in some columns or cells. This alters the whole sheet and affects every formula. If you want to eliminate any scope of error, then protecting data in those sensitive cells by locking them becomes very useful.
Frequently Asked Questions
Yes, your Google Sheets file can be secured with encryption. You need to add a code in the Apps Script editor or limit access to people from the “Share” tab to protect your file.
Although there’s no official feature to password-protect a Google Drive folder, you can convert the folder to a ZIP file and set a password to it. This will enable you to upload the folder with password protection.
Go to “File” and select “Share” > “Share with others”. Enter the name of the accounts you want to share the file with. Next to the account name, you can find a dropdown that has 3 levels of access. Choose “Viewer” from it.
Wrap Up!
It is only a matter of time before Google introduces encryption as a default feature. They already have a password protection feature for email attachments.
Till a built-in feature is introduced, it is highly recommended to protect your data with methods like locking ranges or encrypting an entire file with a password.


Leave a Reply