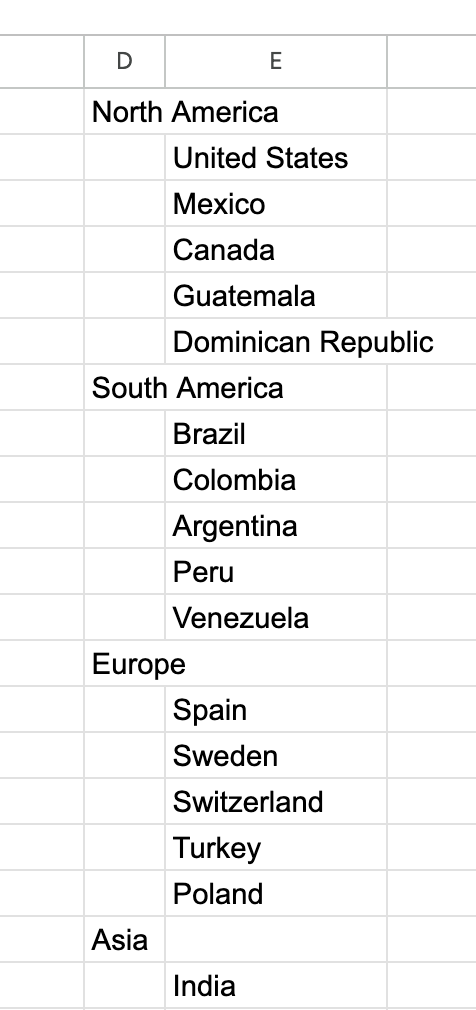
Indent roughly means categorized visualization of your text. Indenting can bring a lot of clarity in your spreadsheets but can we really do that in Google Sheets?
There are dozens of formatting options for texts inside a cell, but indentation is not one of them. Cells, especially laid out as a data table, are all about showing multiple layers and categories of data.
It is a matter of time before Google introduces the indent feature on the platform. But till then, we have to be content with a workaround. I know workarounds are not always fun, but it’s the end result that matters.
So, without further ado, let’s get into it!
Methods To Indent in Google Sheets
There are four different methods. All these couldn’t be any further from each other. While one is pretty straightforward and quick, the other needs some formatting. Let us take a look at each, one by one.
Method 1: By Adding a Separate Column
You need to separate data of your main categories and sub-categories for this way. You need to enter both of them in adjacent columns.
Follow the steps below:
- Enter the first main category in one column.
- Calculate the number of entries you have within this category and leave exactly the same number of cells empty below.
- Enter all the other main categories and leave the cells below them empty the same way as above.
- In the adjacent column, enter the data from sub-category one cell below the main category cell in the adjacent column.
- Similarly, enter all the data from sub-categories below the main category cells.
- Hover over the line between the headings of those two columns and drag them closer till they overlap.
- Now select all the cells that contain the main categories.
- Go to the “Text wrapping” icon from the ribbon menu and select “Overflow”.
Visually it will look perfectly indented, but if it is not what you were looking for, I have another way. Continue reading!
Method 2: By Custom Formatting a Column
You need to add custom formatting to the whole column or a few selected cells for this method. Once you do that for all the cells or for the whole column, it then automatically enters data in an indented manner.
Here’s a step-wise process:
- Select all the cells (leave the main categories and select sub-categories) where you want to indent.
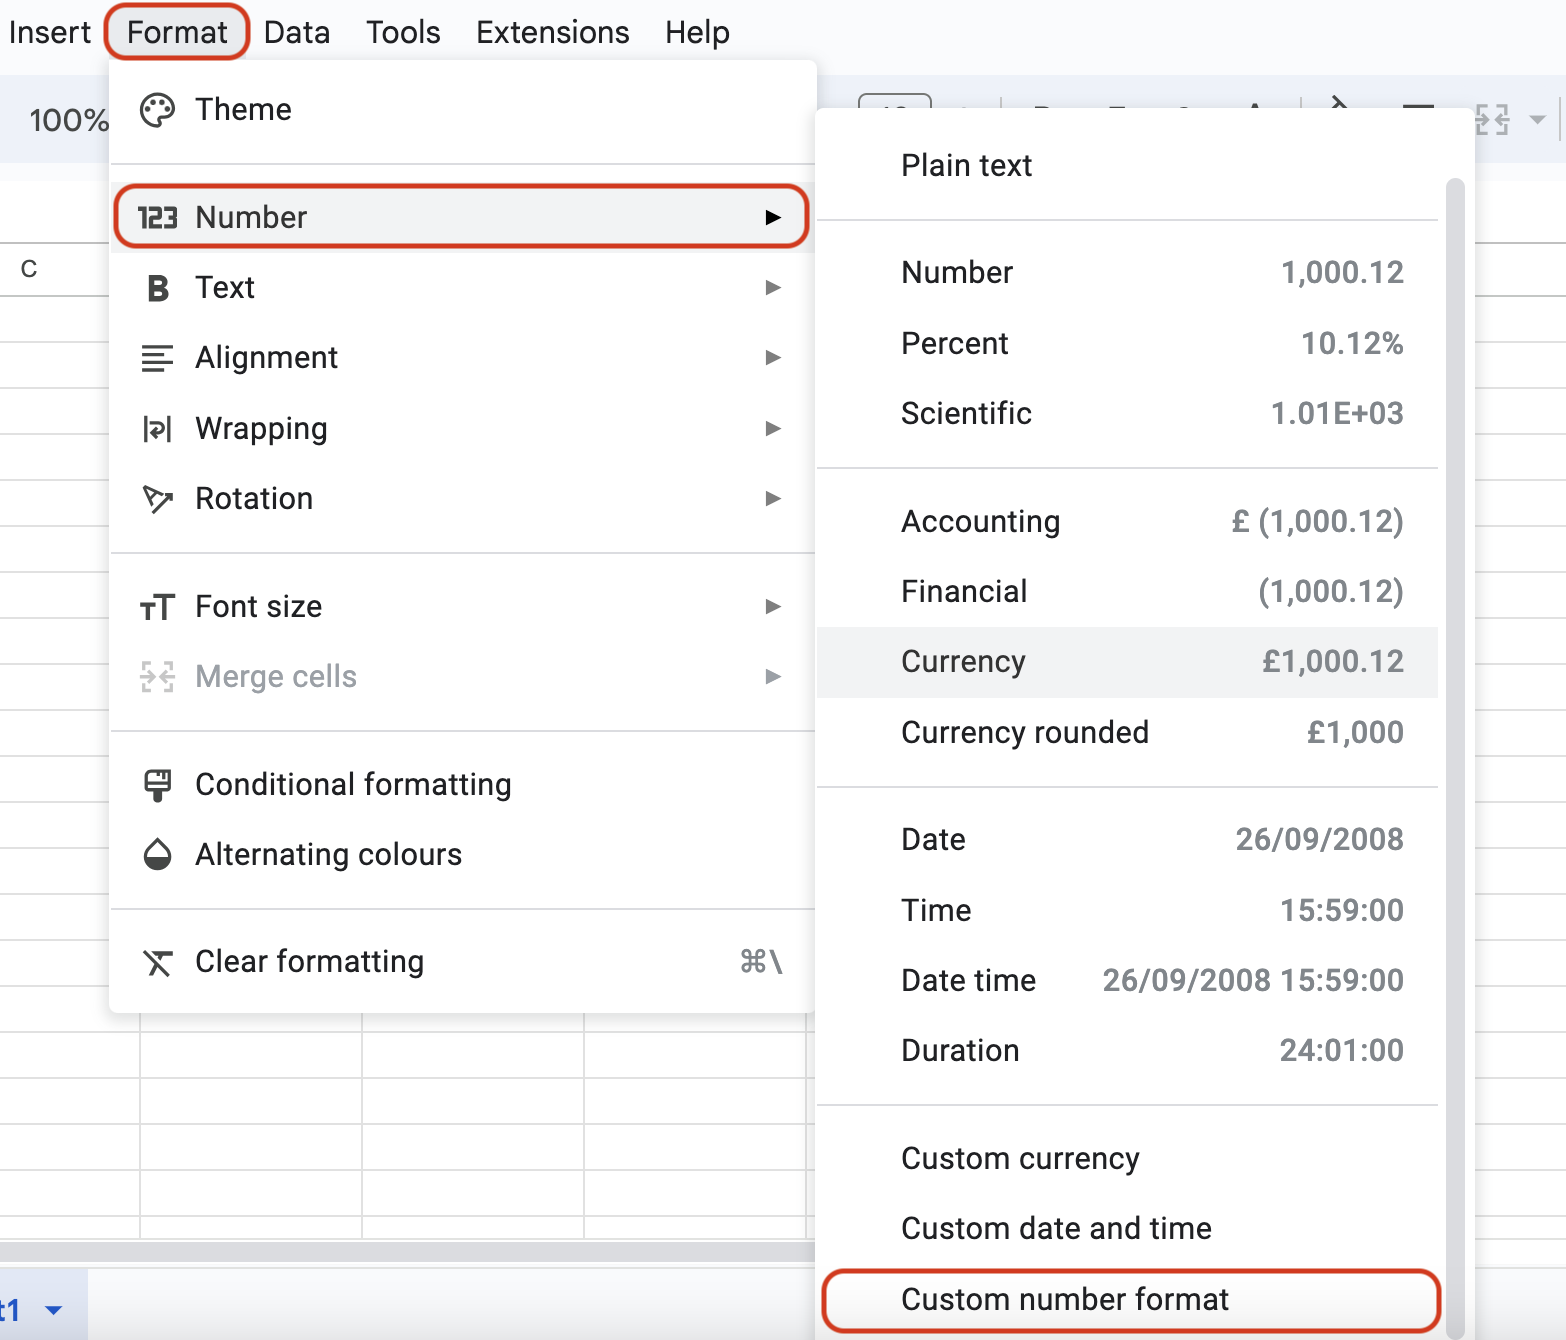
- Go to the “Format” option from the main menu.
- Select “Number” from the dropdown.
- Now select “Custom number format” from the sub-dropdown.
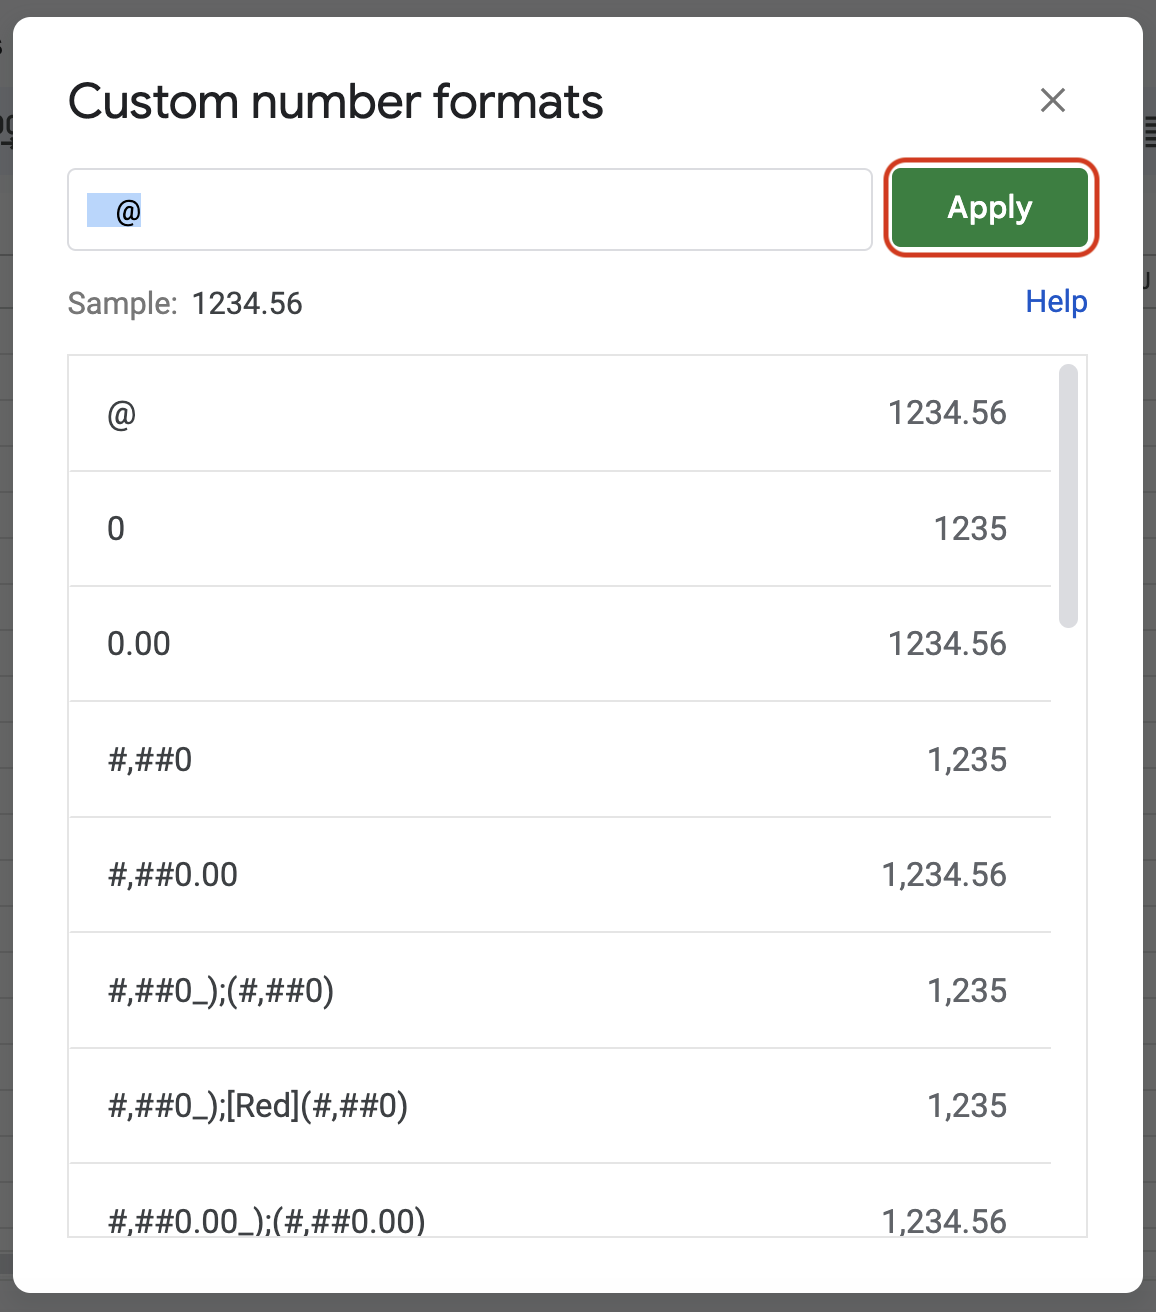
- This will open a pop-up editor. Enter a couple of spaces and then write “@”, which denotes a custom formatting meaning whatever you will write in this cell will be preceded with a couple of spaces.
- Select “Apply” and then enter your data for those columns.
Every time you enter data in the cells that you selected for custom formatting will now have two spaces ahead of them. The ones you didn’t select should have the main categories, as they are all left aligned.
Method 3: Using Formula
The REPT formula under the ARRAYFORMULA works very well for indenting. The structure involves the REPT function and the number of times you want it to perform the function preceded by blank spaces in inverted commas.
Let us assume you want the function to add a blank space ahead of texts in the following 3 cells, and the cell range is F3 to F6. Here is the syntax you have to follow in that case.
=ARRAYFORMULA(REPT(” “,3)&F3:F6)
This will add a space to the cell where you have placed the formula and repeat it for the following 3 cells as well.
Here are some simple steps for understanding:
- Enter all text in the cells F3 to F6.
- Now in the first cell of your destination, write down the formula =ARRAYFORMULA(REPT(” “,3)&F3:F6).
- Press enter.
The function will feed data from cells F3 to F6 and repeat the function of adding one blank space ahead of the text in an arrayed manner for the following 3 cells as well.
Method 4: By Manually Adding Space
Another simple way to indent your cells in Google Sheets is to manually add space preceding to the text you enter in your cells. This is not ideal but works perfectly fine and is very quick to implement.
You add the number of spaces you want ahead of text inside a cell based on the margins you want to keep for the text in an indented format.
Here are some simple steps to indent by manually adding space.
- Put one space ahead of the text in the first cell.
- Put two spaces ahead of the text in the next few cells.
- If there is a 3rd level to your indent, then add two spaces ahead of the text for the next cells.
That is it. Your cells will appear indented. For a more appealing view, you can add altering row colors.
Frequently Asked Questions
Yes, you can by adding texts into different columns, by using a custom formatting method or by using a formula. You can also manually add spaces into cells to make it look like they are indented.
As things stand, there is no keyboard shortcut for indenting in Google Sheets. You have to use a few methods to indent, either through functions or by manually adding spaces into cells.
Wrap Up!
Indented data looks organized and gives a visual appeal to your sheets. It helps the viewer understand the key data points and gives a clear distinction between them. While the custom formatting method seems more authentic, the one with two adjacent columns and overflowing cells is a lot quicker to apply.


Leave a Reply