Do you want to accept payments using Google Forms? Well, officially, you can’t do that. But, after hours of research, I found a legit way to actually make a Google Form payable and start collecting payments from it.
While doing my research, I found out that the majority of small and medium-sized businesses end up displaying their bank details or QR codes on the form and track the payments manually. That’s stupid, right?
So I kept looking for different methods until I came across PayQ — a Google Form addon for adding payments to Google Forms. I’ve been using the addon on most of my Google Forms with payment collections, and my life has never been easier.
Method 1: Using PayQ Google Workspace Add-on [The Best Way]
The PayQ add-on for Google Forms is a simple and effective method of adding payment options to your Google Forms. PayQ supports all major payment gateways, such as Stripe, PayPal, and Razorpay.
Integrating the payment gateway API onto the form is fairly simple, and it gives you an end-to-end solution ranging from payments to adding promo codes, capturing user information, to even sending out confirmation messages.
Here’s a quick video on how PayQ works:
Step 1: Install the PayQ Extension
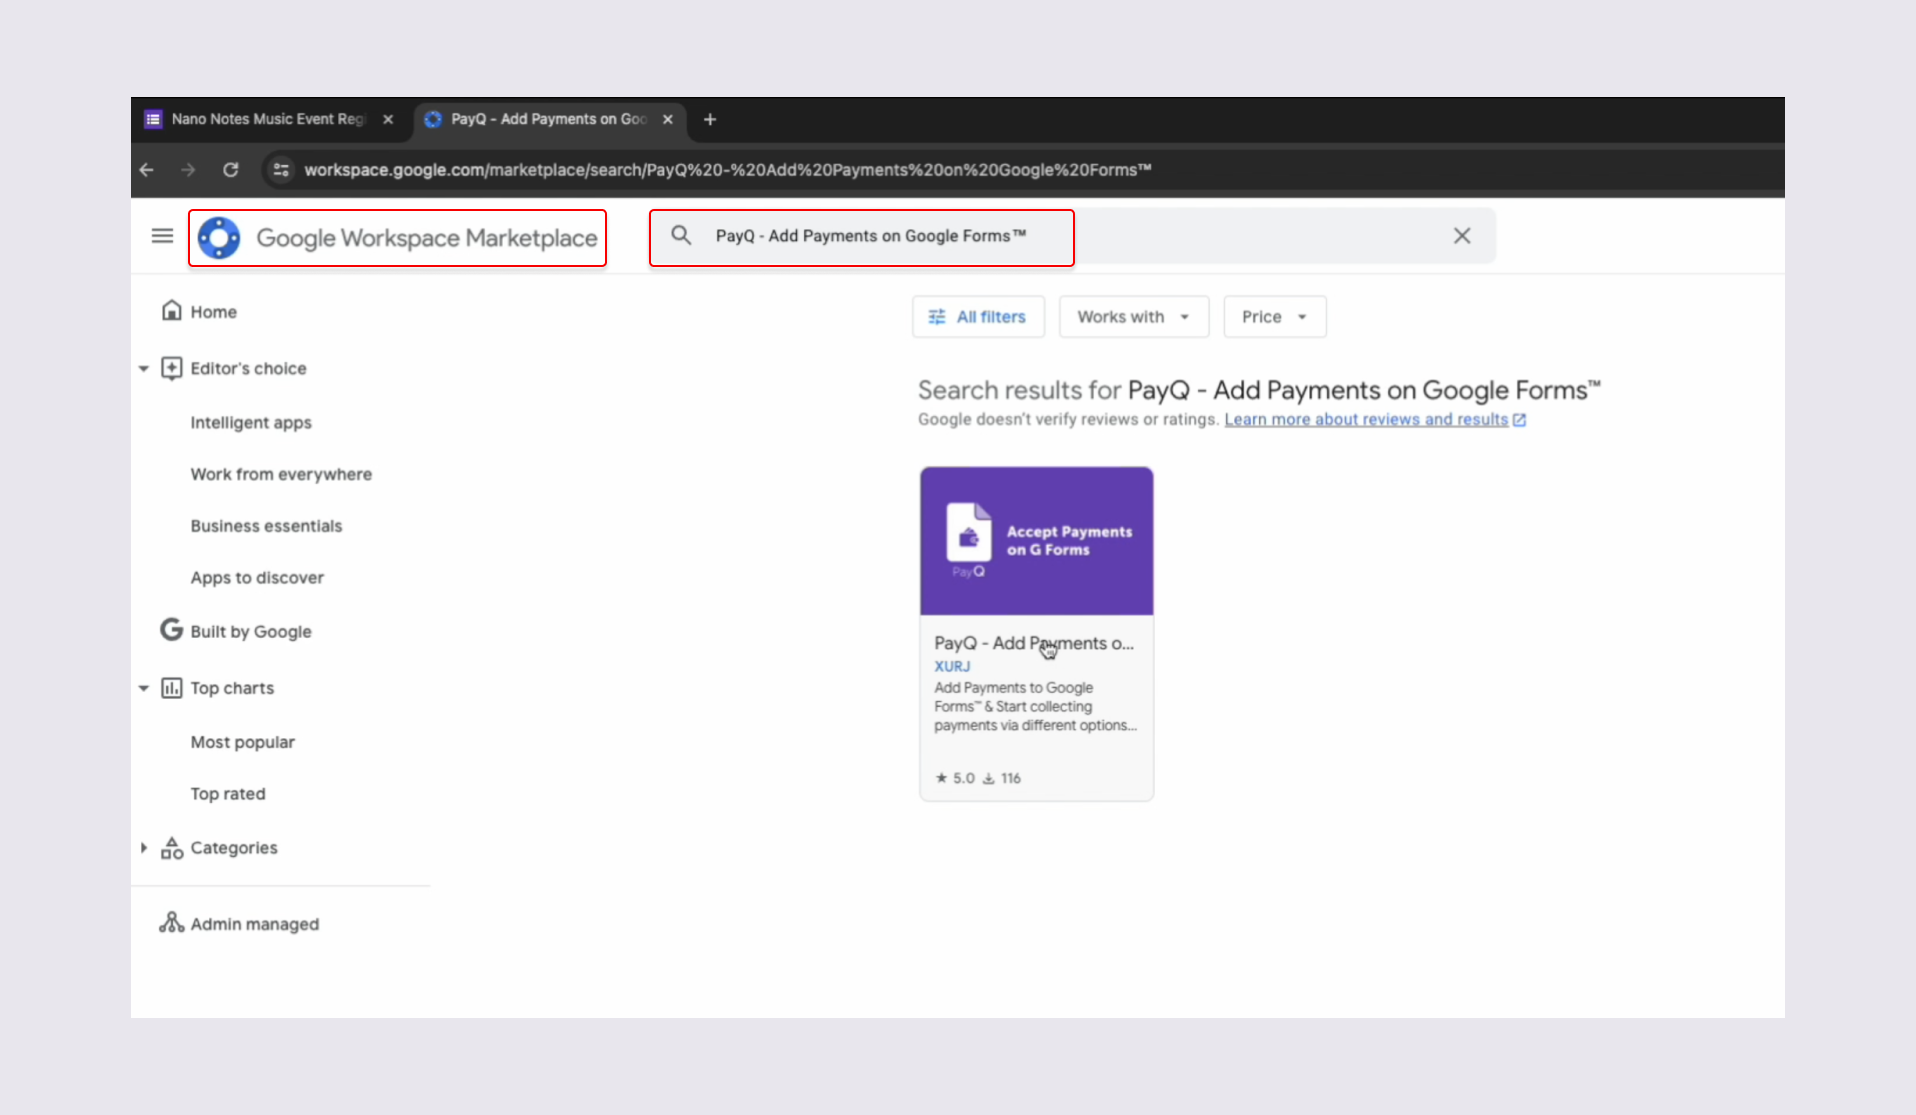
- Open Google Workplace Marketplace.
- Search for “PayQ – Collect Payments”.
- Click on Install.
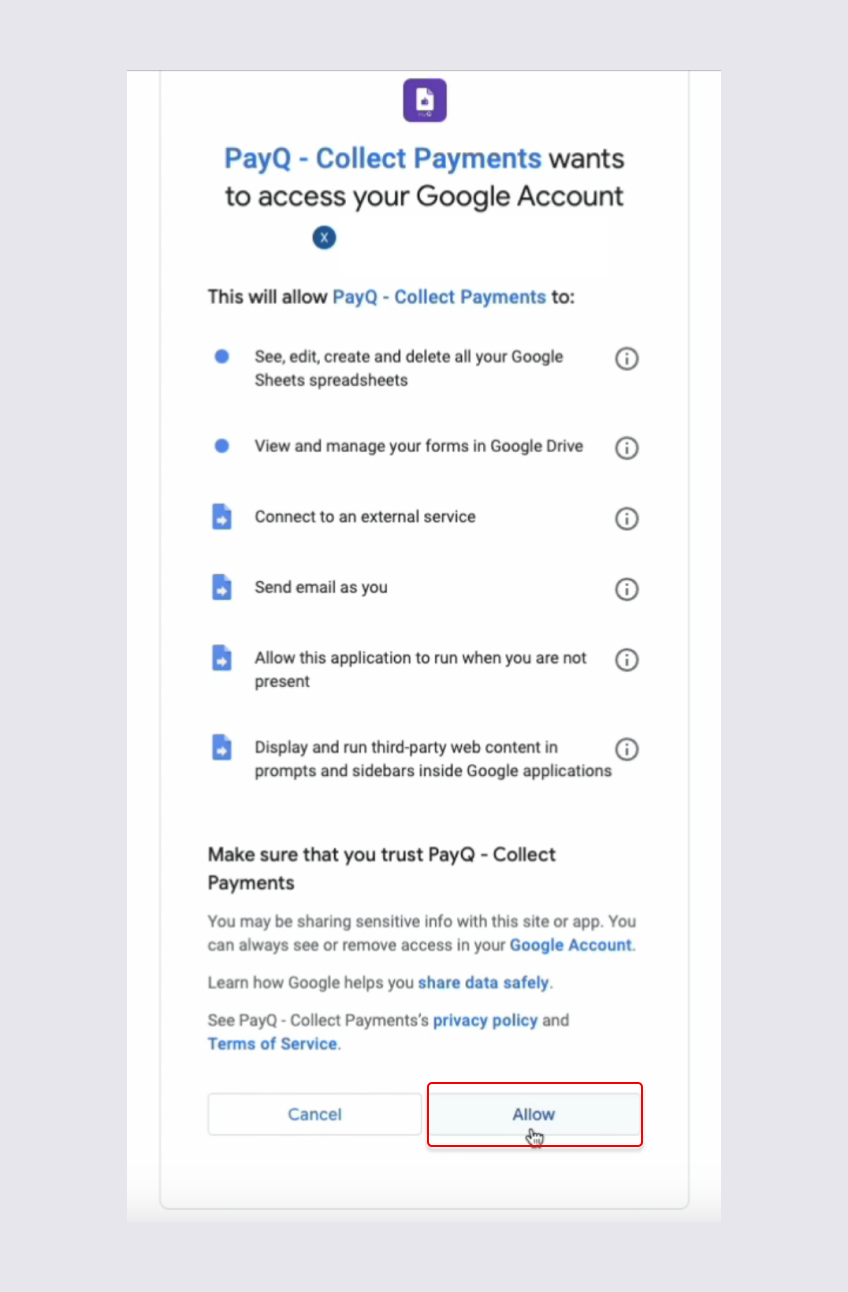
- Read the permissions and allow them.
- Head to the form creation page, and fill out the required details.
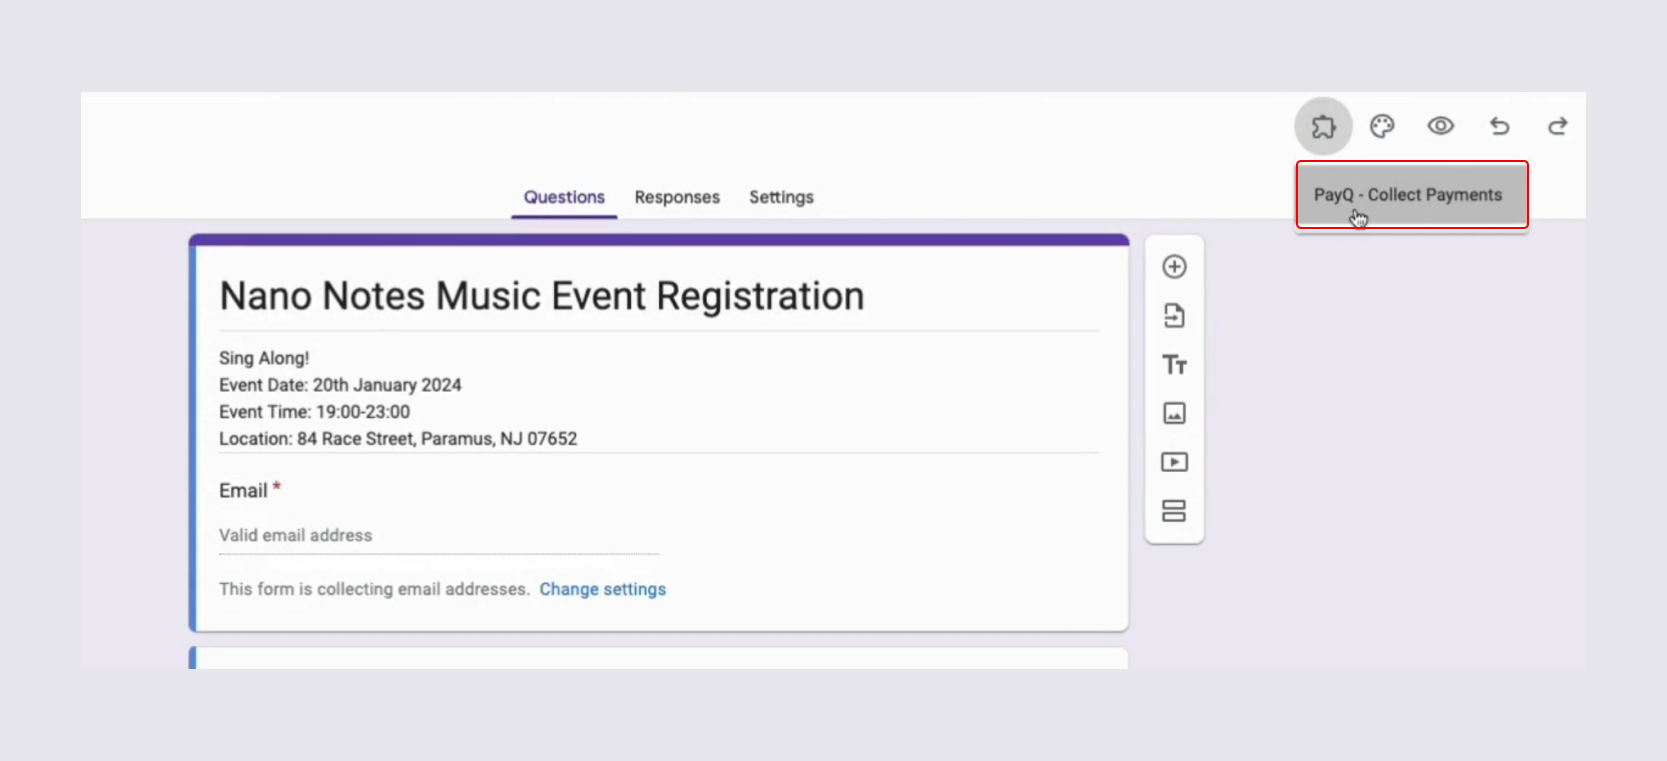
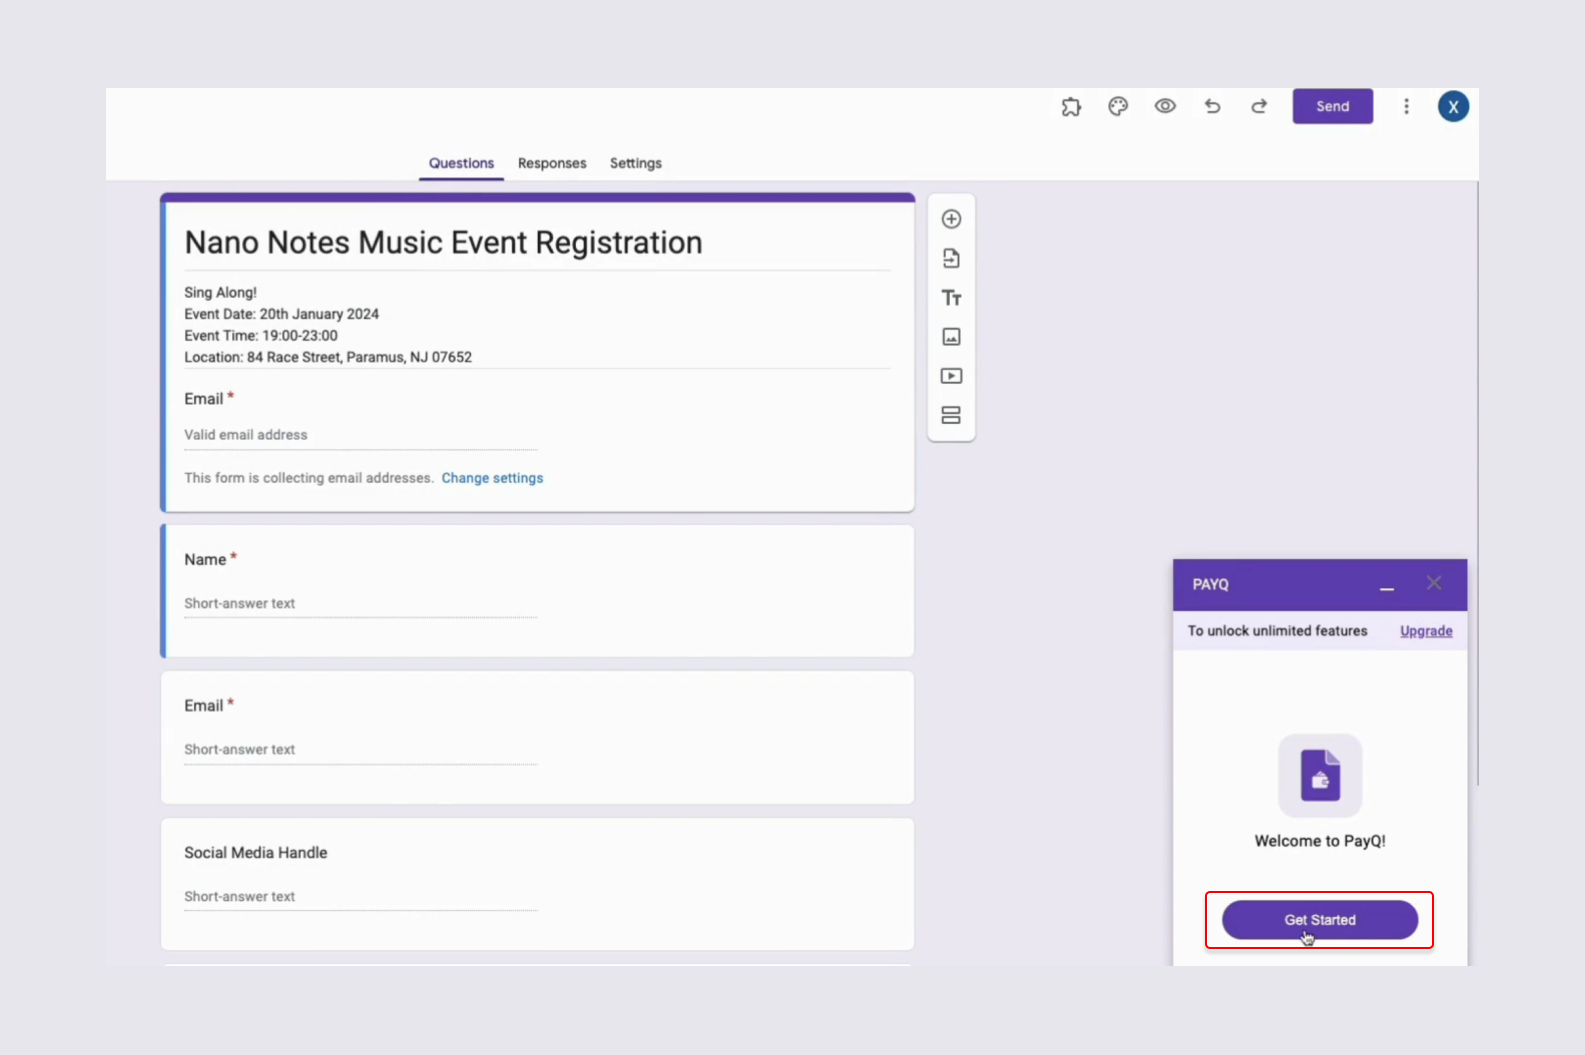
- On the top, there would be an add-on button shaped like a jigsaw.
- Click the jigsaw button and select ‘PayQ – Collect Payments’/.
- Click on Open, a box will pop up on the bottom right.
- Click on ‘Getting Started’ – that should get you started with PayQ.
Once you click on ‘Getting Started’, you will be met with a couple of introductory messages which show you how to make use of the add-on to integrate payments on your Google Form.
Step 2: Linking a Sheet to the Form
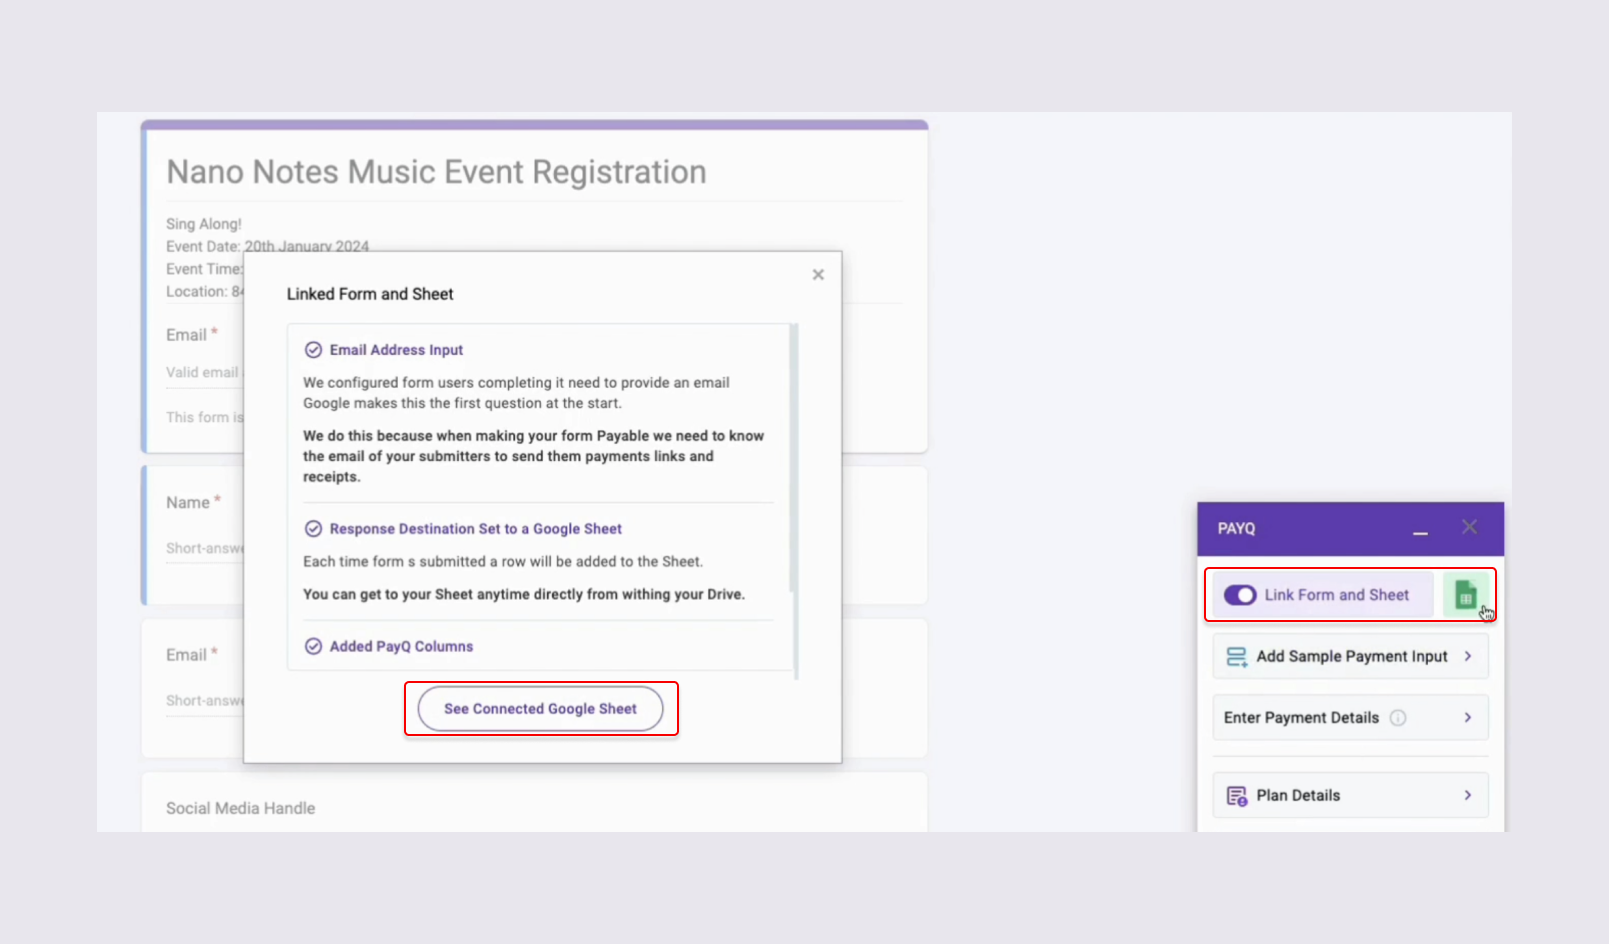
Once you are done browsing through the introductory messages, you can now link a Google Sheet to your Google Form.
This sheet will basically act as a tracker where all the information that a user enters on the form will be captured. Here’s how you can do this.
- On the PayQ box, select the first option, ‘Link Form and Sheet’.
- Check the terms and click on ‘See connected Google Sheet’.
You will now be redirected to the connected Google Sheet, which comes with options such as the time when the user attempted to pay, the order ID, the payment gateway link, the total amount, etc.
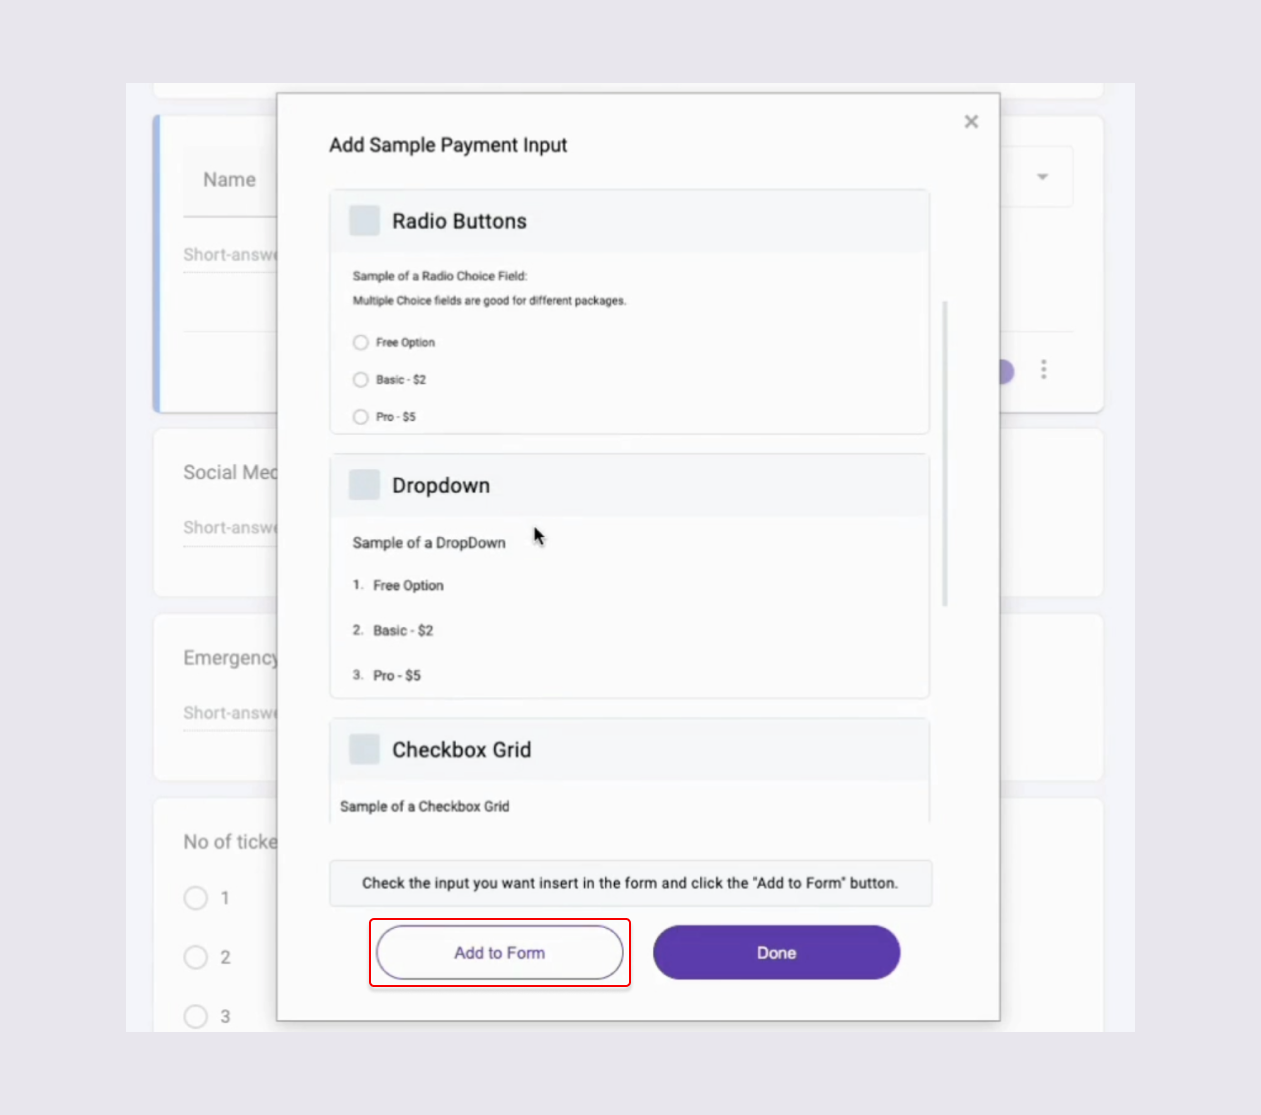
The next thing you can do is add the kind of pricing options that you desire. You can choose from a variety of options, such as:
- Radial buttons for single-choice purchases
- Square checkboxes for multiple-choice purchases
- A grid for multiple options with multiple choices
Step 3: Connect a Payment Partner
Once you are done adding the sheet, you will now need to connect to a payment partner. This is the actual payment gateway that will help you collect the payment from the users who will fill out the form.
At the moment, you have three payment gateway options on PayQ: Razorpay, PayPal, and Stripe. You’ll have to enter the key and secret details over there, which will be provided to you by your payment provider.
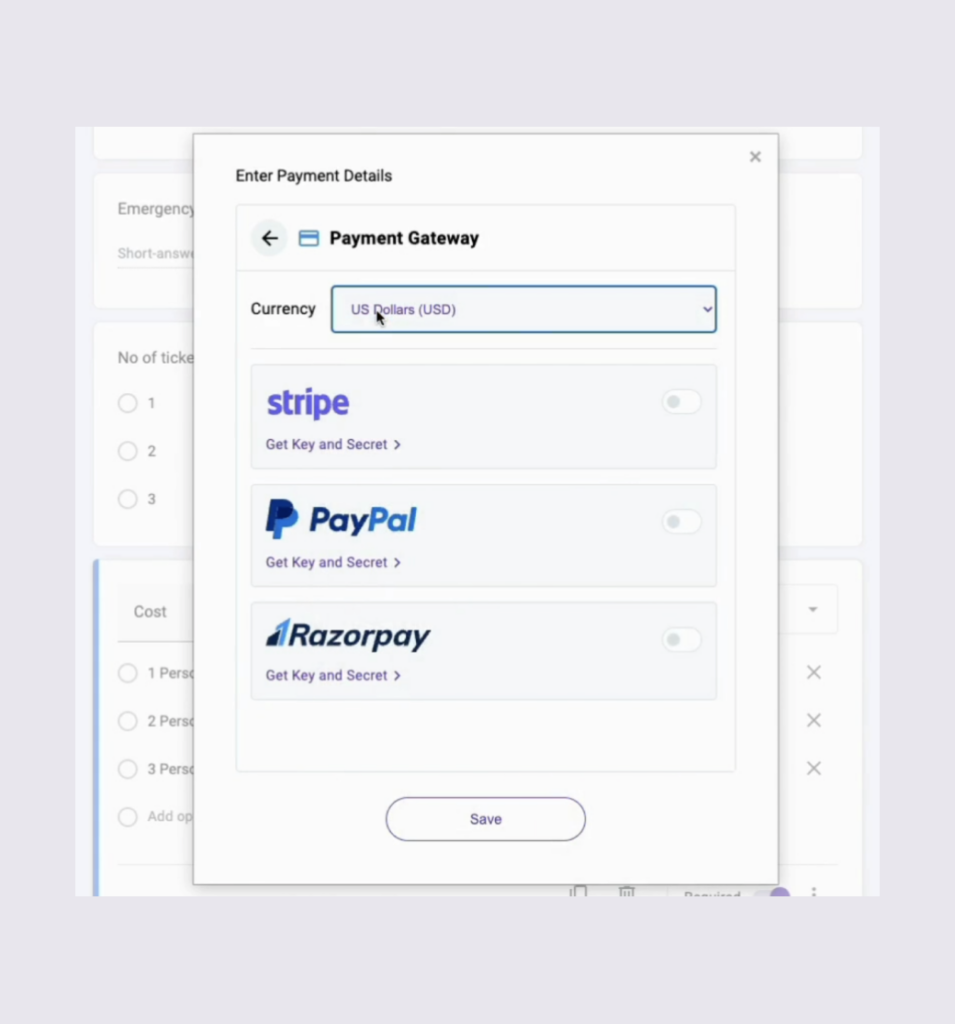
Don’t select the live mode yet because you will have to test out the form once before you go for it. Once your gateway is live, you can choose to add other options, such as taxes, promo codes, etc.
You can add these by going back to the payment partner page, where you have three different options for taxes, promo codes, and notifications. Enter these values based on your preferences and save them.
Step 4: Test your Form & Payments
Now that your payment partner is all set up, I strongly recommend you do a test run before you go live with it.
Here’s how to test it out:
- While setting up the payment gateway, make sure you’re not selecting the ‘live’ option. This will keep you in test mode.
- Set up everything and save the form.
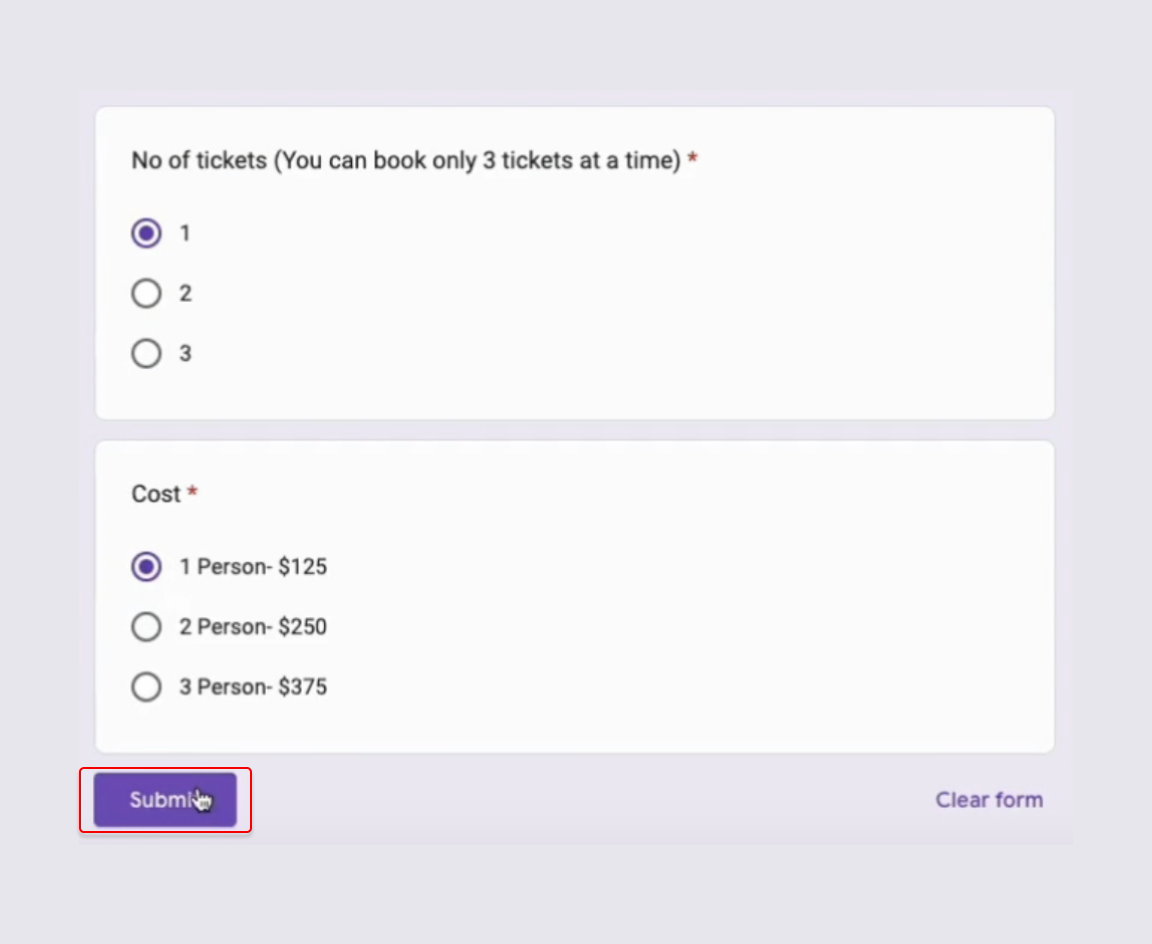
- Use the form link and try filling it out.
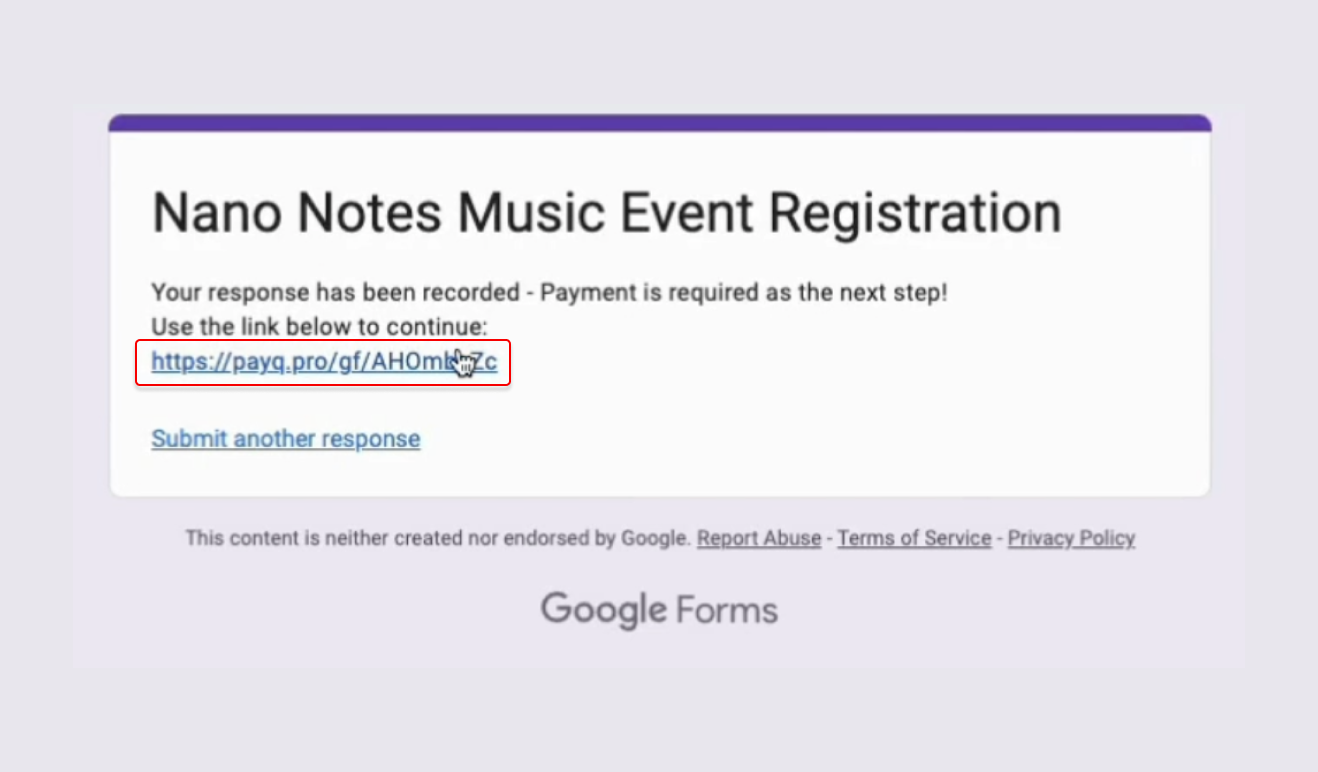
- Once you have filled out the form, you will be shown a PayQ link at the end.
- Click on this end, and enter your email ID.
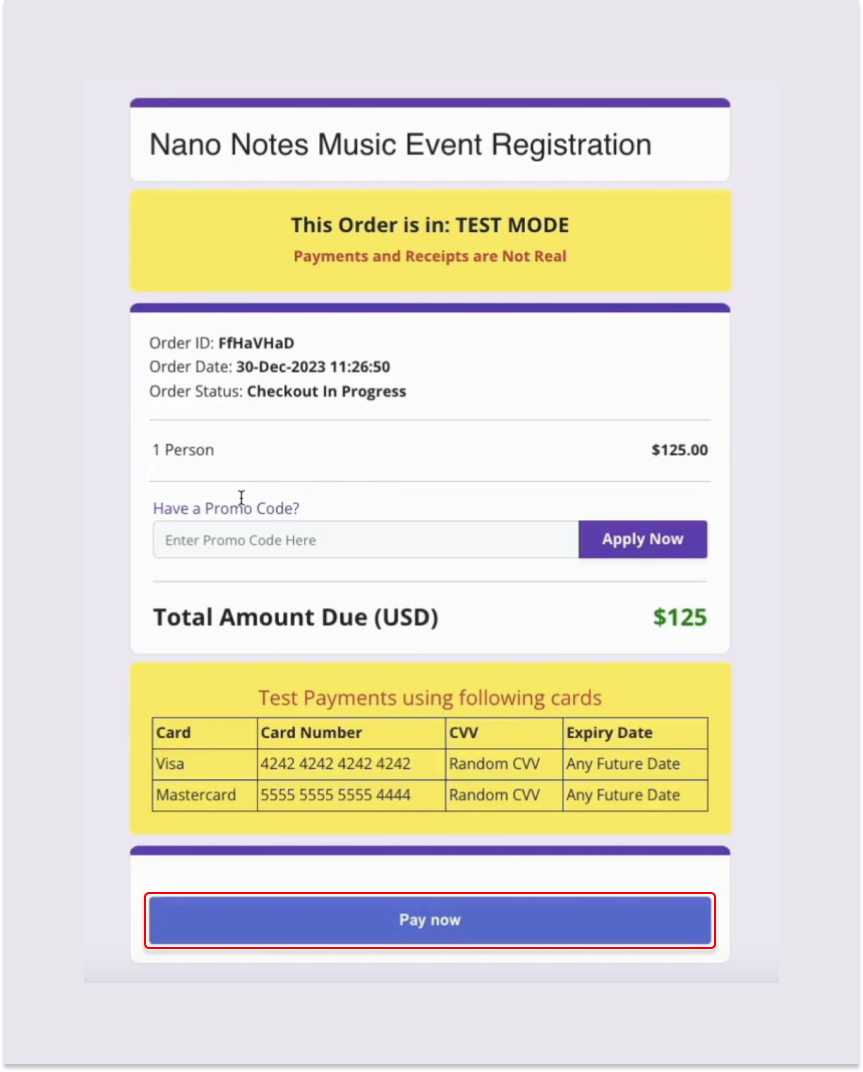
- This will now show you the order totals and a ‘pay now’ option.
- Click on Pay Now, and you will be shown payment methods.
- Make the test payment.
- Make sure to test everything from the form – including the promo code.
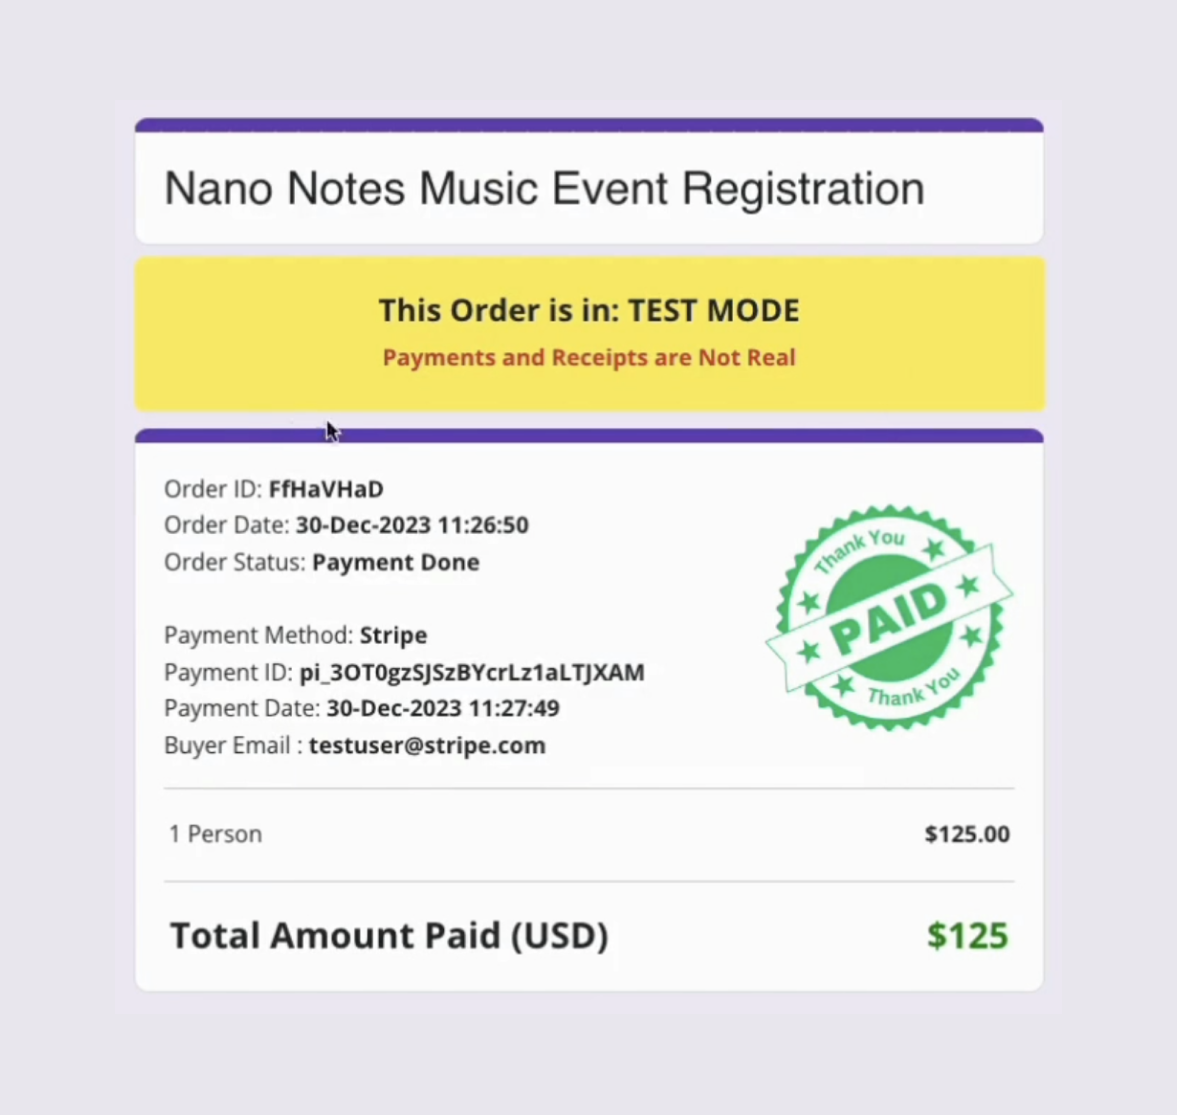
- Once you have submitted your payment, you will be given a confirmation message.
- Lastly, make sure to check the connected sheet to see if you are getting all the details you have entered.
After you have checked your payment page, you can now make the process live by enabling the live box on the payment partner page on the PayQ pop-up.
Step 5: Track Payments
You will be able to track the payments in both, the payment gateway’s dashboard, as well as the linked Google Sheet that you have created.
It will show you details such as the time at which a booking was attempted, Email address, items paid for, order ID, PayQ link to the payment, and the amount paid. Tracking is easy and centralized from this sheet.
Key features of PayQ
- The add-on allows you to integrate payment gateways easily into your forms.
- You can set customized order messages that your buyers will get after the purchase.
- You can set up taxes as well as promo codes for discounts.
- Notifications will be sent, and an order verification will be shown to the user.
- The free plan supports 2 forms and 50 responses. Individual plan at $9.99 and Enterprise plan at $16.99.
Summing up, PayQ is the simplest way in which you can integrate your payment gateway into your Google Forms. The best part about is that you don’t even need to understand any tech or coding in order to do this.
Method 2: Adding QR to Google Forms [Free Method]
You can easily generate a QR code with the help of a peer-to-peer payment platform, such as PayPal, Square, or Venmo.
Here’s how to use them to add to Google Forms:
- Head over to the platform of your choice and create the QR code.
- Download the QR code onto your device.
- Create the form and add an image of the QR code on the questions page.
- Add relevant titles informing users they can pay by scanning below.
- Save the form.
Users filling out your form will now be able to make payments directly by scanning the QR code.
Method 3: Redirecting to the Payment Website
While it might be a little complex for some users to directly integrate payments onto the form, you can actually even redirect users to the website of the payment gateway (or other payment platforms) to make the payment. Here’s how:
- Create the form as intended.
- Go to settings after the form is ready.
- Navigate to the section titled ‘Presentation’.
- Go to the section titled ‘Confirmation Message’ and click on ‘Edit’.
- Type out the message and paste the payment link there.
After submitting the form, users can simply pay from the main payments page. You will get the funds in your platform, as well as the details of the sender.
Method 4: Using Follow-up via email with Appscript
Another easy way of using a Google Form to get payments from the users is by having them fill out the form and then sending them the payment links over a follow-up email. However, for this process, you will need to know a little bit of scripting.
Here’s how to do that:
- Create your form.
- Click on the 3 dots on the top right.
- Select Script Editor.
- Here, create the script that will trigger a mail to the user once they have filled the form.
- This mail will contain all the details of the payment – which could include a link to the payment gateway, or if you want a direct transfer, you can give your bank details over there.
This process is the least recommended of all because it takes the users out of the marketing funnel that has been created with the help of Google Forms. However, it is worth a shot indeed.
Advantages of Integrating Payments Directly to Google Forms
Using Google Forms to directly collect payments from users can be pretty useful. Here are some benefits:
- Easier for the consumer.
- Cheaper than setting up your own website.
- Offers a high degree of customization.
- Allows you to track orders on Google Sheets.
Frequently Asked Questions
Yes, PayPal payments can be made directly via Google Forms by either using a QR code or by using an add-on like PayQ, which integrates the payment gateway on Google Forms.
Yes, the PayQ add-on is free to download and add, and you have a free plan that allows two forms and 50 responses. There are paid plans for unlimited usage costing $9.99 and $16.99 based on your needs.
Adding payment to your Google Forms can be beneficial because it ensures that the payments are included in the marketing funnel. If you collect just the information on forms and send the payment links separately, there’s a chance it can get lost in the shuffle, or the interested users might lose interest over time.
Hence, it is quite important to add payments to the form so users filling the form get everything in one place.
Wrap Up!
I have been looking around for a solution to this problem for quite a while and did deep research, when I first lost business because of not being able to collect payments directly. And I finally found different methods to make payable forms.
For a business, it is important to understand the marketing funnel. Once the user is a part of that funnel, you need to ensure they make a purchase at the end.
Putting payment links in Google Forms makes the payment process seamless as a part of this funnel, which ensures a higher chance that the user is going to pay.
I hope these techniques mentioned above help you set up a smooth payment system for all your needs.

Leave a Reply