I was blown away when one of my team members used shapes with text in her presentation soccer balls, pyramids, and more with words on them. And it was done by making shapes transparent.
If you use shapes purely as design elements, the key here is opacity. You can add text, images, or charts inside semi-transparent shapes and grab attention. In this article, I’ll show you how to spotlight the content behind them.
Let’s start simply by adjusting fill settings, then move on to layered images for custom effects.
Steps to Make Shapes Transparent in Google Slides
Four clicks is all it takes to turn a shape into a transparent one. Follow the below simple steps:
- Open your Google Slides file.
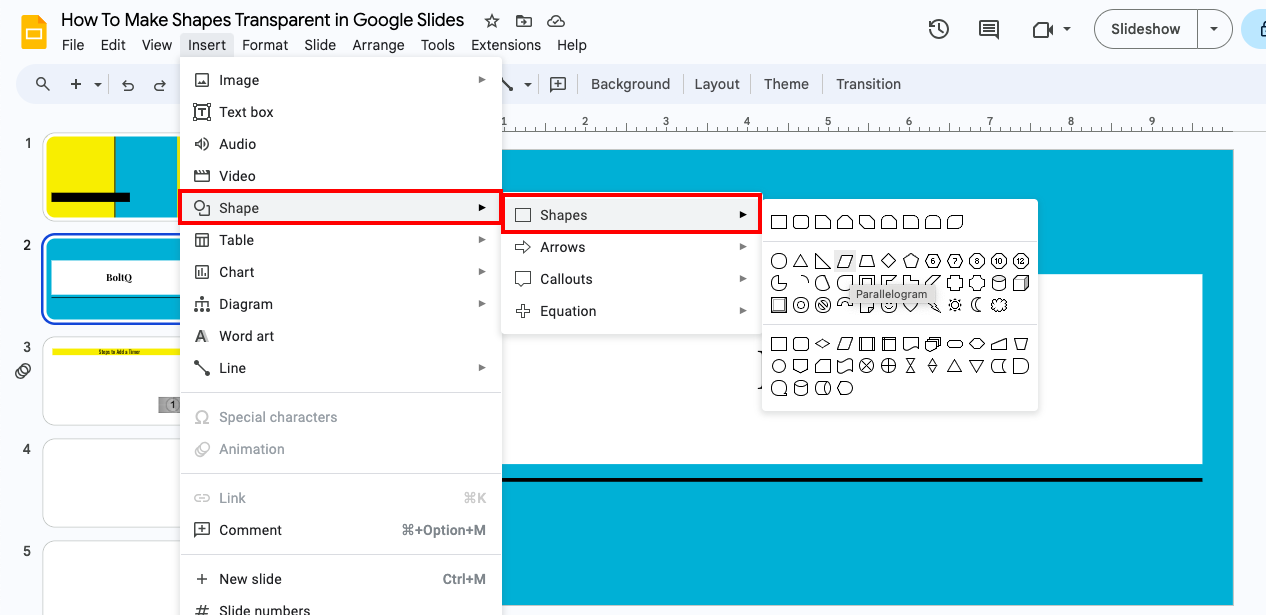
- Select “Insert” from the main menu and then select “Shape” from the dropdown. Select the type of shape you want to add.
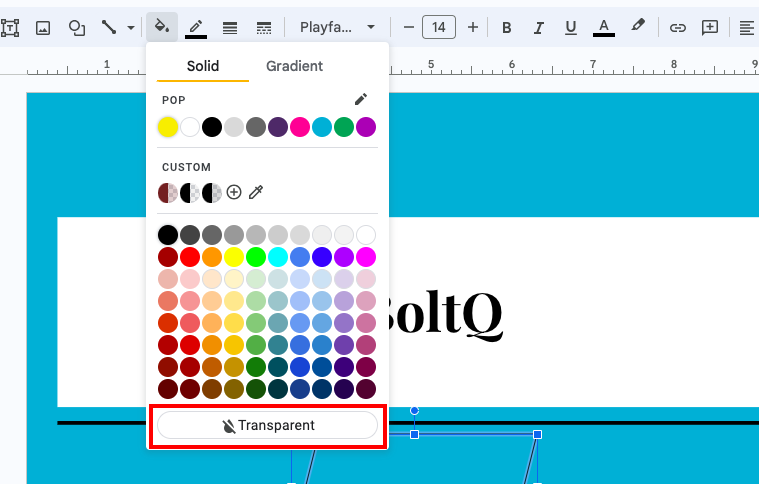
- Select “Fill color” from the top bar menu.
- Select the “Transparent” option which will be at the bottom of the dropdown menu.
- Step 5: Select “OK” to apply changes.
- Move, adjust, and resize the shape the way you want.
I have bad news for those expecting a straight keyboard shortcut for making shapes transparent. As things stand, there are no keyboard shortcuts but the process itself is not too lengthy.
Editing Shape’s Transparency
The semi-transparent shape acts like a highlighter as your attention is swiftly drawn to the shape and you can read the text or see the image in the background. Follow these simple steps to make a shape semi-transparent in Google Slides.
- Step 1: After adding the required Shape, select “Fill color” from the ribbon menu.
- Step 2: Select the “+“ sign from the “Custom” option tab.
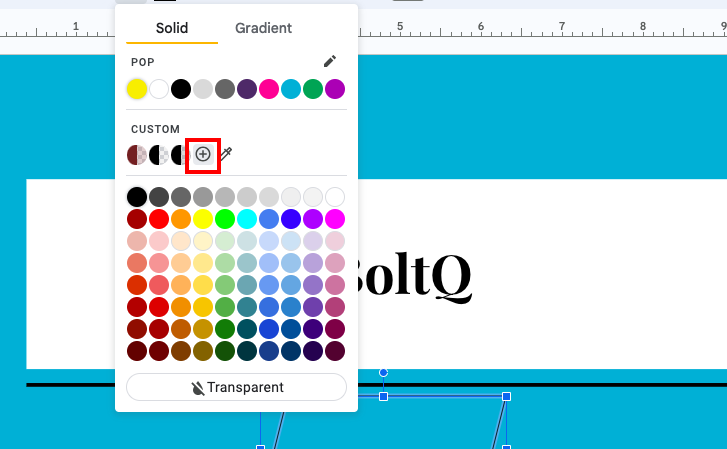
- Step 3: Drag and select the opacity level. Or else you can also write down the digits in terms of percentage in the last box after the RGBA boxes.
- Step 4: Select “OK” to apply changes.
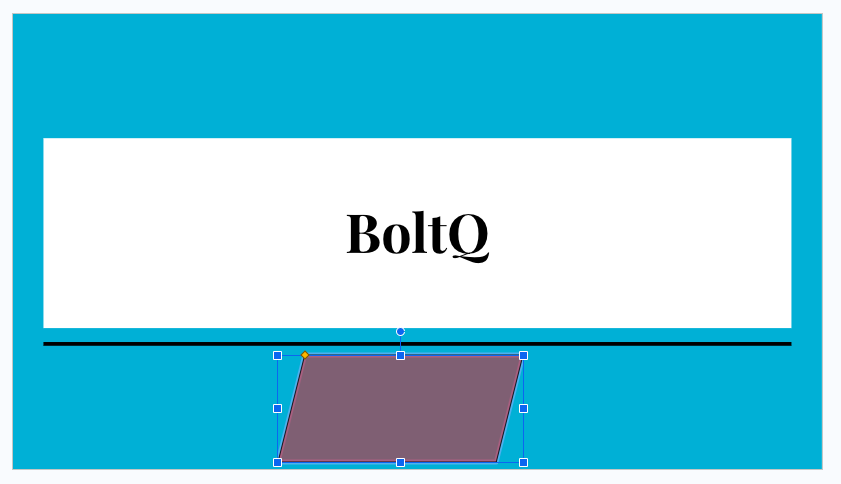
Note that you can also select any particular color and apply the same opacity changes to make that shape semi-transparent with that particular color.
Making an Image Transparent
At times you want to either place some text on an image or simply place an image on top of a certain text without compromising its visibility. Follow the below steps to apply transparency to an image in your Google Slides.
- Open your Google Slides file where you want to make shapes transparent.
- Select “Insert” from the main menu and then select “Image” from the dropdown.
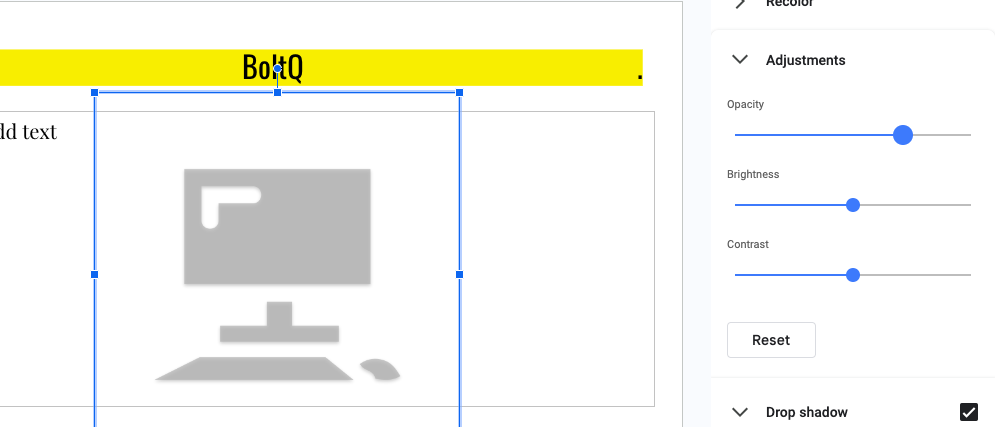
- Select “Format options” which will open a format editor by right-clicking on the image or directly from the main menu.
- Expand the “Adjustments” option from the format editor.
- Drag and select the level of opacity on the image. This will reflect on the transparency of your image.
- Drag it to zero or near zero if you want to make the image completely or almost transparent.
There you have it. You have now applied transparency levels to an image. Additionally, you can use the scribble tool to draw on Google Slides.
Frequently Asked Questions
Select the box, go to the “Fill color” from the ribbon menu, and select “+” below the “Custom” option in the dropdown. Now locate the opacity drag option which is below the color pallet drag option. Drag and select the opacity to the level of transparency you want.
For any shape, you have to go to the “Fill color” option from the ribbon menu and select “+” from the Custom option in the dropdown. Then you have to manually drag the opacity option below the color pallet option to add transparency to a shape. For an image, you have to right-click on it, select “Adjustments” from the editor, and then drag the opacity option.
The fading effect comes with opacity. Select the shape you want to fade, go to the “Fill color” option, and hit “+” below the Custom option. Now locate the opacity drag option below the color pallet drag option and adjust the level of fade you want. Hit OK to apply changes.
Go to the “Fill color” option and select the “+” sign below the Custom option to open custom color and transparency options. Now select the color you want as a gradient from the pallet or the dropdown. Below that, select the level of opacity which will make the shape semi-transparent. Now hit OK to apply changes.
Wrap Up!
Adding transparency to shapes allows you to:
- Draw attention to key points by overlaying transparent shapes
- Maintain visibility of text or images that sit behind a shape
- Add stylish effects like fading for a polished design
Playing around with shapes, images, and other design elements and their opacity is quite fun in Google Slides. It helps you highlight a part in your presentation where you need the utmost attention.
On the design front, it allows you to place important things like bullet points, trendlines, or pie charts on top of or behind a semi-transparent image or shape.
Leave a Reply