Gone are the days when the bare minimum presentations sufficed. Boring slideshows don’t cut it anymore. Therefore, adding transitions to Google Slides is a great way to differentiate yourself.
But how?
Well, that’s exactly what I will cover in this guide. Not one, or two, but I’ll share three easy ways to do it. Additionally, I will also provide some important tips for customizing slide transitions.
Are you ready?
1. Using Slide Menu
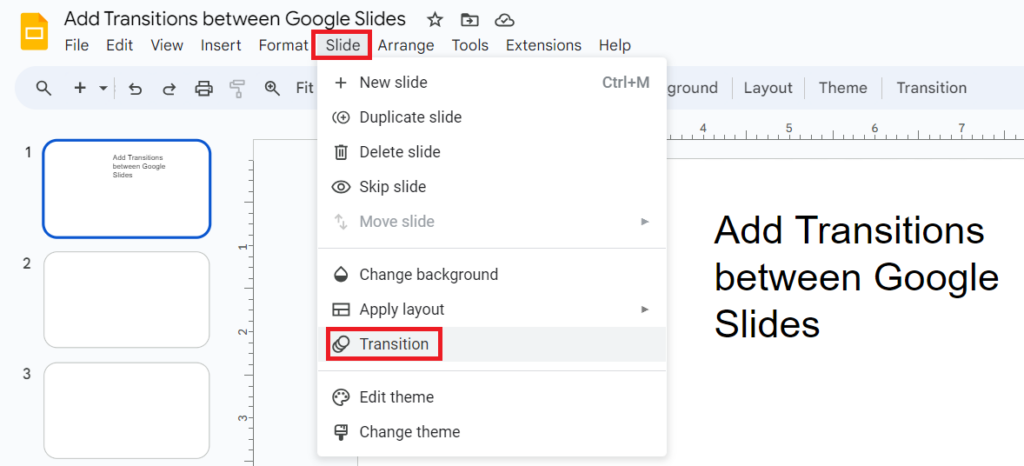
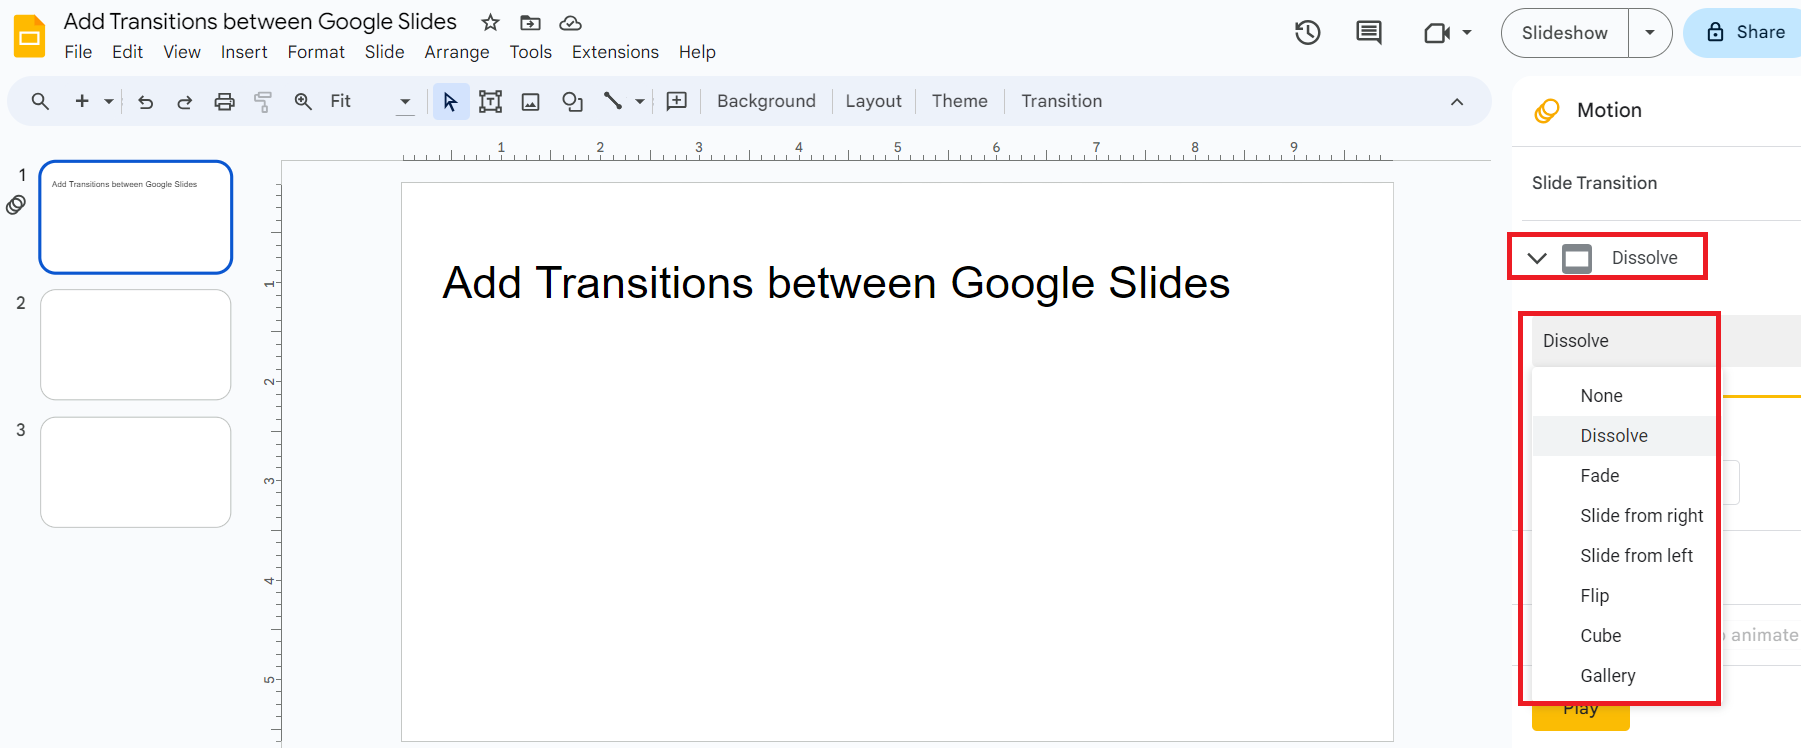
Navigate to the “Slide” menu on the top toolbar, and select “Transition” from the dropdown. This will open the transition settings in the right sidebar where you can browse and select a transition.

Once you encounter that editor sidebar, you have to select from multiple options to make the most of the transitions.
These are the two things you can do with your transitions:
- Type: You can choose from various types of transitions based on how you want it to be. There are some mellow, fancy, and moderate types of transitions, and depending on the kind of presentation you have, you can choose any one of them.
- Speed: Choose how fast you want the transition to happen. There is a drag bar and it has three different speed options namely Slow, Medium, and Fast. You can drag and keep the speed where you want.
Note: If you want all your slides to have the same transition and speed, you can select the “Apply to all slides” option at the bottom of the editor panel.
However, if you wish to select different transitions for different slides then select each slide individually and perform the above steps for all of them individually.
You can also select “Play” from the panel to have a preview of your transition and its speed.
2. Using Transition Menu
Alternatively, you can directly go to the “Transition” options on the toolbar. This will open the transition sidebar on the right. Browse through the different transition options and select the one you want.

3. Using a Shortcut
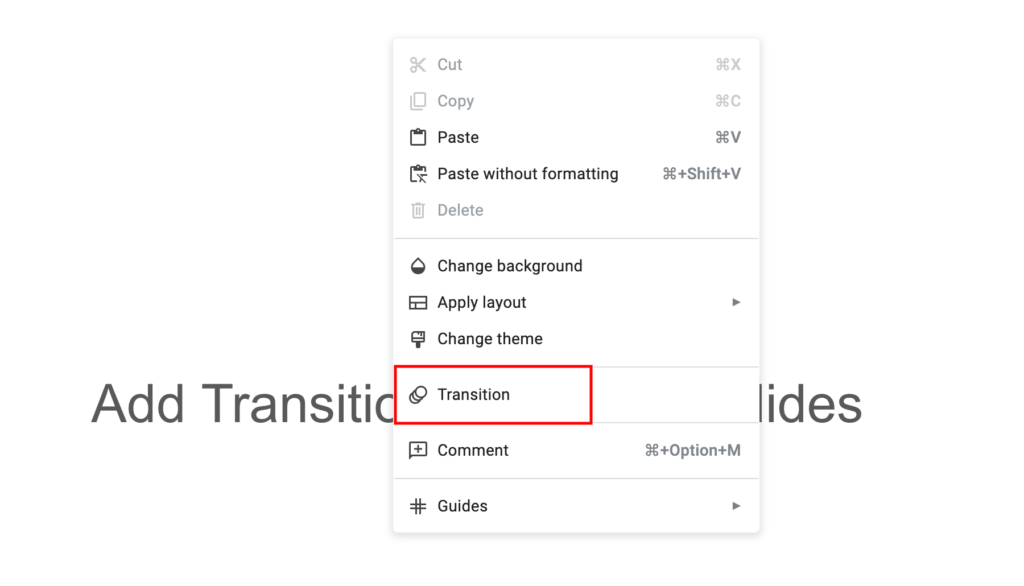
This is by far the easiest method to add animations in Google Slides. All you need to do is Right click on the slide and select “Transitions”.

Simple, right?
Adding Transitions on Google Slides App
Unfortunately, the Google Slides app for iPad, Android, or iOS currently does not support the transition feature.
Considering the growing demand and the rise in usage of mobile devices and tabs, we may see the option enabled soon. But as of now, you can only transition Google Slides on a computer.
Auto-Transitioning Slides in Google Slides
- Open your file whose slides you want to play.
- Select “Slideshow” on the top right of your screen.
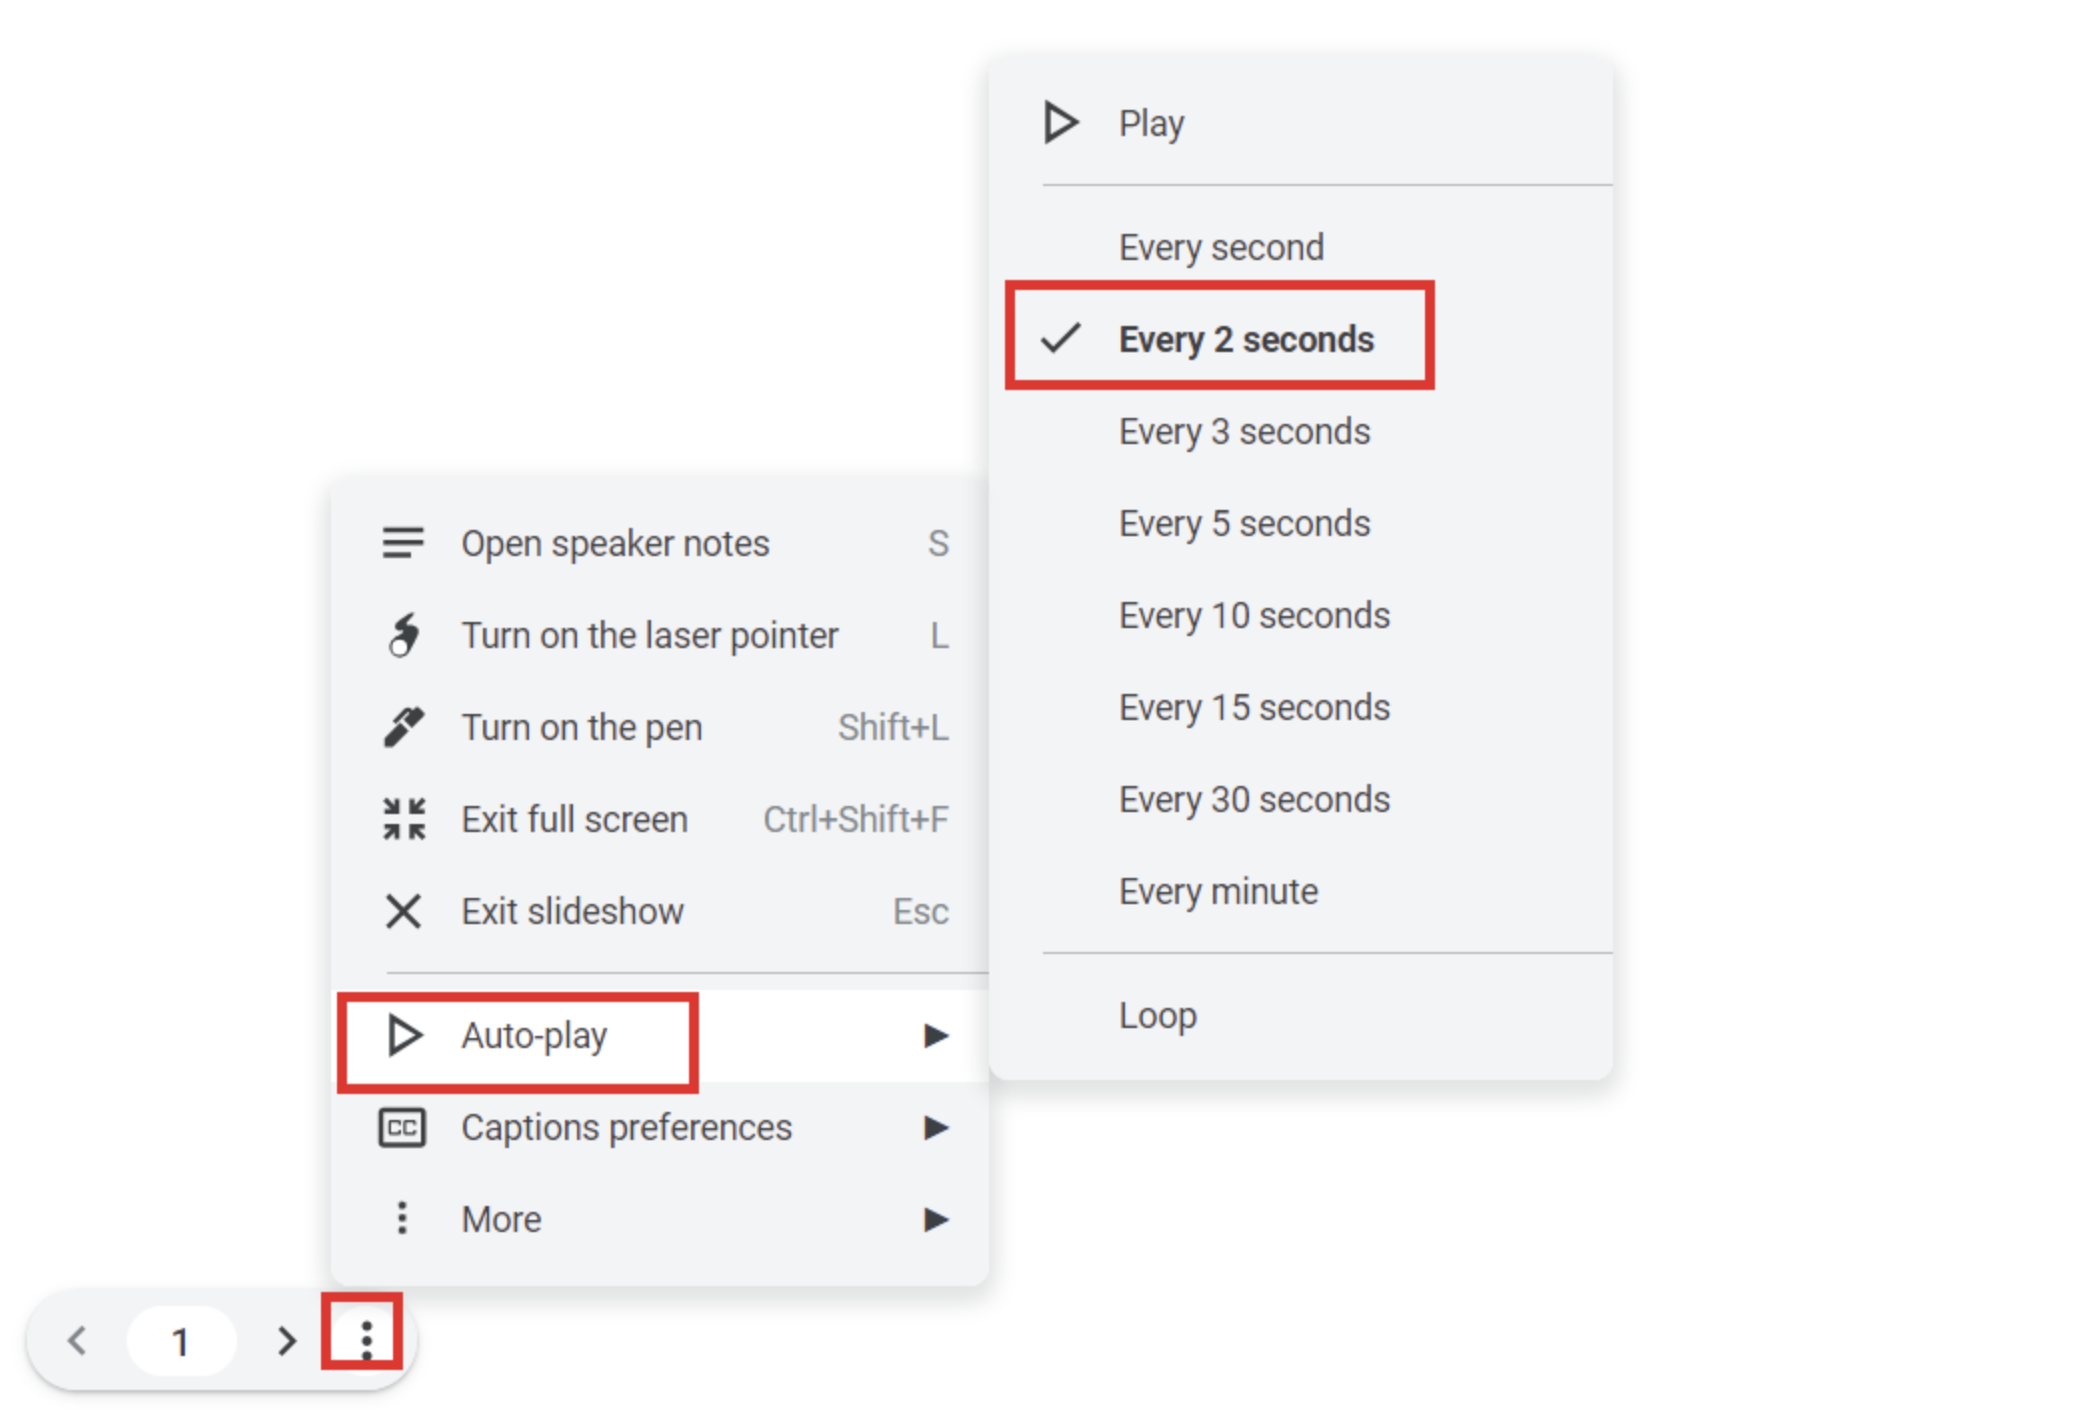
- Upon moving your cursor to the bottom left in the slideshow mode, you will see the slide numbering and the three dots. Select the three dots.
- Select “Autoplay” in the pop-up menu.
- Select the timing of the autoplay. Your slideshow will now autoplay all the slides till it reaches the last slide.
Frequently Asked Questions
Select an image or the text you want to animate. Now select the “Insert” option on the main menu and then select “Animation”. The transition and animation panel will appear on the right side of your screen. Select from the range of options and click on “Play” to preview.
Google Slides does not have a built-in feature to morph a transition. You have to use third-party tools for the same.
Apart from animations and transitions, you can try several other things that can make your slideshows appear intuitive. Some of these are:
1. Curve the text
2. Add a theme
3. Make shapes transparent
4. Make Google Slide vertical
5. Add a timer
Wrap Up!
So there you go. Now note that most new users of Google Slides go overboard and excessively use animations and transitions. Remember that the core of your slides is the data you put in. So only work on the aesthetics and the transitions once you have profound data in your slides.


Leave a Reply