Do you need to add more items to a list, add space between rows, or add rows in a specific part of your Google sheet? You’re in the right place.
There are multiple ways to make room for more data or organize your spreadsheet better. With just a few clicks or taps, you can insert new rows exactly where you need them.
So, without further ado, let’s get started!
Adding One Row in Google Sheets
Inserting rows in your spreadsheet will not only give it structure and consistency but will organize your data, too. So, here are the easiest ways to add rows in a Google Sheet.
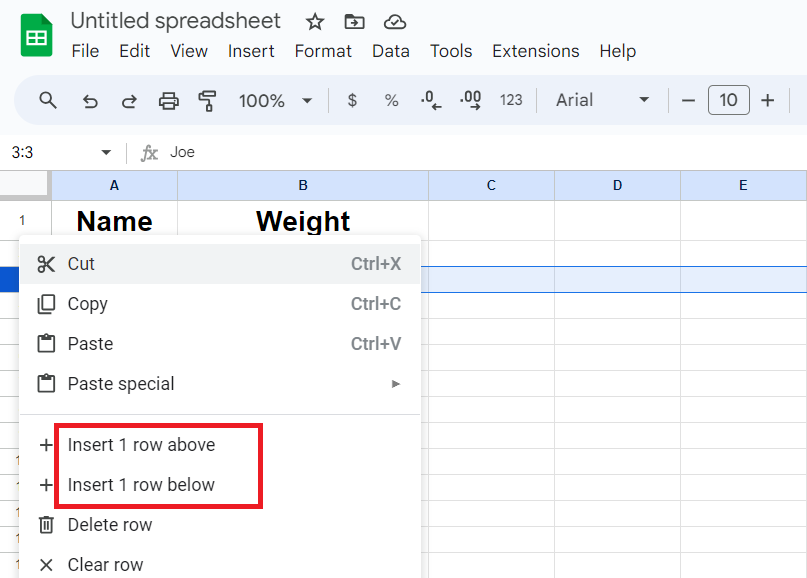
1. Using a Right Click
- Right-click the row number where you wish to add a new row.
- Select Insert row above/below to place a row in your desired position.
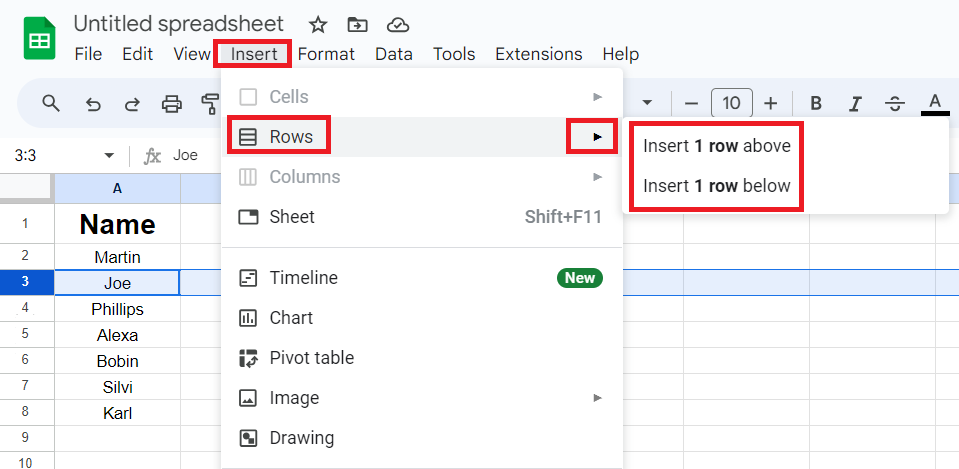
2. Using the Insert Tab
- Select the row number where you want to add a new one.
- Go to the Insert tab > Rows > Insert 1 row above/below.
3. Using a Keyboard Shortcut
Yes, you can use a shortcut to add rows in your Google Sheets. They are handy and easiest but they differ from browser to browser and device to device.
Shortcut for Mac:
Press ⌘ + Option + = (with row selected), or you can also Press Command + Option + I, press R then R to insert the row above.
To insert the row below Press Command + Option + I, press R then B.
Shortcut for Windows:
Press Ctrl + Alt + Shift + = (with row selected), or you can also Press Alt + I, then C in Google Chrome and Alt + Shift + I, then R for other browsers to insert the row above.
To insert the row below, Press Alt + I, then W in Google Chrome and Alt + Shift + I, then W in other browsers.
Adding Multiple Rows in Google Sheets
When you are dealing with multiple new entries, adding one row at a time will not only be time-consuming but confusing. Hence, here is the simplest method to add multiple rows at once.
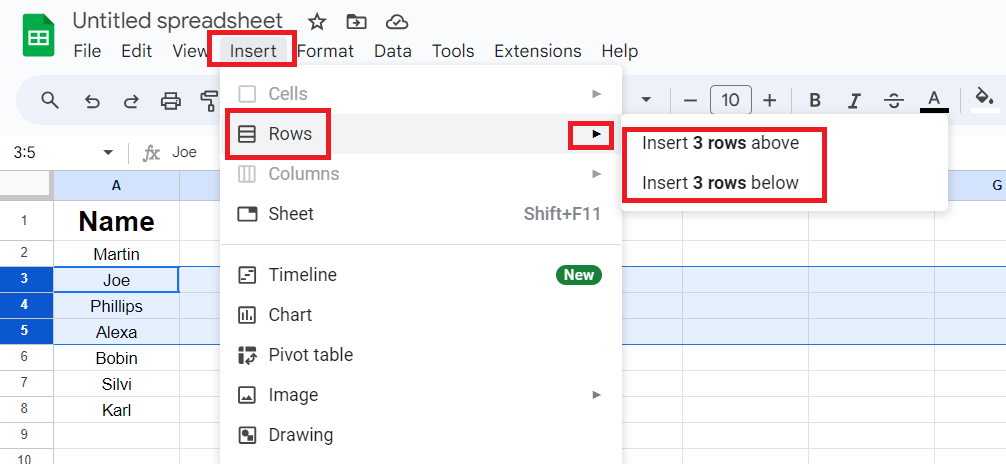
- Hold the Shift key and select the number of rows you want to add.
- Go to Insert to ‘n’ number of rows above/below.
- Now, delete empty rows if any. It will make your spreadsheet organized and easier to analyze.
Customizing Rows in Google Sheets
No matter how insignificant you may think it is, customizing rows enhances the look of your presentation. Another advantage of customization is that you can highlight, freeze, and differentiate essential data.
1. Resize
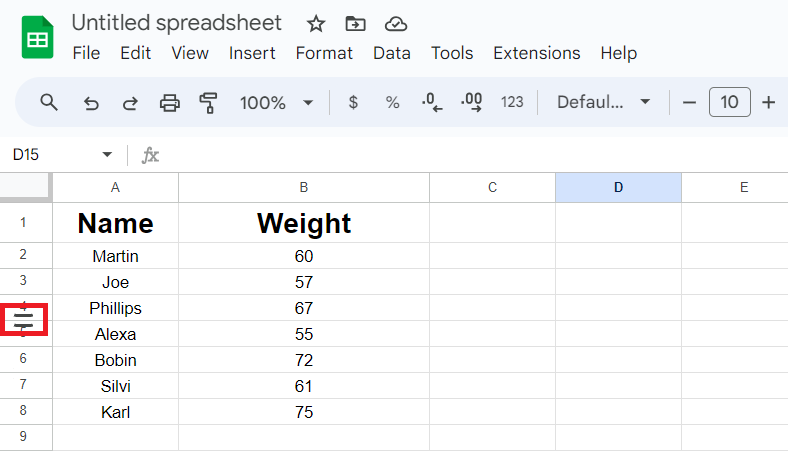
- The simplest method to resize any row in your spreadsheet is to hover between two-row numbers until a resizing arrow appears.
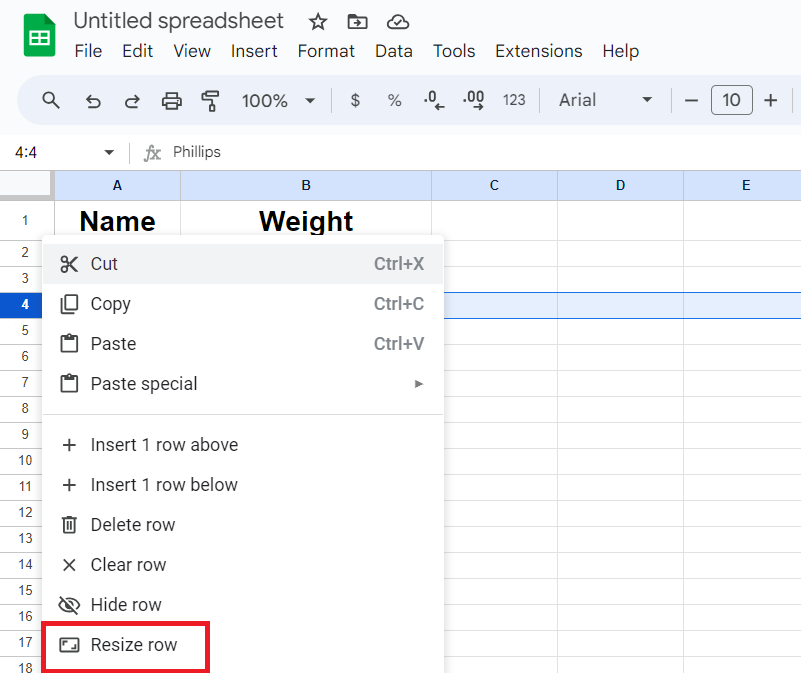
- Extend the row downwards or upwards, or you can also select the row, right-click on it, and go to Resize row.
2. Move
To move any row, drag the selected row to the new location. As you drag, you’ll see a blue line indicating where the row will be inserted. You can do it with multiple rows too.
However, if you do not wish to move the rows but want to split the content within a single cell, you can add a new line in a cell.
3. Merge
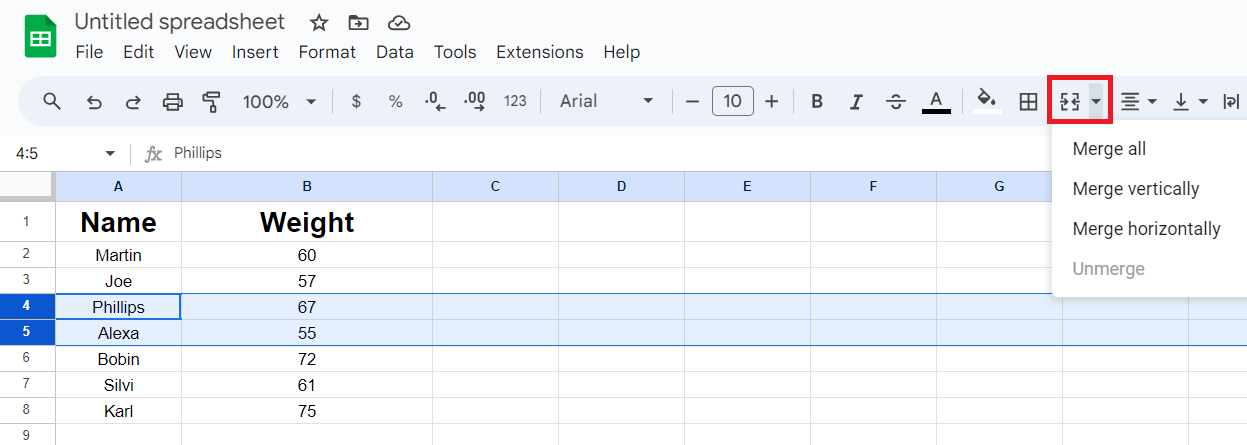
- Select the rows you wish to merge.
- Go to Merge cells from the toolbar.
4. Fill Color
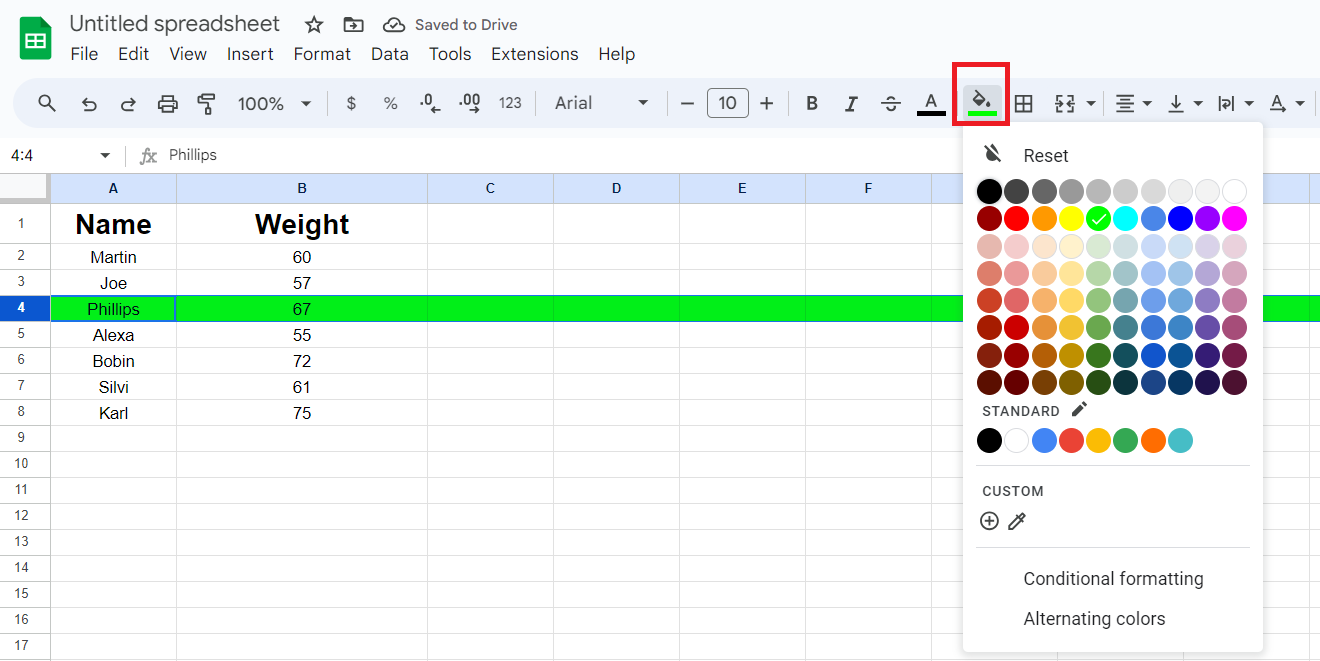
- Select the rows you want to highlight.
- Go to the Fill Color option (paint box).
- Choose the color you want to fill in the selected rows.
5. Border Color
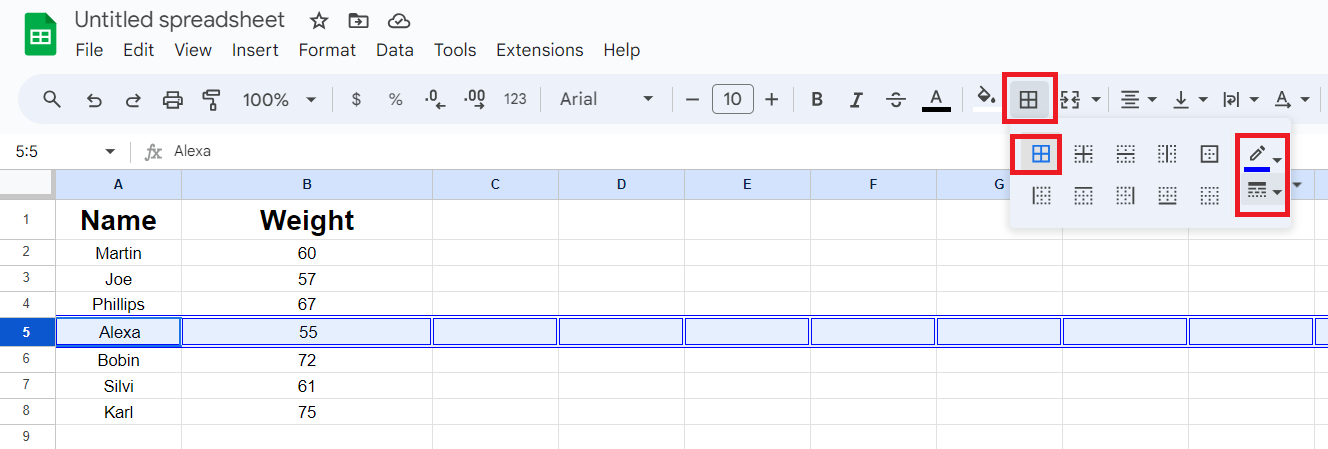
- Select the rows you want to change the border color for.
- Go to the Borders tab, where you can choose the border type and color.
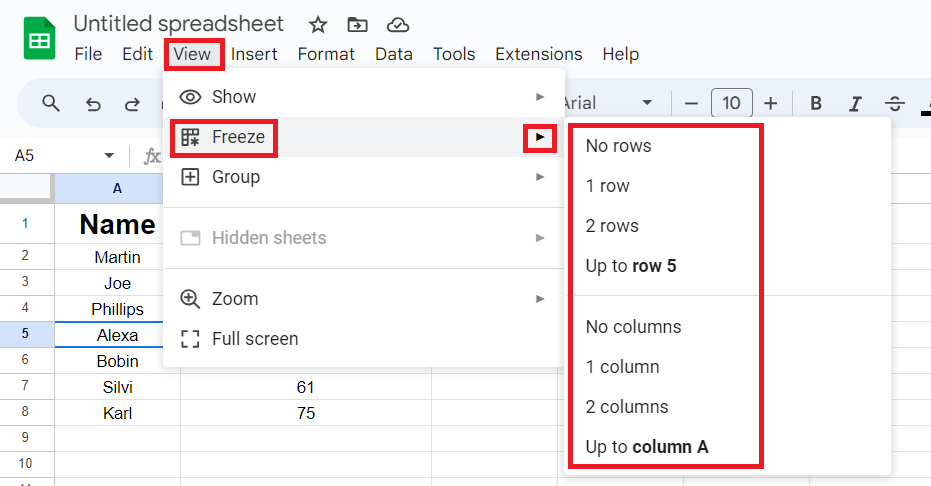
6. Freeze
- Select the cell in any row you want to freeze.
- Go to the Freeze tab in the View menu and choose the desired option.
Frequently Asked Questions
Step 1: Select the row numbers you want to group.
Step 2: Right-click on them and go to View more row actions.
Step 3: Click Group row numbers (numbers of the rows you’ve selected).
Pinning a row on a Google Sheet is the same as freezing.
Step 1: Select the row you want to pin or freeze.
Step 2: Go to the View menu and select Freeze.
Step 3: Choose the desired freeze option from the submenu.
There are multiple ways to add columns in Google Sheets. The easiest one is to right-click the column, tap on Insert, and select Insert Left or Right.
There are two ways to do this.
Method 1:
Step 1: Select the entire sheet from the top-left corner.
Step 2: Click on any one of the rows and drag down the resizing arrow to adjust -your row size.
Step 3: The adjusted row size will be applied to all the rows.
Method 2:
Step 1: Select the rows you want to resize.
Step 2: Right-click and go to Resize rows.
Step 3: Enter the desired pixel size in the menu and click OK.
Wrap Up!
However insignificant it might seem, adding a row in Google Sheets is essential for managing expanding data. I hope this article helped you find a way to do so and create a seamless spreadsheet for your data-driven work.
Leave a Reply